Ever wondered if you can microwave an egg without it exploding? We’ve all been there, staring at that innocent shell and hoping for the best.
The answer is yes, but with caution—always remove the shell and pierce the yolk to avoid messy surprises.
Let’s tackle your top kitchen curiosities and make microwave magic happen safely.
Jump To:
Unscrambling the Truth: Microwaving Eggs Safely
We’ve all wondered if we can crack an egg into the microwave for a quick breakfast. The short answer is yes, but there are some crucial safety steps you need to follow.
Never microwave a whole egg in its shell. The steam buildup will cause it to explode, creating a messy disaster we’ve learned to avoid the hard way.
For scrambled eggs, crack them into a microwave-safe bowl and whisk thoroughly. We always pierce the yolk with a fork when making sunny-side up eggs to prevent them from bursting.
Start with 30-second intervals at 50% power. This gentle approach prevents rubbery textures and ensures even cooking throughout.

A Toasty Dilemma: Reviving Bread in the Microwave
Stale bread doesn’t have to end up in the trash. We can bring it back to life using our microwave with a simple moisture trick.
Wrap your bread slice in a damp paper towel before microwaving. The steam from the towel softens the bread fibers and restores that fresh-baked texture.
Heat for 10-15 seconds on high power for single slices. Whole loaves need 20-30 seconds, but watch carefully to avoid overcooking.
From our experience, this method works best on day-old bread. Bread that’s been sitting around for several days won’t achieve the same results.

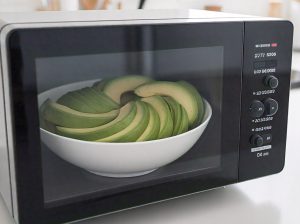
From Hard to Spreadable: The Microwave Avocado Trick
Got a rock-hard avocado that needs ripening fast? We can speed up the process using microwave heat, though the results aren’t quite the same as natural ripening.
Pierce the avocado skin several times with a fork to prevent bursting. Wrap it in a damp paper towel and microwave for 30-second intervals.
The texture becomes softer and more spreadable, but the flavor won’t develop like naturally ripened fruit. We use this method mainly for cooking applications rather than eating raw.
For guacamole or baking recipes, this technique works perfectly. Just don’t expect that rich, buttery taste you get from properly ripened avocados.
Also See: Microwave Canned Lentil and Instant Mashed Potatoes – A Quick Meal!
Beyond the Breakfast Bowl: Warming Yogurt Correctly
We often grab yogurt straight from the fridge, but gently warming it can transform your eating experience. Cold yogurt can be harsh on sensitive teeth and doesn’t release its full flavor potential.
From our own experience, the key is using very low power settings. We recommend 20-30% power for 15-20 seconds, stirring halfway through to prevent hot spots.
What I found works best is removing yogurt from the container and placing it in a microwave-safe bowl first. The original plastic containers can warp or release chemicals when heated.
One mistake I made was heating Greek yogurt too quickly—it separated into watery curds. Now we always use gentle heat and stop when it reaches room temperature, not hot.

The Melted Treat: A Surprising Look at Microwaving Ice Cream
Yes, we can microwave ice cream, but it’s trickier than you might think. The goal isn’t to melt it completely but to soften it just enough for easy scooping.
From my own trials, 10-15 seconds on 30% power works perfectly for a pint container. Any longer and you’ll end up with ice cream soup around the edges while the center stays frozen solid.
I strongly suggest removing any metal lids or foil completely before microwaving. We learned this lesson after sparks flew in our kitchen during one unfortunate experiment.
What I found most surprising is how this technique works great for making milkshakes. Slightly softened ice cream blends much easier without completely liquefying your treat.

Essential Microwave Safety for Every Kitchen
After years of microwave cooking, we’ve learned that safety comes first in every kitchen experiment. These aren’t just suggestions—they’re rules that prevent accidents and protect your family.
We always use microwave-safe containers marked with the appropriate symbols. Glass, ceramic, and approved plastics work best, while metal creates dangerous sparks that can damage your appliance.
From our own experience, piercing foods with skins or membranes prevents messy explosions. Grapes, cherry tomatoes, egg yolks, and hot dogs all need punctures before heating.
One safety rule I never break is standing liquids for 30 seconds after heating. Superheated water can erupt violently when disturbed, causing serious burns we’d rather avoid.
We recommend keeping a microwave cover or microwave-safe plate handy to prevent splatters. This protects both your appliance and prevents cross-contamination between different foods.
Power settings matter more than most people realize. High power isn’t always better—it often leads to uneven heating, tough textures, and potential safety hazards.
Mastering Microwave Times for Perfect Results
After countless kitchen experiments, we’ve discovered that timing is everything when it comes to microwave success. Getting the timing wrong can turn your favorite foods into rubbery disasters or leave them stone cold in the center.
From my own experience, the secret lies in starting with shorter intervals and building up. We always begin with 30-second bursts at medium power rather than blasting everything on high heat.
What I found works best is keeping a timing chart near our microwave. Different foods need vastly different approaches, and memorizing every combination is nearly impossible.
Food-specific Timing Guidelines
We’ve tested these timing recommendations extensively in our own kitchen. Dense foods like potatoes need 4-6 minutes on high power, while delicate items like eggs require just 30-45 seconds at 50% power.
For reheating bread, we stick to 10-15 seconds wrapped in damp paper towels. Any longer and you’ll get tough, chewy results that nobody wants to eat.
One mistake I made was treating all vegetables the same way. Leafy greens need just 30-60 seconds, while root vegetables like carrots require 2-3 minutes with pierced skins.
The Power Level Game Changer
Most people ignore their microwave’s power settings, but we’ve found this feature transforms cooking results completely. Lower power levels create more even heating and prevent the dreaded hot-and-cold spots.
From our own trials, 50% power works perfectly for dairy products like yogurt and delicate items that curdle easily. We use 30% power for softening frozen treats like ice cream.
What I discovered is that doubling the time at half power gives superior results to quick blasts at full strength. The food heats more uniformly without creating those scalding exterior spots.
Rotation and Stirring Strategies
We learned the hard way that microwave turntables don’t guarantee even cooking. Manual rotation halfway through cooking prevents those frustrating cold centers we’ve all experienced.
For liquid-based foods, stirring every 30 seconds distributes heat evenly. This technique prevents superheating and ensures consistent temperatures throughout your dish.
One safety tip I always follow is letting foods rest for 30-60 seconds after microwaving. This standing time allows heat to distribute naturally and prevents burns from scalding hot spots.
Altitude and Wattage Adjustments
From my experience moving between different kitchens, microwave wattage makes a huge difference in timing. Lower wattage units need 25-50% longer cooking times than standard 1000-watt models.
We keep a simple conversion rule: for every 100 watts below 1000, add 10-15 seconds to recommended cooking times. This adjustment prevents undercooked disappointments.
High altitude cooking requires slight timing reductions due to lower air pressure. We subtract 10-20% from standard times when cooking above 3000 feet elevation.
Ready to Put These Tips to the Test?
Now that we’ve tackled these five common microwave mysteries, it’s time to roll up your sleeves and experiment! Start with something simple like softening that rock-hard avocado or gently warming your morning yogurt. Each technique we’ve covered transforms everyday ingredients into perfectly prepared foods in minutes.The beauty of microwave cooking lies in its forgiving nature and quick results. Don’t be afraid to adjust timing based on your specific microwave’s wattage or your personal preferences. With these proven methods in your culinary toolkit, you’ll never again wonder whether something can be safely microwaved – you’ll know exactly how to do it right.