We’ve all done it: tossed a frozen brick of food into the microwave and hoped for the best. It often ends with a cold center or a rubbery, overcooked mess.
Microwaving frozen food isn’t as simple as it seems, and doing it right is the difference between a soggy disaster and a perfect meal.
We’re covering the secrets to everything from crispy samosas to juicy fish fillets.
Jump To:
The Art Of Microwaving Frozen Meatballs for Last-minute Dinners
From my own experience, frozen meatballs are absolute lifesavers when dinner time hits and we’re scrambling. The key isn’t just throwing them in and hoping for the best – it’s all about proper defrosting technique and power control.
What I found works best is using 50% power for the initial thaw. We place the meatballs in a microwave-safe dish with a splash of water or sauce. This creates steam that prevents those dreaded rubbery exteriors.
One mistake I made early on was using full power right away. This created hot spots while leaving cold centers – not exactly appetizing. Instead, we microwave on medium power for 2-3 minutes, flip them over, then continue in 1-minute intervals.
The magic happens when we cover the dish with a microwave-safe lid or vented plastic wrap. This traps steam and ensures even heating throughout each meatball.

Unlocking the Secret to Crispy Microwaved Samosas
Here’s something most people don’t realize: achieving crispy samosas in the microwave is absolutely possible, but it requires a completely different approach than traditional microwaving.
What I’ve discovered through countless attempts is that placement and timing are everything. We start by arranging frozen samosas on a microwave-safe rack or paper towel-lined plate. This elevates them and prevents soggy bottoms.
The game-changer is using a browning dish if you have one. Preheat it for 2 minutes, add a tiny amount of oil, then place the samosas carefully. The sizzle you hear means it’s working!
From my own trials, I strongly suggest microwaving for just 1-2 minutes initially, then flipping and continuing in 30-second bursts. The pastry should sound crisp when tapped, not soggy or chewy.

How to Perfectly Microwave Frozen Spring Rolls
Spring rolls present a unique challenge because their delicate wrappers can turn to mush in seconds. What I found works best is treating them like precious cargo that needs gentle, controlled heat.
We place frozen spring rolls on a microwave-safe plate with space between each one. No overlapping! The wrapper needs room to breathe and heat evenly. I learned this the hard way after several batches turned into sticky messes.
The secret technique involves starting with 30% power for the first minute, then bumping up to 50% power for additional heating. This gradual approach prevents the wrapper from splitting while ensuring the filling heats through completely.
One trick I swear by: lightly dampening a paper towel and placing it over the spring rolls. This creates just enough moisture to keep the wrappers pliable without making them soggy. Check them every 45 seconds and rotate for even heating.

Also See: Sunset Sangria Mocktail – Microwave Infused Delight
Transforming Frozen Fruit in the Microwave
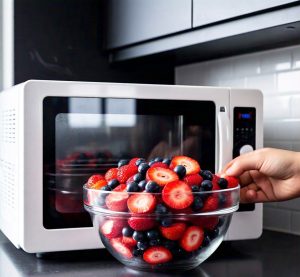
From my own experience, microwaving frozen fruit is one of the most underestimated kitchen skills. What I discovered is that frozen fruit actually microwaves better than fresh in many cases because the cell walls are already broken down from freezing.
We start by placing frozen berries or fruit pieces in a microwave-safe bowl with just a tablespoon of water. This creates gentle steam that prevents the fruit from drying out while heating evenly.
One mistake I made early on was using full power, which turned my beautiful strawberries into mushy soup. Instead, we use 60% power for 1-2 minutes, stirring gently halfway through. The fruit should be warm but still hold its shape.
What works brilliantly is adding a pinch of sugar or honey before microwaving. This draws out natural juices and creates a light syrup that’s perfect for oatmeal, yogurt, or pancakes. I strongly suggest letting the fruit rest for 30 seconds after microwaving to finish the heating process naturally.
Mastering the Technique for Microwaving Frozen Fish
Microwaving frozen fish requires finesse because fish proteins are delicate and overcook quickly. What I found works best is treating it like a two-stage process: gentle thawing followed by careful cooking.
We place the frozen fish in a microwave-safe dish and cover it with a damp paper towel. This creates a humid environment that prevents the fish from drying out during the defrost cycle.
From my own trials, the defrost setting (30% power) for 3-4 minutes per pound works perfectly. The fish should be pliable but still slightly icy in the center when we move to the cooking phase.
One technique I swear by is seasoning the fish while it’s still partially frozen. The seasonings penetrate better as the ice crystals melt. We then cook on 70% power for 2-3 minutes per fillet, checking every minute to prevent that rubbery texture we all hate.
The fish is done when it flakes easily with a fork and reaches an internal temperature of 145°F. Let it rest for a minute before serving – this allows the heat to distribute evenly throughout the fillet.

Essential Safety Tips for Microwaving Frozen Food
Safety comes first when we’re dealing with frozen foods in the microwave. From my own experience, most accidents happen because we rush the process or ignore basic precautions.
Temperature checking is non-negotiable. We always use a food thermometer to verify internal temperatures reach safe levels: 165°F for poultry, 145°F for fish, and 160°F for ground meats. Cold spots in microwaved food can harbor dangerous bacteria.
What I learned the hard way is that steam burns are serious business. Always pierce foods with skins or membranes before microwaving. Sausages, hot dogs, and whole vegetables can explode if we don’t vent them properly.
We never microwave frozen food in its original packaging unless it’s specifically labeled microwave-safe. Metal twist ties, foil packaging, or plastic containers not designed for microwaving can spark or melt, creating toxic fumes.
Stirring and rotating food every 30-60 seconds eliminates hot spots and ensures even heating. I strongly suggest using oven mitts when handling dishes – that ceramic might look innocent, but it absorbs heat and can burn your hands.
One safety rule I never break: let microwaved frozen food rest for at least 1-2 minutes after cooking. This allows heat to distribute evenly and prevents those painful mouth burns from hidden hot spots.
Timing and Power Settings for Frozen Microwave Meals
From my own experience, getting timing and power settings right is the difference between a perfectly heated meal and a disaster. What I’ve learned through countless frozen meal experiments is that one size definitely doesn’t fit all when it comes to microwave settings.
Most frozen meal packages give you basic instructions, but they’re often wrong for your specific microwave. We’ve all been there – following the box directions only to end up with scorching hot edges and ice-cold centers. The secret lies in understanding your microwave’s actual wattage and adjusting accordingly.
What works best in my kitchen is starting with 70% power for the initial heating phase. This might take longer, but it prevents those dreaded hot spots that ruin the entire meal. I strongly suggest ignoring the package’s full-power instructions and going slower instead.
For standard frozen entrées (10-12 oz), I use this proven method: 70% power for 4 minutes, stir if possible, then continue at 70% power for 2-3 more minutes. Dense items like lasagna or casseroles need longer – sometimes 8-10 minutes total with stirring breaks every 2 minutes.
One mistake I made early on was not accounting for standing time. After microwaving, we let the meal sit covered for 2-3 minutes. This allows the heat to distribute evenly throughout the dish, finishing the cooking process naturally.
Different food types require different approaches. Frozen rice dishes heat faster than pasta-heavy meals. Meals with cheese need lower power (50-60%) to prevent the cheese from turning rubbery. Vegetable-heavy frozen meals benefit from a light covering of damp paper towels to create steam.
What I’ve discovered is that microwave wattage makes a huge difference. If your microwave is 700 watts instead of the 1000 watts most packages assume, you’ll need to add 30-40% more time. I keep a conversion chart taped inside my microwave door for quick reference.
Temperature checking is crucial for safety and quality. We always test the center with a fork or food thermometer – it should reach 165°F throughout. Cold spots aren’t just disappointing; they can be dangerous with certain frozen meals containing meat or poultry.
Ready to Master Your Microwave Game?
We’ve covered the essential techniques that’ll transform your frozen food microwave adventures. From getting those meatballs perfectly heated to achieving crispy samosas, you now have the knowledge to tackle any frozen item with confidence. The key lies in understanding power settings, timing intervals, and those crucial safety steps that prevent soggy disasters.
Start experimenting with these methods tonight! Pick one frozen item from your freezer and apply what you’ve learned. Remember to use medium power for even heating, rotate your food halfway through, and always check internal temperatures. With practice, you’ll develop that intuitive feel for timing that separates microwave novices from the pros.