Making candy at home doesn’t require a fancy sugar thermometer or a lot of time. Your microwave is the secret weapon for creating perfect sweets in minutes.
We’re sharing our top five recipes for delicious homemade treats that are surprisingly simple to master.
Get ready to make everything from classic toffee to modern tanghulu without ever turning on your stove.
Jump To:
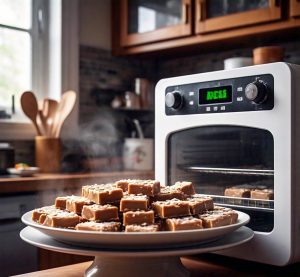
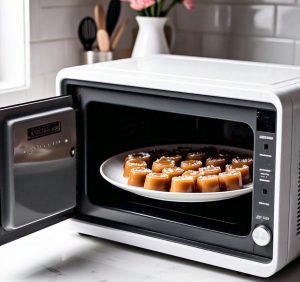
Creating Perfect Microwave Toffee in Minutes
We’ve mastered the art of microwave toffee, and it’s honestly become our go-to sweet treat. The key is using the right butter-to-sugar ratio and timing your microwave bursts perfectly.
From our experience, the magic happens at 280°F. You’ll know it’s ready when the mixture turns a deep golden amber color and makes those satisfying bubbling sounds.
What I found works best is using salted butter – it adds that perfect contrast to the sweetness. We start with one stick of butter and three-quarters cup of brown sugar in a microwave-safe bowl.
The timing is crucial here. We microwave in 2-minute intervals, stirring between each burst. After about 6-8 minutes total, you’ll see the mixture transform from pale and foamy to rich and glossy.
One mistake I made early on was not greasing my pan properly. Trust me, use parchment paper or you’ll be chipping toffee off your baking dish for days!
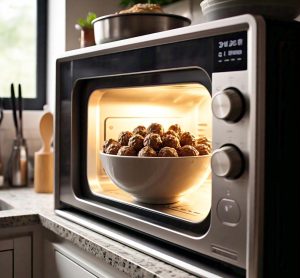
Effortless Microwave Praline Perfection
Our microwave praline recipe delivers that classic Southern sweetness without any of the traditional fuss. We’ve simplified this time-honored treat into a 10-minute microwave miracle.
The secret lies in getting your pecans perfectly toasted before adding them to the hot sugar mixture. We pre-toast our pecans for 2 minutes in the microwave – this creates that essential crunch factor.
From my own experience, using evaporated milk instead of regular milk makes all the difference. It creates a creamier texture and prevents that grainy consistency that can ruin pralines.
What I strongly suggest is working quickly once your sugar reaches the soft-ball stage. We combine brown sugar, evaporated milk, and butter, then microwave in 3-minute increments until it reaches 240°F.
The beating phase is where the magic happens. We stir vigorously for about 2 minutes until the mixture loses its glossy shine and starts to thicken. Then we fold in those toasted pecans and drop spoonfuls onto wax paper.
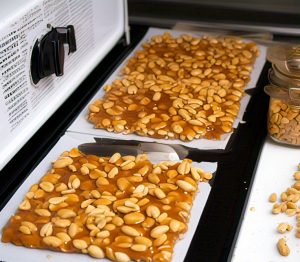
Quick and Crunchy Microwave Peanut Brittle
We’ve perfected microwave peanut brittle that rivals any candy shop version. The best part? It takes just 8 minutes from start to finish.
The key is using raw peanuts, not roasted ones. They’ll get perfectly toasted during the cooking process and won’t become overly crunchy or burnt.
From my own trial and error, I learned that corn syrup is non-negotiable here. It prevents crystallization and gives you that perfect glass-like texture when the brittle cools.
We start with one cup of sugar, half a cup of corn syrup, and a pinch of salt in a large microwave-safe bowl. The mixture needs room to bubble up, so don’t skimp on bowl size.
What works best for us is microwaving the sugar mixture for 4 minutes first, then adding the peanuts and continuing for another 3-4 minutes. You’ll know it’s ready when it turns a beautiful golden amber color.
The final step involves quickly stirring in butter, vanilla, and baking soda. The baking soda creates those signature air bubbles that make brittle so satisfying to crunch. Pour it thin on a greased baking sheet and let it cool completely before breaking into pieces.
Also See: How to Microwave Frozen Spring Rolls Perfectly
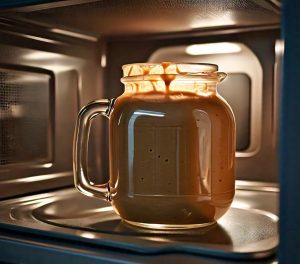
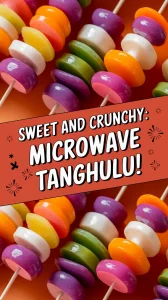
Making Modern Tanghulu in Your Microwave
We’ve discovered that making tanghulu in the microwave brings this viral TikTok treat right into our kitchens. The traditional Chinese candy-coated fruit gets a modern makeover with our foolproof microwave method.
The secret is achieving the hard crack stage at exactly 300°F. From my own experience, using a candy thermometer is non-negotiable here – guessing will leave you with sticky, chewy coating instead of that signature glass-like crunch.
What I found works best is using fresh strawberries or grapes threaded onto wooden skewers. We start with two cups of granulated sugar and half a cup of water in a deep microwave-safe bowl.
The timing varies by microwave wattage, but we typically microwave in 3-minute intervals, checking the temperature each time. After about 9-12 minutes total, you’ll reach that perfect amber-colored syrup.
One mistake I made early on was not having my fruit completely dry. Even tiny water droplets will make the sugar coating slide right off. Pat your fruit completely dry and work quickly once the syrup is ready.
The magic happens when you dip each skewer into the hot syrup and immediately plunge it into ice water. You’ll hear that satisfying crack when you bite through the glass-like coating to the juicy fruit inside.
The Ultimate Guide to a Simple Microwave Candy
Our go-to simple microwave candy recipe has become the foundation for countless sweet experiments in our kitchen. This basic hard candy recipe serves as your launching pad for creating endless flavor variations.
The beauty lies in its simplicity – just sugar, corn syrup, water, and flavoring. From my own testing, this ratio creates the perfect balance of sweetness and texture every single time.
What I strongly suggest is investing in candy molds if you plan to make this regularly. We use silicone molds that pop out easily and create professional-looking results.
The process starts with combining one cup of sugar, one-third cup of corn syrup, and one-fourth cup of water. We microwave this mixture in 2-minute bursts, stirring between each interval.
From my experience, the transformation happens around the 8-minute mark when the mixture reaches 300°F. You’ll see it turn from cloudy to crystal clear, then develop that beautiful golden color.
One trick I learned is adding food coloring and flavoring only after removing from the microwave. The residual heat will distribute everything evenly without cooking off the flavor compounds.
Essential Ingredients for Microwave Candy Success
We’ve learned that ingredient quality makes or breaks your microwave candy adventures. After countless batches, these are the non-negotiables that separate amateur attempts from candy shop perfection.
Granulated sugar forms the backbone of most recipes. We always use pure cane sugar rather than beet sugar – it caramelizes more evenly and creates better flavor profiles.
Corn syrup prevents crystallization, which is crucial for smooth textures. From my own experience, light corn syrup works best for most applications, while dark corn syrup adds molasses notes to recipes like peanut brittle.
Butter quality matters more than you’d think. We use unsalted butter for control over salt content, then add our own pinch of sea salt for flavor balance.
What I found works best is having everything measured and ready before starting. Microwave candy waits for no one – once you hit those critical temperatures, timing becomes everything.
Heavy cream creates the smoothest fudges and caramels. Never substitute with milk or half-and-half – the fat content directly impacts final texture and mouthfeel.
Temperature monitoring tools are essential. We use an instant-read thermometer that gives accurate readings in seconds. Candy thermometers work too, but they’re slower to respond.
Vanilla extract should be pure, not imitation. Add it after removing from heat to preserve those delicate flavor compounds that make all the difference in your final product.
Key Safety Tips for Microwave Candy Making
We’ve learned the hard way that microwave candy making requires serious respect for safety protocols. Hot sugar mixtures reach temperatures exceeding 300°F – that’s hot enough to cause severe burns in seconds.
From my own painful experience, never touch melted sugar with your bare hands. I once got a drop of 280°F toffee on my finger, and the burn lasted weeks.
What I strongly suggest is keeping a bowl of ice water nearby whenever you’re working with hot sugar. If you do get splattered, immediately plunge the affected area into cold water.
Always use microwave-safe bowls that are larger than you think you need. Sugar mixtures bubble up violently, especially when adding ingredients like baking soda or butter.
We learned this lesson after our first peanut brittle attempt overflowed all over the microwave turntable. Glass or ceramic bowls work best – avoid plastic containers completely as they can melt or warp.
One mistake I made early on was not wearing closed-toe shoes. Hot sugar can splatter when stirring or pouring, and you don’t want molten candy landing on exposed skin.
Never leave your microwave unattended while cooking candy. Sugar can go from perfect to burnt in seconds, creating dangerous smoke and potential fire hazards.
From my experience, keeping oven mitts within arm’s reach is essential. Bowls become extremely hot during the cooking process, and the handles can be deceiving.
What works best for us is opening the microwave door carefully and allowing steam to escape before reaching inside. That initial burst of hot air can cause burns if you’re not prepared.
Keep children and pets away from your workspace completely. The combination of hot equipment, boiling sugar, and potential splattering creates multiple hazards.
We always have a fire extinguisher rated for grease fires nearby, though we’ve thankfully never needed it. Sugar fires burn differently than regular fires and water won’t put them out effectively.
One safety tip I wish I’d known sooner is to clean up spills immediately after they cool. Hardened sugar becomes extremely slippery on floors and countertops, creating slip hazards.
Your Sweet Adventure Starts Now
We’ve shared our favorite microwave candy recipes that transform your kitchen into a confectionery wonderland in just minutes. Each recipe delivers that perfect balance of simplicity and spectacular results that’ll have you wondering why you ever bothered with traditional stovetop methods. The beauty of microwave candy making lies in its forgiving nature and lightning-fast satisfaction.
Start with whichever recipe caught your eye first – maybe the buttery toffee for its rich caramel notes or the crunchy peanut brittle for that satisfying snap. Remember to keep our safety tips handy, especially when working with hot sugar mixtures. Your microwave is about to become your new favorite candy-making companion, delivering professional-quality sweets with amateur-friendly ease.