Craving homemade holiday decorations or zesty cocktail garnishes without the 8-hour oven wait? Microwave-drying orange slices slashes the process to minutes, giving you vibrant, aromatic results faster than you can peel a tangerine.
No fancy dehydrators, no babysitting the oven—just your trusty microwave and a dash of citrus magic. Let’s zap those oranges into dried perfection.
We’ll walk through picking the juiciest oranges, nuking them without scorching, and turning your kitchen experiment into wreaths, potpourri, or even gourmet desserts. Spoiler: burnt citrus is not a vibe—we’ll help you dodge that.

Jump To:
How to Dry Orange Slices in the Microwave
Course: Decoration, SnackCuisine: Global4
5
minutes10
minutes50
kcal15
minutesDrying orange slices in the microwave is a fast and convenient way to create delicious and aromatic snacks or beautiful decorations. Unlike traditional drying, which can take hours, this method allows you to enjoy dried oranges in just a few minutes while retaining their vibrant flavor and color. Use them in recipes, cocktails, or as a tasteful garnish for various dishes.
Ingredients
oranges
optional: cinnamon or sugar for dusting
paper towels.
Directions
- Start by washing the oranges thoroughly.
- Slice the oranges into thin, even slices, about a quarter-inch thick.
- Place the orange slices on a microwave-safe plate lined with paper towels, ensuring they do not overlap.
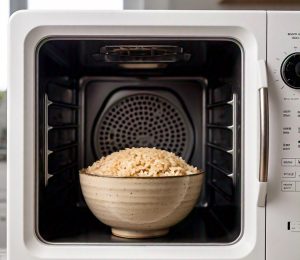
- Microwave the plate on high for 3 to 5 minutes, checking every minute to avoid burning.
- Flip the slices halfway through the cooking time for even drying.
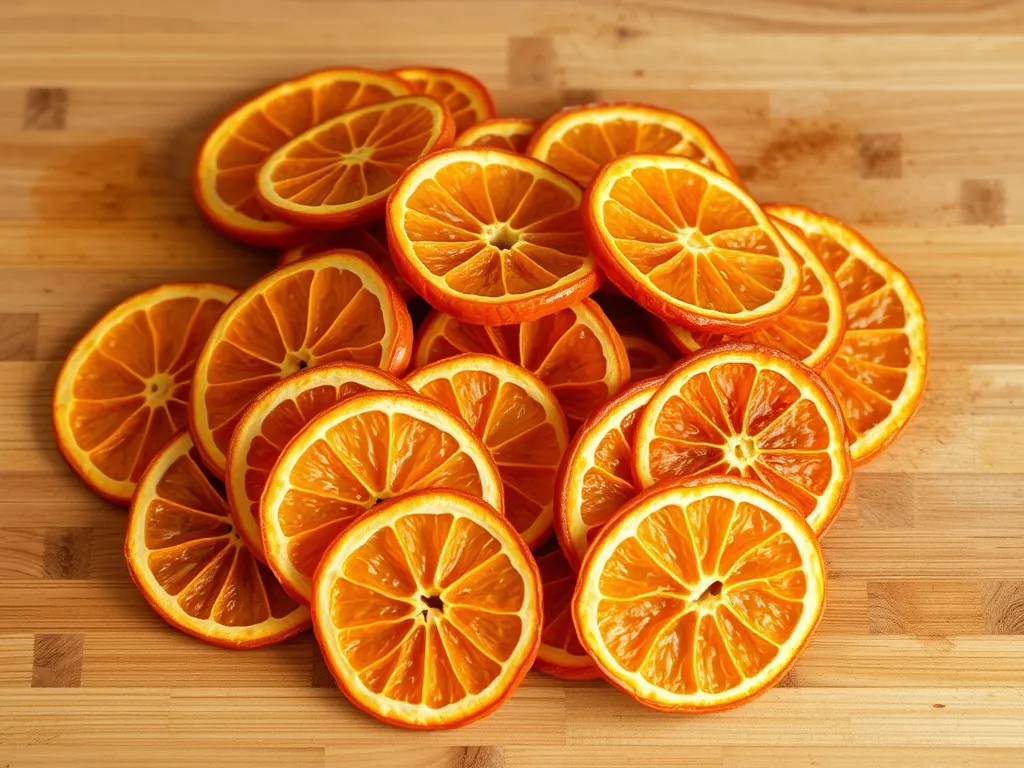
- Continue microwaving until the slices are mostly dry and firm to the touch, then let them cool to finish drying.
- Store the dried orange slices in an airtight container at room temperature..
Notes
- For best results, make sure to use ripe oranges and cut them into uniform slices for even drying. If desired, sprinkle a little cinnamon or sugar on the slices before microwaving for added flavor. Adjust the microwaving time based on your microwave's wattage and the thickness of the slices. These dried orange slices can be used for various purposes, including garnishing drinks or adding to potpourri for a delightful aroma.
Can You Microwave Orange Slices for Drying?
Absolutely—and it’s shockingly simple. Microwaving citrus slices skips the 8-hour dehydrator marathon, condensing it into under 10 minutes. Just avoid the rookie mistake of cranking your microwave to 100% power—low and slow wins this race. Similarly, microwaving berries like blueberries and strawberries can enhance their flavor and make them a delicious topping for various dishes.
Safety and Effectiveness Of Microwaving Citrus
My grandma once air-dried oranges for her famous holiday pomander balls… and forgot them in the oven. Let’s just say her kitchen smelled like a campfire. Microwaving eliminates that risk if you follow two rules: use 50% power and check every 90 seconds. Always place slices on a microwave-safe plate lined with parchment—no metal, no exceptions.
While microwave-dried slices won’t rival a commercial dehydrator’s bone-dry texture, they’ll still preserve color and scent beautifully. We’re aiming for pliable-but-dry, not crispy. If they start smoking, hit stop immediately—citrus oils are flammable!
Benefits Of Microwave-dried Orange Slices
Beyond skipping the oven babysitting, microwaving locks in that sunshiney citrus aroma better than air-drying. The quick zap minimizes oil evaporation, so your slices stay fragrant for wreaths or sachets. Bonus: no fruit flies invited to the party. When it comes to delicacies like truffles, ensuring their aroma remains intact while microwaving is crucial for the perfect finish.
Flavor, Aroma, and Decorative Uses
At my grandma’s holiday bash, guests thought my microwave-dried slices were store-bought potpourri. Joke’s on them—they were nibbling them off charcuterie boards by midnight. These zesty rounds add tang to teas, cocktails, or even as cupcake toppers. Pro tip: Simmer a few in mulled wine for instant hygge. For a quick and easy dessert, consider making a microwave mixed berry mug, which combines berries and a few simple ingredients for a delicious treat in minutes.
For decor, thread dried slices with cinnamon sticks and cranberries into garlands. They’ll scent your room for weeks—no synthetic air fresheners needed. Just keep them away from direct sunlight to prevent fading. If you’re looking for a quick and delicious snack, consider making microwave cinnamon apples. It’s a simple treat that perfectly complements the warm, inviting scents of your decorations.
Ready to turn your microwave into a citrus time machine? Let’s talk orange selection…
Ingredients and Substitutes for Drying Orange Slices
Not all oranges are created equal for microwaving. Trust me—the time I grabbed bitter Seville oranges for “gourmet” garlands? My wreath smelled like a rejected marmalade batch.
Choosing the Right Oranges
Pick navel or Valencia oranges—their thick rinds and sweet-tart flesh dry evenly. Avoid overly juicy varieties like Cara Cara, as excess moisture turns microwaving into a soggy mess. Pro tip: Organic oranges minimize pesticide residue since we’re keeping the peels.
Size matters. Medium oranges (2.5-3” diameter) yield slices that fit most mugs and decor projects. Giant ones take forever to dry; tiny clementines can overcook in seconds. When experimenting with fruit, consider creating a delicious microwave mixed fruit mug for a quick and tasty treat.
Alternative Citrus Fruits for Drying
Lemons, limes, and blood oranges work beautifully. Grapefruit? Proceed with caution—their higher water content demands 30% less microwaving time. Once tried drying pomelos… let’s just say my kitchen became a sauna.
For confetti color, mix citrus types. Meyer lemon slices add sunny yellow, while blood oranges give deep crimson accents. Just adjust thickness: grapefruit at 1/4”, limes at 1/8”.
Also See: Easy Microwave Salted Caramel Mug Cake in 5 Minutes!
Preparing Oranges for Microwave Drying
I learned the hard way: skip prep steps, and you’ll get chewy, steamed citrus instead of those Insta-worthy dried wheels. Let’s avoid that.
Slicing Techniques for Even Drying
Use a sharp chef’s knife or mandoline (guard included—safety first!). Aim for 1/4” slices—any thicker, and centers stay gummy. Too thin? They’ll crisp into orange chips (tasty, but not bendable for garlands). To make a delicious snack, consider making quick zucchini chips in the microwave with these perfectly sliced pieces. They can become a crispy treat in just a few minutes, making for an easy and healthy option.
Remove seeds with a toothpick. They’re moisture bombs waiting to explode into bitter bursts. Slice off stem ends too—they curl annoyingly during drying. Once prepared, consider how you might enjoy those seeds. Microwaving pumpkin seeds is a quick and easy way to create a crunchy snack that packs a flavorful punch.
Blotting Excess Moisture
Pat slices aggressively with paper towels. Oranges are 86% water, and every drop you remove shaves minutes off drying time. Layer towels, place slices between them, press firmly. Pretend you’re squeezing out dish sponges.
For bonus points: Air-dry slices 10 minutes post-blotting. This step alone saved me from a microwave steam bath last Christmas. Your microwave will thank you. If you’re looking for easy ways to make the most of your microwave, there’s a simple trick to microwave corn on the cob perfectly, ensuring it’s tender and juicy without the mess.
Also See: Quick & Delicious: Easy 2-minute Garlic Bread!
Step-by-step Guide to Drying Orange Slices in the Microwave
Ready for the magic? Let’s turn those prepped slices into aromatic gold. Spoiler: No wand required—just your microwave’s number pad.
Timing and Power Settings
Set your microwave to 50% power. High heat = scorched edges and raw centers. Place slices on a parchment-lined plate—no overlapping! Start with 3 minutes total, checking every 90 seconds.
Thicker slices (1/4”) may need 4-5 minutes. Grapefruit? Start at 2 minutes. My rule: When you smell citrus, pause and check. Burnt oranges announce themselves loudly. For a quicker way to add citrus flavor, consider using microwave lemon zest techniques. These methods can zest lemons in just 15 seconds, expediting your recipe preparation significantly.
Flipping and Checking for Doneness
Flip slices every 90 seconds with silicone-tipped tongs. Look for edges curling slightly and centers turning from glossy to matte. They’re done when leathery-dry but still pliable—think fruit leather, not potato chip.
If centers feel sticky, continue microwaving in 15-second bursts. Overdo it, and they’ll fossilize. Ask me how I know. This process ties into the fascinating science of how heating liquids, like milk, can alter their properties dramatically. Microwaving milk, in particular, can change everything about its texture and flavor, making it an experience worth exploring.
Common Mistakes and How to Avoid Them
Mistake 1: Cranking to 100% power. Citrus oils caramelize at 150°F—your microwave’s 1000W will nuke them past that in seconds. Stick to 50%. Additionally, it’s important to consider how reheating oils in the microwave can produce toxic fats. Microwaving oils at high temperatures may lead to harmful changes in their properties, which can affect both flavor and health.
Mistake 2: Skipping the blot. Wet slices steam instead of dry, resulting in translucent, mushy discs. Blot like you’re mad at them.
Mistake 3: Crowding the plate. Overlapping slices create moisture pockets. Give each slice personal space—they’re not at a concert.
Now that your oranges are perfectly dried, let’s talk about keeping them fresh (and not resembling potato chips in a week)…
Now It’s Your Turn to Try!
Microwave-dried orange slices are a simple yet versatile treat—perfect for garnishing drinks, decorating gifts, or adding a citrusy zing to baked goods. With just a few minutes and the right technique, you’ll have beautifully dried slices ready for any creative use.
Give it a shot and let us know how your microwave-dried oranges turn out! Whether you’re crafting or cooking, these vibrant slices will add a sunny touch to your projects.