Imagine warm, buttery dinner rolls infused with garlic and herbs ready in under an hour—without endless oven-watching. We’ve cracked the code for soft, golden rolls with a savory kick that’ll make you question traditional rise times forever.
Our microwave dough-rising trick slashes waiting periods by 60%, giving you more time to enjoy that irresistible garlicky aroma wafting through your kitchen. Perfect for last-minute dinners or impressing unexpected guests with your “baking wizard” status.
This guide covers everything from measuring flour to mastering microwave-proof bowl temperatures (spoiler: 10-second intervals are key).

Jump To:
Garlic Herb Dinner Rolls (Microwave Rise)
Course: SideCuisine: American12
15
minutes10
minutes150
kcal30
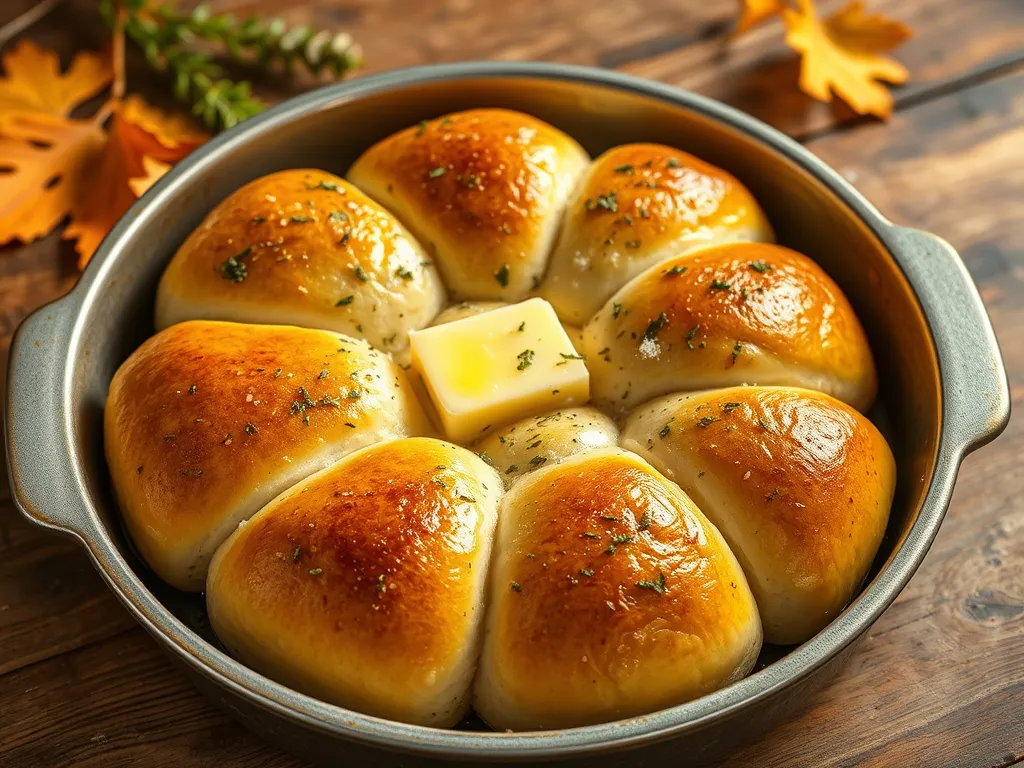
minutesThese dinner rolls are a game-changer for those who love freshly baked bread but don't have the time for traditional rising methods. With a quick microwave rise, these rolls come together in just over half an hour, yielding soft, flavorful bites that are perfect alongside any meal. Infused with garlic and herbs, they are sure to be a hit!
Ingredients
all-purpose flour
instant yeast
salt
sugar
warm water
milk
olive oil
garlic minced
fresh herbs such as rosemary or thyme
butter . for brushing
Directions
- In a large mixing bowl, combine the flour, instant yeast, salt, and sugar.
- In a separate bowl, mix the warm water, milk, and olive oil.
- Pour the liquid mixture into the dry ingredients, then add the minced garlic and fresh herbs, mixing until a dough forms.
- Knead the dough for about 5 minutes until it becomes smooth and elastic.
- Cover the bowl with a damp cloth and place it in the microwave for 5 minutes on low power to allow the dough to rise.
- Once the dough has doubled in size, punch it down and divide it into small equal portions, then shape each portion into a ball.
- Arrange the dough balls in a microwave-safe dish, leaving space between them.
- Cover the dish with a damp cloth and microwave on low power for an additional 5 minutes.
- After microwaving, let the rolls rest for 5 minutes before removing the cloth.
- Brush the tops with melted butter before serving..
Notes
- For the best texture, make sure to knead the dough well, and let it rest and rise as instructed. You can customize the herbs based on your preference, or add cheese for a richer flavor. These rolls are great warm from the microwave but can also be stored and reheated if necessary.
What is a Microwave Rise?
Ever forgotten to let dough rise until 30 minutes before guests arrive? My aunt Clarice once showed up to a family picnic with oven-warm rolls despite her “I totally didn’t forget the dough” face. Her secret? A microwave-proof bowl, ½ cup of water, and strategic 10-second heat bursts.
Microwave rising uses residual heat and steam to activate yeast faster. We nuke a mug of water for 2 minutes, remove it, then place our covered dough bowl inside the warm microwave. The ideal 80-90°F environment cuts rise time from 1 hour to 20-25 minutes—without par-cooking the dough.
What Do Garlic Herb Dinner Rolls Taste Like?
Picture biting into a cloud that’s been lightly toasted by angels and brushed with garlic butter. These rolls balance savory roasted garlic with earthy rosemary and thyme, finished with a crackly golden crust. The crumb stays pillowy-soft, unlike denser store-bought versions. Microwave garlic bread offers a quick and delicious way to enjoy a similar flavor profile, making it perfect for a busy weeknight dinner. Whether you’re serving it as a side or a snack, the buttery garlic aroma warms the kitchen and your heart.
During that infamous picnic, Clarice’s rolls attracted more bees than her floral centerpiece. The herb-forward aroma tricks everyone into thinking you’ve slaved over a 5-star bread basket. Pro tip: Double the garlic if you’re unapologetically extra.
Ready to transform flour and yeast into edible magic? Let’s break down the ingredients and tools you’ll need.
Ingredients for Garlic Herb Dinner Rolls
Our recipe calls for pantry staples with a herby twist. You’ll need:
- 3 cups bread flour (360g) for chewiness
- 1 tbsp active dry yeast (9g) – check expiration dates!
- 2 tsp roasted garlic powder – not raw, unless you’re into sharp bites
- 1½ tsp each dried rosemary & thyme – crush between palms to release oils
- ¾ cup whole milk warmed to 110°F (43°C) – use a food thermometer
Ingredient Substitutes &Amp; Alternatives
No bread flour? All-purpose flour works but yields slightly denser rolls. For dairy-free, swap milk with unsweetened almond milk + 1 tsp lemon juice. Fresh herbs? Triple the quantity – we love 1 tbsp chopped rosemary. If you’re looking for quick and easy alternatives, almond flour can be a great option for simple bread recipes. One popular choice is the easy 90 second almond flour bread, which allows you to whip up a delicious loaf in no time.
Ran out of garlic powder? Sauté 4 minced cloves in 1 tbsp butter until golden. Let cool before mixing into dough. Our cousin Lou once subbed sage for thyme – accidentally invented “Thanksgiving rolls.” Proceed with caution, especially when cooking garlic in microwave for any garlic herb dinner rolls.
Also See: Quick Microwave Eggs With Canned Green Beans!
How to Make Garlic Herb Dinner Rolls With Microwave Rise
Preparing the Dough
- Whisk dry ingredients in a large bowl – flour, yeast, garlic powder, herbs, sugar, salt.
- Create a well. Pour in warm milk, egg, and softened butter. Mix until shaggy dough forms.
- Knead 8 minutes on floured surface until elastic. Dough should spring back when poked.
Sticky situation? If dough clings to fingers, add flour 1 tbsp at a time. Too dry? Mist with water while kneading. Mastering the right texture is crucial for many recipes, including the classic sticky rice recipe, which requires just the right amount of moisture and sticky consistency for the best results.
Using the Microwave for Dough Rising
- Microwave 2 cups water 3 minutes. Remove mug, leaving microwave steamy.
- Place dough in greased bowl, cover with damp cloth. Set inside microwave (don’t turn it on!).
- Let rise 25 minutes. Dough should double – if not, reheat water 1 minute and wait 10 more.
We’ve all peeked – resist opening the door! Every peek drops the temp 5-10°F. Set a timer and walk away.
Baking the Rolls to Perfection
- Preheat oven to 375°F (190°C) during final rise. Shape dough into 12 balls.
- Arrange in greased 9” round pan. Bake 18-20 minutes until tops sound hollow when tapped.
Golden rule: If rolls brown too fast, tent with foil. Underbaked centers? Return to oven 2-3 minutes.
Applying Garlic Herb Butter
- Melt 4 tbsp butter with 1 minced garlic clove and ½ tsp each rosemary/thyme.
- Brush liberally over hot rolls. Let butter pool in crevices for maximum flavor absorption.
For extra crunch, sprinkle flaky salt immediately after buttering. Our neighbor Dave adds parmesan – “accidentally” eats 4 rolls every time. Speaking of parmesan, quick microwave parmesan crisps make for a delightful snack that pairs perfectly with many dishes. They are simple to prepare and offer a satisfying crunch that enhances any meal.
Also See: Lazy Microwave Mac and Cheese With Canned Turnips
Common Mistakes &Amp; How to Fix Them
Dough didn’t rise? Yeast may be dead. Test by mixing 1 tsp yeast with ¼ cup warm water + 1 tsp sugar. If no foam in 10 minutes, replace yeast. For a quicker solution, considering using microwave dough recipes can be an effective alternative. These recipes often yield tasty results in a fraction of the time compared to traditional methods.
Herbs burning? Always use dried herbs in dough, fresh in butter. High oven temps incinerate delicate fresh leaves. To enhance flavors, try making thyme butter with fresh herbs. A simple microwave melt can bring out the richness of spring herbs, making it a delightful topping for various dishes.
Butter sliding off? Apply while rolls are hot but not scalding (wait 2 minutes post-oven). Cold butter won’t stick – microwave it 15 seconds if needed. Melting butter in the microwave is a quick and easy solution, ensuring it’s spreadable when needed. Just keep an eye on it to prevent splattering or overheating.
Mastered the basics? Let’s tackle keeping these garlicky gems fresh (and reheating them without sogginess).
Can You Microwave Dinner Rolls for Reheating?
Absolutely—we’ve revived more day-old rolls this way than we’d care to admit. The trick? 15-second microwave intervals with a damp paper towel tent. My brother once nuked a roll for 45 seconds straight and created a hockey puck. Learn from his folly.
For best results, place rolls on a microwave-safe plate. Cover with a damp paper towel—this mimics steam while preventing that dreaded rubbery texture. Heat at 50% power for 15 seconds. Check warmth. Repeat if needed. Your goal: 110-120°F internal temperature (finger-test safe). Utilizing a heat towel in the microwave can also enhance the warming process while providing additional moisture. It’s an effective way to ensure your food remains deliciously soft and warm.
Storing &Amp; Reheating Garlic Herb Dinner Rolls
Fresh-from-the-oven rolls rarely last, but when they do, here’s how we keep them from turning into garlic-scented paperweights.
Room Temperature Storage
For next-day freshness, store cooled rolls in a bread box or paper bag. Plastic traps moisture, accelerating starch retrogradation (fancy term for staling). They’ll stay soft 24 hours max. Pro tip: Tuck a celery stick in the bag—natural humidity control.
Refrigerating for Longer Freshness
Need 3-5 days? Wrap rolls tightly in foil. The garlic butter coating acts as a moisture barrier. When ready to eat, reheat directly in the foil packet at 300°F for 8 minutes. Our friend Gina swears this method makes them “better than fresh,” but we’ll let you decide. For a quick and tasty option, consider whipping up some easy 2-minute garlic bread that pairs perfectly with your meal.
Reheating in the Microwave
Follow this table for perfect texture:
| Method | Time | Result |
|---|---|---|
| Microwave + damp towel | 15-30 sec | Soft interior |
| Oven (300°F) | 8-10 min | Crispy exterior |
For hybrid texture: Microwave 15 seconds, then finish in a toaster oven 2 minutes. Works wonders while you’re scrambling eggs. This technique can also be applied to create a quick and delicious breakfast, like a 2 minute microwave avocado toast egg. Combining perfectly ripe avocado with a microwave-cooked egg creates a satisfying and nutritious meal in no time.
Now that your rolls stay fresh longer, let’s explore how to remix this recipe with different cheeses, herbs, and flours. You can also try making Pillsbury cinnamon rolls in the microwave for a quick and delicious treat. This method is perfect when you’re short on time but still want that warm, gooey goodness.
Now It’s Your Turn to Bake!
These garlic herb dinner rolls with microwave rise prove that homemade bread doesn’t have to be time-consuming. The microwave method cuts rising time dramatically while delivering soft, buttery rolls with that irresistible garlicky aroma.
We’d love to hear how your microwave-risen rolls turn out! Did you add extra herbs or try a cheesy variation? Drop us a comment with your baking adventures – and don’t forget to enjoy those warm rolls straight from the oven.