Rhubarb season just got sweeter—and faster. Whip up this spring dessert in 8 minutes flat using your microwave’s magic (and zero oven space).
Imagine tender, tangy rhubarb bubbling under a crunchy oat topping. Now imagine eating it before your oven finishes preheating. That’s the power of microwaving done right.
Below, we’ll share how to tweak sweetness, avoid sogginess, and make this crumble your springtime MVP.
Jump To:
Microwave-Baked Rhubarb Crumble for Spring
Course: DessertCuisine: American4
10
minutes5
minutes250
kcal15
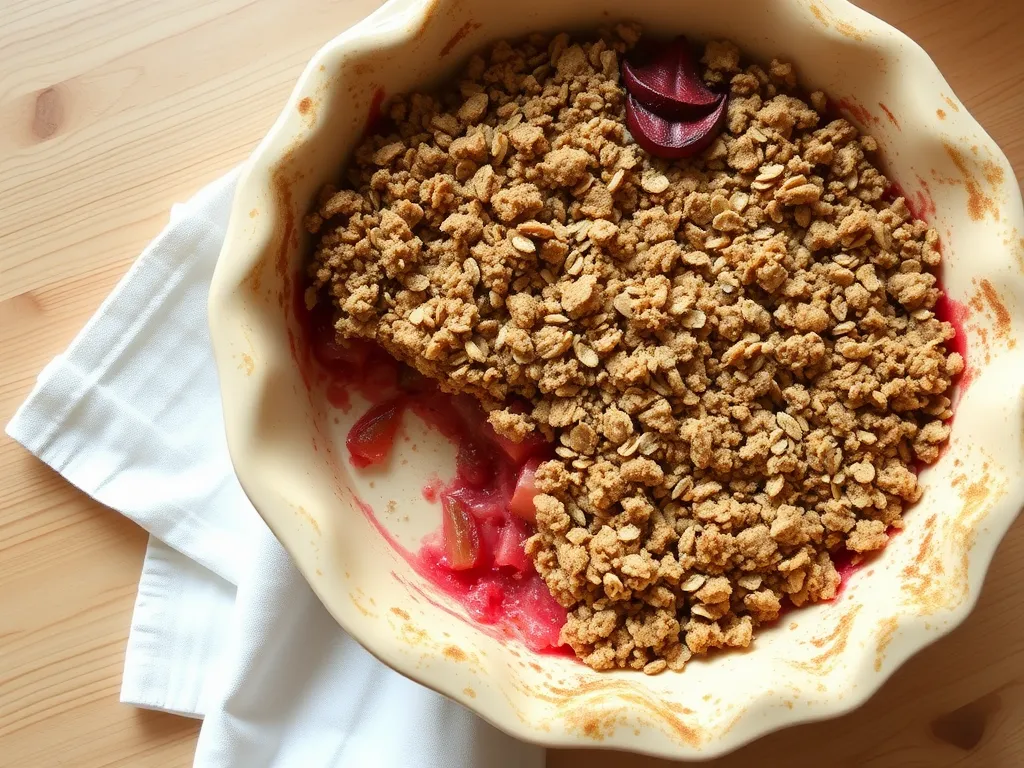
minutesRhubarb is a classic spring ingredient, and this microwave-baked rhubarb crumble recipe captures its vibrant flavor in no time at all. Skip the traditional oven method and enjoy a warm serving of crumble in just a few minutes. The combination of tart rhubarb and sweet crumble topping makes for an irresistible dessert that is both satisfying and simple.
Ingredients
chopped rhubarb
granulated sugar
cornstarch
vanilla extract
rolled oats
all-purpose flour or gluten-free flour
brown sugar
cinnamon
salt
melted butter
optional: vanilla ice cream for serving.
Directions
- In a microwave-safe bowl, combine 2 cups of chopped rhubarb with 1/2 cup of granulated sugar, 1 tablespoon of cornstarch, and 1 teaspoon of vanilla extract.
- Mix thoroughly, then microwave on high for 2 minutes until the rhubarb is soft.
- In another bowl, combine 1/2 cup of rolled oats, 1/3 cup of all-purpose flour, 1/4 cup of brown sugar, 1/4 teaspoon of cinnamon, and 1/4 teaspoon of salt.
- Stir in 3 tablespoons of melted butter until the mixture is crumbly.
- Spread the crumble topping over the rhubarb mixture in the microwave-safe bowl.
- Microwave the assembled dish on high for an additional 3 minutes, or until the topping is golden and the rhubarb is bubbly.
- Allow the crumble to cool for a few minutes before serving.
- Serve warm, optionally topped with a scoop of vanilla ice cream..
Notes
- Feel free to adjust the level of sweetness according to your preference. If you want a bit more texture in your crumble, you can add chopped nuts to the topping. This recipe is a wonderful way to celebrate seasonal rhubarb, providing a quick and easy dessert option for spring gatherings.
What Does Rhubarb Crumble Taste Like?
Rhubarb crumble is spring’s edible paradox. The tart, almost citrusy punch of rhubarb (think nature’s Sour Patch Kid) gets tamed by a sweet, buttery oat topping. When microwaved right, you get jammy fruit beneath a crispy golden crust—like pie’s low-maintenance cousin.
At our family reunion last May, my kids Sarah and Timmy devoured this dessert despite initial skepticism. “It’s sour… but also crunchy… but I want more?” Timmy mumbled through a mouthful. That’s rhubarb crumble magic—balancing bold flavors with cozy textures.
Can You Microwave Rhubarb Crumble? Key Considerations
Absolutely, but microwave wattage matters. Most recipes assume 1000W—if yours is weaker (800W) or stronger (1200W), adjust cooking time by ±30 seconds. We learned this the hard way when Sarah’s first attempt turned our dish into rhubarb soup (RIP, vintage Tupperware).
Use a wide, shallow ceramic dish—it promotes even cooking. Deep mugs trap steam, leading to soggy topping syndrome. Leave a small vent by slightly offsetting the lid or using a microwave-safe plate to cover. This lets excess moisture escape without sacrificing texture. Choosing the right container is important, especially when using a microwave ceramic mug, as it ensures even heating and enhances your culinary experience.
Stir the rhubarb mixture halfway if your microwave has cold spots. No fancy turntable? Rotate the dish manually. And don’t skip macerating the rhubarb with sugar first—it draws out juices, preventing a dry or overly watery filling. Similarly, using a simple trick to microwave corn on the cob can yield perfectly cooked results in just a few minutes. This method ensures the corn stays sweet and juicy, making it a delicious addition to any meal.
Ready to turn that spring rhubarb haul into a 7-minute wonder? Let’s talk ingredients—including how to swap frozen stalks when fresh ones play hide-and-seek in your fridge. For a quick meal option, consider pairing your dish with a lazy microwave frozen chicken patty or even instant barley, which can be ready in no time to complement your spring creation.
Ingredients for Microwave-baked Rhubarb Crumble
Our recipe calls for 2 cups diced rhubarb (1/2-inch pieces), 1/4 cup rolled oats, and 3 tbsp brown sugar. You’ll also need 2 tbsp softened butter, 2 tbsp all-purpose flour, and a pinch of cinnamon. Pro tip: toss rhubarb with 1 tsp lemon juice to keep its vibrant pink hue during microwaving. For a quick and delightful treat, consider trying a microwave strawberry rhubarb mug—perfect for satisfying cravings in just minutes.
Rhubarb Alternatives: Fresh Vs. Frozen
Fresh rhubarb is ideal, but frozen works in a pinch—just thaw and pat dry first. Frozen stalks release 15% more liquid, so mix in 1 extra teaspoon of flour. Last spring, I used frozen rhubarb during a late-night craving session, similar to how I sometimes use frozen vegetables in microwave meals for convenience. The result? Slightly soupier, but still spoon-licking good.
Sweetener and Flour Substitutes
Swap brown sugar with honey or maple syrup (reduce to 2 tbsp—they’re sweeter). For gluten-free crumble, use almond flour instead of all-purpose. Our test kitchen found coconut flour absorbs too much moisture, leaving your topping drier than a British comedy. If your brown sugar is hard, consider a quick 5-second microwave fix to soften it effortlessly. This simple method can save your recipes and prevent frustration in the kitchen.
Also See: Lazy Microwave Canned Chicken & Instant Quinoa Flakes
How to Make Rhubarb Crumble in the Microwave
This is where microwaves shine. Unlike oven baking (45+ minutes), we’re done in 8 flat. The key? Layering and power intervals to avoid mush or charcoal. In fact, many foods actually taste better when microwaved rather than baked. Exploring those options can lead to quicker and tastier meals.
Step-by-step Microwave Instructions
- Toss diced rhubarb with 1 tbsp sugar in a microwave-safe pie dish. Let sit 5 minutes—this “sweats” out excess juice.
- Mix oats, remaining sugar, flour, cinnamon, and butter until crumbly. Sprinkle over rhubarb.
- Microwave on high (1000W) for 4 minutes. Check doneness—rhubarb should be fork-tender with bubbly edges.
- If needed, microwave in 30-second bursts (max 2 extra minutes). Let rest 3 minutes—it keeps the topping crisp.
Tips for Avoiding Soggy or Burnt Results
- Use a 9-inch wide dish—crowding creates steam pockets.
- Place a bamboo chopstick under the microwave plate to slightly vent steam.
- If your microwave has uneven heating, pause halfway to rotate the dish 180°.
Also See: Lazy Microwave Mug Omelet With Leftovers
Common Mistakes and How to Fix Them
We’ve all been there—crumbling crumbles, tart overloads, or dessert lava. Here’s how to course-correct mid-microwave.
Adjusting Texture and Sweetness During Cooking
Too tart? Sprinkle 1 tsp sugar over the rhubarb layer and microwave 30 seconds more. Too watery? Mix 1/2 tsp cornstarch into the juices and nuke another minute. Once, I added strawberry jam mid-cook to balance tartness. Not textbook, but Timmy declared it “breakfast-worthy.”
Now that your crumble is perfected, let’s keep it tasting fresh. Up next: storage hacks and proper reheating techniques that preserve that just-made crunch. When it comes to snacks like veggie chips, proper reheating techniques can make a world of difference in maintaining their delightful crunch.
Now It’s Your Turn to Whip Up Spring Bliss!
We’ve walked through every step—from picking the perfect rhubarb to nailing that golden crumble texture in your microwave. This spring dessert delivers tangy, sweet comfort in under 10 minutes, no oven required.
Grab those stalks and a microwave-safe dish—your shortcut to seasonal deliciousness starts here. Let us know how your crumble turns out!