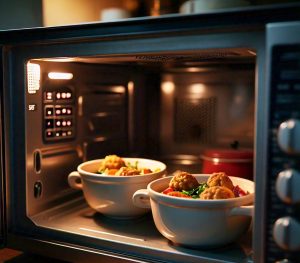
Craving a crunchy snack without the guilt? We’ve got you covered with crispy, delicious chips made right in your microwave.
You can make chips from zucchini, sweet potatoes, or even cheese in minutes, using little to no oil.
We’ll show you three simple methods to satisfy your snack attack any day of the week.
Jump To:
Quick and Crispy Microwave Zucchini Chips
From our experience, zucchini chips are hands down the easiest veggie chips to master in the microwave. We love how they crisp up without any oil and give you that satisfying crunch you’re craving.
The key is slicing your zucchini paper-thin – we’re talking about 1/16 inch thick slices. A mandoline slicer works wonders here, but a sharp knife and steady hand will do the trick too.
What we found works best is arranging the slices on a microwave-safe plate in a single layer. Don’t overlap them or they’ll steam instead of crisp. We microwave for 2-3 minutes, flip each slice, then continue for another 2-3 minutes.
One mistake we made early on was not patting the zucchini slices dry before microwaving. All that moisture creates steam, which is the enemy of crispiness. Use paper towels to remove excess water first.
Two-minute Oil-free Microwave Sweet Potato Chips
Sweet potato chips are our go-to when we want something with natural sweetness and loads of nutrients. The best part? You can make them completely oil-free and still get amazing results.
We slice our sweet potatoes into thin rounds – about 1/8 inch thick works perfectly. Any thicker and they won’t crisp up properly in just two minutes. The secret is using high power and watching them carefully to prevent burning.
What I strongly suggest is starting with 90 seconds on high power, then checking for doneness. Some microwaves run hotter than others, so you might need an extra 30 seconds. The edges should look slightly golden and feel crispy to the touch.
From my own experience, sweet potatoes with orange flesh work better than the white varieties. They have more natural sugars that help with the crisping process and give you that restaurant-quality taste.
Anyday Hack: Microwave Veggie Chips and Parmesan Crisps
This hack changed our snacking game completely. We discovered you can make crispy parmesan crisps and veggie chips using specialized microwave cookware that creates perfect results every time.
The Anyday dishes work so well because they’re designed specifically for even microwave heating. You get consistent results without hot spots or uneven cooking that plague regular plates.
What we found works best is mixing different vegetables in the same batch. Try combining thinly sliced radishes, turnips, or even beets. Each vegetable has its own cooking time, so we add the hardest vegetables first, then layer in the softer ones.
For parmesan crisps, we grate fresh parmesan into small mounds about 2 inches apart. They bubble and crisp up in about 60-90 seconds. One mistake I made was using pre-grated cheese – fresh grated melts and crisps much better.
Also See: Cheap Microwave Peanut Butter Banana Toast – 5-minute Recipe!
Secrets to Getting Your Microwave Chips Perfectly Crispy
Getting that perfect crispy texture in microwave chips took us months of trial and error. We learned that moisture is your biggest enemy when making chips in the microwave.
Pat everything dry before you start cooking. We use paper towels to remove surface moisture from vegetables like zucchini, sweet potatoes, or any watery produce. This single step makes the difference between soggy disappointment and restaurant-quality crunch.
What I found works best is using a microwave-safe wire rack when possible. It allows air to circulate underneath your chips and prevents them from sitting in their own steam. If you don’t have a rack, flip your chips halfway through cooking.
Power level matters more than we initially thought. We run our microwave at 70-80% power for most vegetable chips. Full power can create hot spots that burn the edges while leaving the center soggy.
One mistake I made was overcrowding the plate. Space your chips at least half an inch apart. Yes, this means making multiple batches, but each chip needs room to release moisture properly.
From my own experience, letting chips cool for 30-60 seconds after microwaving makes them crispier. They continue cooking from residual heat and firm up during this resting period.
Best Seasonings and Spices for Homemade Microwave Chips
Seasoning microwave chips is where you can get really creative. We’ve experimented with dozens of combinations, and timing is everything when it comes to getting flavors to stick.
Salt your vegetables before cooking – this draws out moisture and helps seasonings adhere better. We sprinkle fine sea salt on our zucchini chips about 10 minutes before microwaving.
What I strongly suggest is mixing oil-free seasonings with a tiny amount of cooking spray or olive oil mist. This helps spices stick without adding significant calories. We use about 1/4 teaspoon of oil for a whole batch.
Our favorite combinations include garlic powder and paprika for sweet potato chips, or dried herbs like rosemary and thyme for regular veggie chips.
For something more adventurous, we love nutritional yeast mixed with smoked paprika. It gives chips a cheesy, umami flavor that’s completely plant-based. Ranch seasoning powder works amazing too.
One mistake we made early on was over-seasoning. Microwave cooking concentrates flavors, so use about half the seasoning you’d normally use for oven-baked chips.
From our experience with parmesan crisps, fresh grated cheese needs minimal additional seasoning. A light dusting of black pepper or garlic powder is plenty.
Pro tip: Keep a small shaker bottle with your favorite chip seasoning blend ready to go. We mix equal parts garlic powder, onion powder, and sweet paprika as our go-to base.
Time to Get Crispy in Your Kitchen
We’ve walked you through three fantastic ways to create healthier chips right in your microwave. From zucchini rounds to sweet potato slices and cheesy veggie crisps, you now have the tools to satisfy those crunchy cravings without the guilt. The best part? Each method takes just minutes and uses ingredients you probably already have sitting in your fridge.Don’t wait for your next snack attack to strike. Grab your mandoline slicer or sharp knife and start experimenting with different vegetables and seasonings. Your taste buds (and your waistline) will thank you for making the switch from store-bought chips to these nutrient-packed microwave alternatives. Trust us, once you taste that perfect crispy crunch, you’ll wonder why you ever bothered with the bagged stuff.


