Craving a bold salsa but short on time and cash? Our microwave hack turns canned beans and bargain-bin pears into a sweet-savory fiesta in your mouth.
Zero chopping and minimal cleanup make this the ultimate lazy cook’s appetizer. Bonus: your microwave does 90% of the work while you scroll memes.
We’ll walk you through the simple steps, smart ingredient swaps, and pro tips to nail this quirky combo every time.
Jump To:
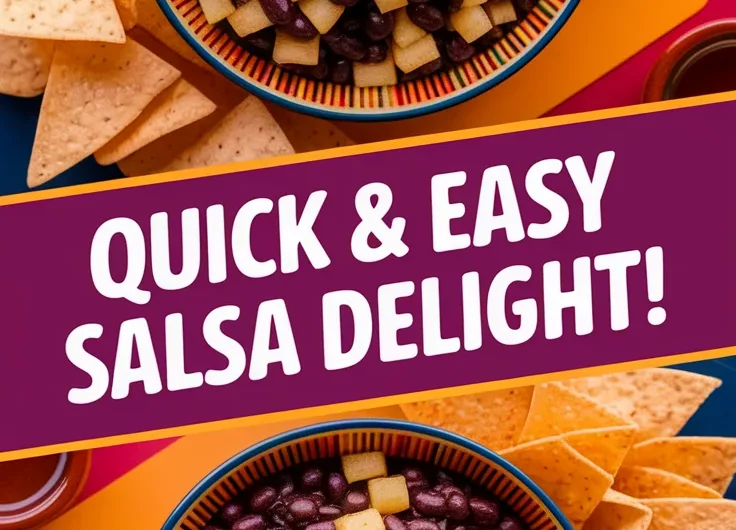
Cheap Microwave Canned Black Bean and Pear Salsa
Course: AppetizerCuisine: American, Tex-Mex4
5
minutes3
minutes150
kcal8
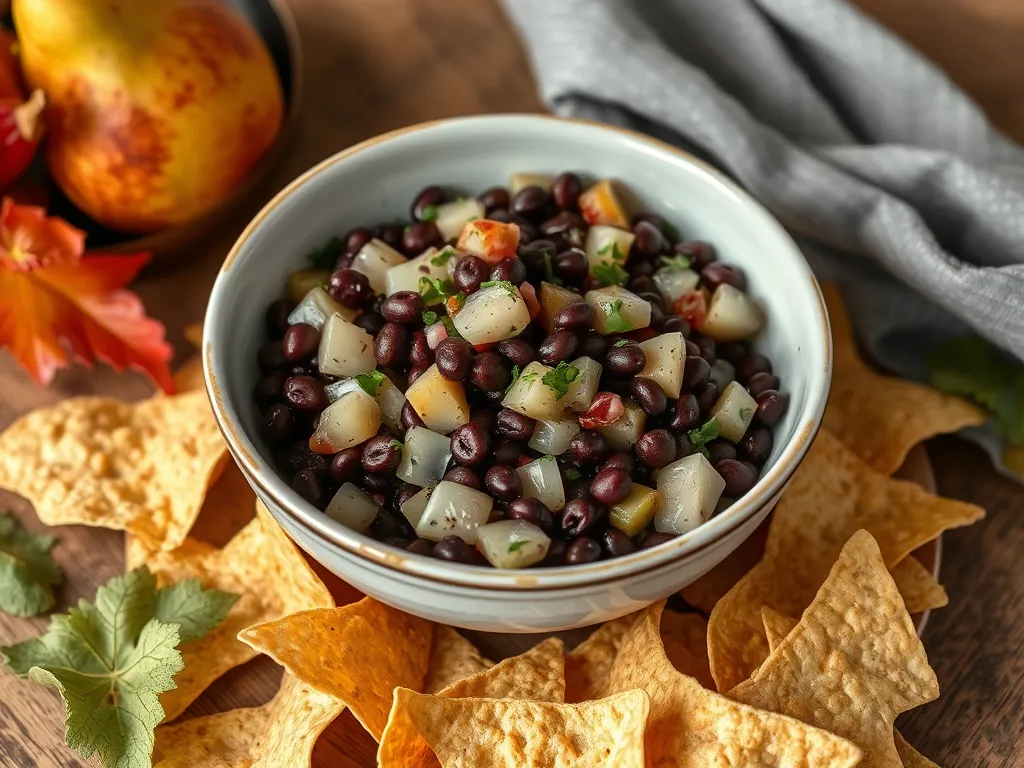
minutesThis microwave canned black bean and pear salsa is perfect for those busy days when you want something tasty without breaking the bank. Using canned ingredients, it comes together swiftly, making it an ideal choice for a quick appetizer or topping for any meal.
Ingredients
of black beans 15 oz
drained and rinsed
pear
diced
red onion
finely chopped
jalapeño
seeded and minced
juice of
cumin
salt and pepper to taste
fresh cilantro . optional
Directions
- In a microwave-safe bowl, combine the black beans, diced pear, chopped red onion, and minced jalapeño.
- Squeeze the lime juice over the mixture, then add the cumin, salt, and pepper.
- Stir all the ingredients together until well combined.
- Microwave the bowl on high for 3 minutes, or until heated through.
- Remove from the microwave and let it cool slightly.
- Stir in the chopped cilantro if desired.
- Serve the salsa warm or at room temperature with tortilla chips or as a topping for tacos and salads..
Notes
- Feel free to adjust the spice level by adding more or less jalapeño. You can also substitute the pear with diced mango or pineapple for a different flavor twist. This salsa is great for meal prep and can be made in advance, storing it in the fridge for up to 3 days.
What Does Black Bean and Pear Salsa Taste Like?
Imagine biting into a flavor tug-of-war where sweet pear chunks arm-wrestle smoky black beans – and everyone wins. My grandpa once served this oddball combo at his 70th birthday fiesta, and we all thought he’d swapped his denture glue for salsa. Turns out, the creamy beans and fruity zing create magic when forced to coexist.
Balancing Sweet and Savory Flavors
Ripe pears (we use whatever’s on sale) bring honeyed brightness that cuts through the earthy beans. A squeeze of lime acts as referee, keeping the sweet and savory from overpowering each other. It’s like a fruit salad and bean dip had a delicious baby.
Texture Variations in Microwave Salsa
Nuking canned corn for 45 seconds plumps the kernels into juicy little flavor bombs. The beans stay firm, while microwaved onions turn translucent and tender. For textural drama, we leave pear skins on – they add subtle crunch without pretentious “chef-y” effort.
Essential Ingredients and Substitutes
This recipe thrives on pantry raids. Found a dented can of peaches behind the Spam? Welcome to the salsa family. With a little creativity, those peaches can also turn your lazy microwave instant oatmeal into a delicious breakfast treat.
Canned Black Beans (Alternative: Cooked Dried Beans)
One 15-oz can ($0.89 average) gives perfect texture. Dried beans work too – soak 1 cup overnight, then microwave 15 minutes in 3 cups water. Pro tip: Add 1/4 tsp baking soda to speed softening. It’s one of those tricks I picked up for making affordable microwave bean dishes that taste way better than their price tag.
Fresh Pears (Alternative: Canned Peaches or Apples)
Overripe “manager’s special” pears ($0.50 each) are ideal. Canned fruit? Drain well and pat dry – excess syrup makes salsa cloying. We’ve even used apple sauce in a pinch (microwave 30 seconds to thicken first). There are also quick and easy options like lazy microwave instant pancake mix paired with canned fruit for a delicious breakfast. Just add some syrup or whipped cream, and you have a satisfying meal in no time.
Canned Corn (Alternative: Frozen or Fresh Corn)
Canned kernels cost $0.75 vs fresh ($1.25 per ear). Microwaving frozen corn? Zap 1 cup with 1 tbsp water for 2 minutes. Blot thoroughly – soggy corn drowns other flavors. When it comes to quick meals, microwave canned corn is a convenient option. It heats up in just minutes and retains its sweet flavor, making it a great addition to many dishes.
Lime Juice (Alternative: Bottled Lime Juice or Vinegar)
Fresh limes ($0.33 each) beat bottled ($2.49) for zing, but we’ve used lemon juice + 1/4 tsp white vinegar in emergencies. Acid is non-negotiable – it prevents the bean-pear duo from tasting like baby food.
Spice Adjustments: Jalapeños or Chili Powder
Fresh jalapeños ($0.20 each) pack more heat, but 1/4 tsp chili powder ($0.02 per serving) works. Microwave sliced chilies 15 seconds to mellow their bite. You can also easily microwave jalapenos to achieve a tender, flavorful kick in your dishes. Grandpa’s secret? A dash of cinnamon – “makes it taste expensive.”
Now that we’ve got our flavor agents sorted, let’s transform these humble ingredients into microwave magic…
How to Make Canned Black Bean and Pear Salsa in the Microwave
I once tried making salsa while binge-watching Great British Bake Off – multitasking led to a chunky disaster. Follow these steps carefully, and you’ll avoid my “salsa soup” incident.
Step 1: Draining and Rinsing Canned Ingredients
Drain your black beans and corn like your taste buds depend on it – because they do. That goopy liquid in cans? We call it “sodium sludge” in our kitchen. Rinsing for 10 seconds under cold water cuts sodium by up to 40% (USDA data). On busy days, microwave canned beans can be a quick and nutritious option. They provide a versatile base for meals, making it easy to add flavor and nutrients in no time.
Pat pears dry with paper towels if using canned. Wet fruit turns salsa into a sad bean pool. Trust me – I learned this during The Great Salsa Flood of 2022.
Step 2: Microwaving Vegetables for Softness
Toss rinsed beans, corn, and diced onions in a microwave-safe bowl. Zap for 1.5 minutes on high – this softens onions without obliterating texture. For an even quicker flavor boost, try whipping up instant caramelized onions using a simple microwave hack. Cover with a damp paper towel to prevent corn kernel explosions (yes, it’s a thing).
Step 3: Mixing Fruits and Beans Safely
Add diced pears after microwaving veggies. Raw fruit + hot beans = perfect temp contrast. Stir gently with a wooden spoon – metal utensils can scratch bowls and your dignity (ask my college roommate).
Step 4: Adjusting Consistency With Microwave Timing
Too watery? Microwave uncovered for 20-second bursts. Too thick? Add 1 tsp lime juice between zaps. The sweet spot? When your spoon stands upright briefly before tipping – like a salsa sundial.
Pro Tip: Preventing Overheating in the Microwave
Set your microwave to 50% power after the initial cook. Full power turns pears into mushy landmines. Stir every 30 seconds – it’s less annoying than scrubbing caramelized bean goo later.
Also See: Cheap Microwave Tortilla and Cheese Melt – Ready in Minutes!
Why Microwave Instead Of Traditional Salsa Methods?
My stovetop salsa attempts usually end with burnt garlic and existential dread. Microwaving fixes two major salsa sins:
Speed and Cost Efficiency
Traditional simmering takes 25 minutes – ours takes 5. At $0.12 per microwave session (national average) vs $0.35 for gas stovetop, you’ll save enough for extra tortilla chips.
Controlling Moisture Levels in Microwave Prep
Microwaves excite water molecules – science speak for “steams veggies perfectly.” Unlike boiling, nutrients stay locked in. Translation: your salsa tastes fresher despite using canned goods. However, it’s essential to consider the overall impact of microwaving on food nutrition, as some microwaved vegetables can still lose vital nutrients. These nutrient losses can contribute to empty calories, making it crucial to balance convenience with nutritional quality when preparing meals.
Also See: Microwave Fried Rice Recipe – 5 Variations, Tips, Tools, FAQs & More
Common Mistakes When Microwaving Salsa and How to Avoid Them
We’ve all nuked a bowl into oblivion. Here’s how to dodge salsa-specific disasters:
Overcooking Pears (Fix: Shorter Microwave Intervals)
Pears turn to mush at 165°F (74°C). Microwave in 15-second increments after initial cook. If they resemble baby food, you’ve gone too far – toss in some apple chunks as backup.
Using Metal Containers (Fix: Microwave-safe Bowls)
My cousin microwaved a foil-wrapped bean once. The fire department wasn’t amused. Use glass or ceramic – if it sparks, it’s not salsa-friendly. It’s a good reminder that using aluminum foil in the microwave can lead to dangerous situations. Always avoid putting any metallic items in the microwave to ensure safe cooking.
Ignoring Standing Time for Flavor Blending
Let salsa sit 3 minutes post-zapping. Heat opens up flavor molecules – basically, your ingredients get to know each other. Rushing this step tastes like regret with a side of raw onion. This smooth texture and burst of flavor make it the perfect topping for fish tacos. Combining summer salsa with microwave-cooked fish tacos creates a quick and delicious meal ideal for any summer day.
Now that your salsa’s ready to rock, let’s talk about keeping leftovers fresh (because nobody wants food poisoning with their Netflix marathon)…
Storing and Reheating Leftover Salsa
Leftover salsa? We’ve all been there – that half-eaten bowl staring at you after a Netflix binge. Let’s keep it fresh and tasty for round two without turning your fridge into a science experiment.
How Long Does Microwaved Salsa Last?
Our salsa stays fresh in the fridge for 3-4 days max. The lime juice acts as a natural preservative, but those tender pears start breaking down fast. I learned this the hard way when my day-five salsa developed a personality (and fuzzy coat).
Freezing? Not ideal. Thawed beans get mealy and pears turn to mush. If you must freeze, strain liquid first and expect texture changes. When it comes to frozen options, microwave frozen fruit can be a great alternative. It maintains more of its natural texture and flavor while providing a quick and convenient way to enjoy fruits any time.
Best Containers for Refrigerating Salsa
Use glass jars with silicone seals or BPA-free plastic containers. My thrift-store mason jars work perfectly – plus, they double as serving dishes. Avoid metal tins (they react with acidic lime juice) and flimsy takeout containers (ask me about The Great Salsa Leak of 2021). Choosing safe microwave meal prep glass containers and lids not only ensures your food stays fresh but also protects against harmful chemicals that can leach into your meals when heated.
Press plastic wrap directly on the salsa surface before sealing. This blocks air exposure better than just snapping on a lid. Your future self will thank you when the salsa tastes day-one fresh.
Reheating Salsa in the Microwave Without Sogginess
Zap leftovers at 50% power for 30 seconds, stir, then repeat. Cover with a damp paper towel – it steams gently without making corn kernels shrivel. If it looks watery, drain excess liquid and add a fresh squeeze of lime.
Pro tip from my abuela: Toss in a few fresh cilantro leaves post-reheating. It revives the flavors better than any microwave sorcery.
Now that your salsa is stored like a pro, let’s explore creative ways to serve this sweet-savory superstar…
Ready to Whip Up Your Salsa?
This microwave black bean and pear salsa proves budget-friendly meals don’t have to skimp on flavor. With canned staples and 5 minutes of microwave magic, you’ll get a sweet-savory dip that beats store-bought versions.
Play with the heat level by adjusting jalapeños or try different fruits like peaches. Just remember: microwave in short bursts and let flavors meld for 2 minutes before serving. Your chips won’t know what hit them!