Craving Starbucks cake pops but refuse to pay $3 per bite? We’ve cracked the code to under-15-minute microwave magic that skips oven preheating and mixer wrestling.
Our version costs less than a latte and delivers that iconic soft-centered, candy-coated joy. Bonus: You’ll avoid the coffee shop line while wearing pajamas.
We’ll walk through microwave hacks, allergy-friendly swaps, and pro tips for achieving those signature Starbucks swirls without fancy tools.
Jump To:
Copycat Starbucks Cake Pop (Microwave Shortcut)
Course: DessertCuisine: American12
5
minutes10
minutes150
kcal30
minutesMaking Starbucks-style cake pops can be time-consuming, but with this microwave shortcut, you can have your cake and eat it too, in just a fraction of the time. This recipe uses boxed cake mix and a microwave, allowing you to create moist and decadent cake pops in minutes.
Ingredients
of cake mix any flavor
of frosting your choice
sticks
of chocolate melting wafers
(optional
for decoration)
Directions
- Prepare the cake mix according to package instructions and microwave in a microwave-safe dish for about 8-10 minutes until cooked through, Let the cake cool completely, Crumble the cake into a large bowl, then add frosting to the crumbled cake, Mix until thoroughly combined and the mixture is moldable, Roll the mixture into 1-inch balls and place them on a parchment-lined baking sheet, Insert lollipop sticks into each cake ball, Freeze the cake pops for about 15 minutes to firm up, While the cake pops are chilling, melt the chocolate wafers in the microwave in 30-second intervals until smooth, Dip each cake pop into the melted chocolate, allowing any excess to drip off, Place the coated cake pops back on the parchment paper and add sprinkles if desired, Allow the chocolate to set before serving..
Notes
- Feel free to use any flavored cake mix and frosting to customize your cake pops. For best results, ensure your chocolate coating is smooth and fully melted. You can add flavorings like vanilla or almond extract to the cake mixture for an extra twist. These cake pops can be stored in the refrigerator in an airtight container for up to a week.
What Are Cake Pops?
Imagine a cupcake and lollipop had a delicious baby—that’s a cake pop. Starbucks made them famous with their velvety texture and pastel coatings, but my mom Linda proved they’re homemade heroes. At my 10th birthday party, she accidentally turned a collapsed layer cake into 50 cake pops…and became the neighborhood legend.
Key Components Of Starbucks-style Cake Pops
Starbucks’ version nails three things: moist crumb, firm coating, and unapologetic cuteness. The secret? A precise 2:1 cake-to-frosting ratio. Too little frosting, and your pops crumble like my aunt Clarice’s infamous “deconstructed” trifle. Too much, and you’re gnawing on sugary cement.
Can You Microwave Cake Pop Ingredients?
Absolutely—we’re rebels with a microwave-safe cause. Microwaving skips the oven’s 20-minute preheat and cuts baking time to 90 seconds. Just ensure your mug or bowl is labeled “microwave-safe” (no metallic accents!) to avoid a Fourth of July rerun in your appliance. While it’s great for cooking or warming food, it’s especially handy when you’re in a hurry to make a copycat Starbucks cake pop.
Safety and Efficiency Of Microwave Use
Wattage matters. Most recipes assume a standard 1000W microwave. If yours is weaker (700-900W), add 10-15 seconds to baking. Stronger (1200W+)? Subtract 5 seconds. Melt chocolate in 20-second bursts, stirring between each—overheating causes seizing, which is fancier jargon for “chocolate tantrums.” Knowing how to melt chocolate in the microwave properly can save you from those unfortunate seizing moments. With careful timing and stirring, you can achieve perfectly smooth melted chocolate every time.
We’ve all been there: one distracted moment, and suddenly your candy melts resemble lumpy oatmeal. If this happens, add 1 tsp coconut oil and stir vigorously. Crisis averted—no Starbucks run required. Speaking of oatmeal, a quick microwave version can be made at home to replicate that beloved Starbucks flavor without leaving your kitchen.
Ready to raid your pantry? Let’s talk ingredients that play nice with microwaves…
Ingredients for Copycat Starbucks Cake Pops
Our microwave method slashes ingredient lists faster than a barista spells “venti.” You’ll need: Microwaves excel at heating food quickly, allowing flavors to meld in a way that can sometimes surpass traditional baking. Consider how certain foods, like pizza or bread, often taste better when reheated in the microwave.
Essential Ingredients &Amp; Microwave-friendly Alternatives
Base: ½ cup vanilla box cake mix (or DIY blend: ¼ cup flour, 3 tbsp sugar, ¼ tsp baking powder). Box mixes win for speed—we’re not judging. For a delightful treat, consider trying a microwave vanilla sprinkle cake. It’s a quick and fun way to enjoy a classic dessert in minutes!
Binder: 3 tbsp milk (any type) + 1 tbsp oil. For extra fluff, swap oil with unsweetened applesauce. My cousin Dave’s accidental swap made his pops 20% lighter—now he brags.
Coating: 1 cup candy melts (vanilla or pink). Chocolate chips work but require 1 tsp coconut oil to prevent seizing. When it comes to melting chocolate perfectly, the microwave can be a game changer. Discovering 7 microwave tricks can help achieve that silky smooth texture every time.
Substitutes for Dietary Restrictions (Gluten-free, Vegan)
- Gluten-free: Use 1:1 GF flour (Bob’s Red Mill works) + ⅛ tsp xanthan gum
- Vegan: Flax egg (1 tbsp ground flax + 2.5 tbsp water) + coconut milk + dairy-free chocolate
- Nut-free: Sunflower seed butter instead of frosting (adds binding without allergens)
Microwave-safe Tools Needed
Avoid Pyrex with gold trim—it sparks like my toddler’s glitter crafts. Use:
- 12-oz ceramic mug or silicone bowl
- Plastic lollipop sticks (metal conducts too much heat)
- Wax paper for setting
Also See: Easy 2-minute Taco Dip for Instant Party Magic!
How to Make Cake Pops in the Microwave
We’re bypassing Starbucks’ 4-hour process with nuking know-how. Total hands-on time: 8 minutes.
Step 1: Microwave the Cake Base (Quick Mix Method)
Whisk ½ cup cake mix, 3 tbsp milk, and 1 tbsp oil in a mug until smooth—lumps lead to sad, dense pops. Microwave 70 seconds (1000W). If your microwave’s older than TikTok, add 10-second increments until springy. Unlike some tricks to bake cakes in microwave for quick fixes, this one’s actually consistent for Copycat Starbucks Cake Pop microwave shortcuts.
Step 2: Blend Frosting Using Microwave-softened Ingredients
Crumble cooled cake into a bowl. Add 2 tsp frosting (store-bought or 1 tbsp butter + ¼ cup powdered sugar). Microwave butter for 8 seconds to soften—overdo it, and you’ll have soup. Mix until it resembles Play-Doh. For a delicious twist, try making a microwave chocolate raspberry cake that combines rich flavors with a quick preparation time. This dessert is perfect for satisfying your sweet tooth in just a few minutes!
Step 3: Shape and Chill Without a Freezer (Time-saving Tips
Roll into 1-inch balls. No freezer? Place pops on a plate chilled in the fridge for 5 minutes. Starbucks uses a blast chiller—we use ice packs under the plate. Resourceful beats expensive. When time is tight, consider using microwave frozen meatballs for a quick and easy meal option.
Step 4: Microwave Melting Chocolate for Smooth Coating
Nuke candy melts in 20-second bursts, stirring between each. At 45 seconds total, they’ll hit 110°F—ideal for dipping. Too thick? Add ½ tsp oil. My first batch looked like lumpy cottage cheese until I learned this trick. For those looking for a fun sweet treat, a microwave candy recipe can simplify the process and make your confections even more enjoyable.
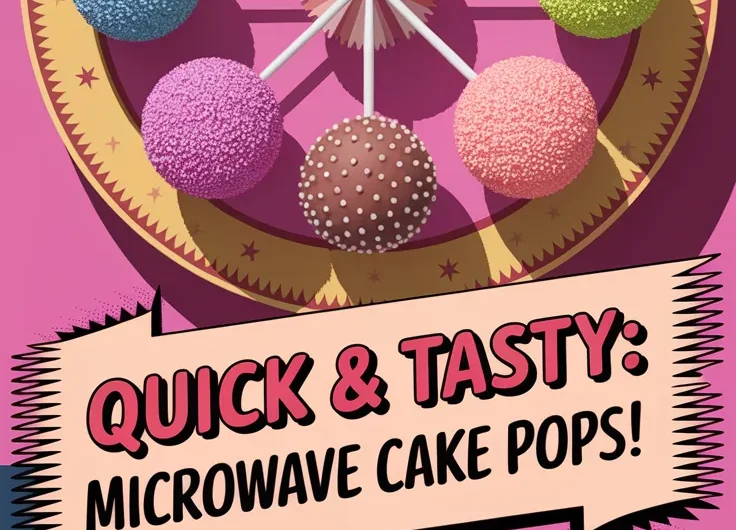
Step 5: Decorate Like Starbucks (Without Specialty Tools)
Dip sticks in chocolate before inserting into pops—it acts as edible glue. Roll in sprinkles immediately after coating. For stripes, drizzle contrasting chocolate using a ziplock bag corner. No pro piping tips needed! For a quick and easy method, consider using a piping bag to melt chocolate chips without a double boiler. This technique allows for precise control, making it easier to decorate your treats.
Also See: This Simple Trick Makes Microwaved Fries Taste Fried Again

Tips to Avoid Common Cake Pop Mistakes
I’ve made every error so you won’t have to. Consider this your edible insurance policy.
Fixing Crumbly Texture With Microwave Adjustments
Crumbly pops mean dry cake. Next time, add 1 tsp extra milk or reduce microwaving by 5 seconds. Salvage current batches by mixing in ½ tsp warmed honey—it binds without sogginess.
Preventing Chocolate Cracking in Microwave Melting
Cracks happen when coating cools too fast. After dipping, let pops set at room temp—not the fridge. If cracks appear, briefly wave pops 6 inches above the microwave vent (heat from residual steam softens chocolate).
How to Salvage Overheated Ingredients
Burnt cake base? Scrape off charred bits—the interior is still usable. Chocolate seized? Stir in 1 tsp vegetable oil per ¼ cup melts and remix. It’s like CPR for candy coatings. If you’re ever in doubt about baking, a reliable chocolate cake recipe can help you avoid these mishaps altogether. A well-made chocolate cake can be a delightful treat that’s less prone to these issues.
With these tricks up your sleeve, you’re ready to tackle storage hacks that keep your pops fresher than Starbucks’ display case…
Now It’s Your Turn to Whip Up These Cake Pops!
We’ve covered everything from microwave safety to pro decorating tricks – all you need is 15 minutes and that sweet tooth of yours. These copycat Starbucks cake pops deliver the same festive charm without the coffee shop price tag.
Tag us on Instagram if you try them! We love seeing your kitchen experiments (even the lopsided ones – those have character). Happy microwaving!