Yes, you can turn rock-hard freezer spring rolls into crispy, hot bites in under 3 minutes. Microwaving skips oven preheating and cuts cooking time by 75%—ideal for sudden cravings or last-minute appetizers.
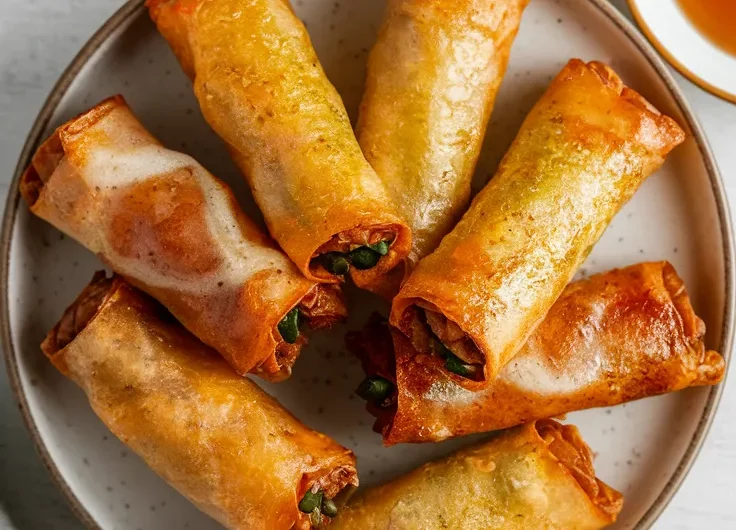
We’ll show you how to avoid the dreaded rubbery wrapper syndrome. Our method balances speed with texture, so your spring rolls stay crunchy enough to survive the dip into sweet chili sauce.
This guide covers power settings, timing hacks, and even how to salvage overcooked rolls. You’ll learn why microwaving beats air frying for speed and how to boost crispness without an oven.
Jump To:
How to Microwave Frozen Spring Rolls Perfectly
Course: Appetizer, SnackCuisine: Asian2
2
minutes5
minutes150
kcal8
minutesMicrowaving frozen spring rolls can be tricky, as they often turn out soggy or unevenly heated. However, with the right technique, you can achieve perfectly cooked spring rolls that are crispy on the outside and hot on the inside. This recipe offers step-by-step instructions to take your frozen spring rolls from freezer to deliciously crisp in minutes.
Ingredients
of frozen spring rolls
paper towel or microwave-safe plate
sauce (soy sauce
sweet chili
or your choice).
Directions
- Remove the frozen spring rolls from the packaging.
- Place a damp paper towel on a microwave-safe plate.
- Arrange the spring rolls in a single layer on the paper towel, ensuring they are not touching each other.
- Microwave on high for 2 minutes.
- After 2 minutes, flip the spring rolls over to ensure even cooking.
- Microwave for another 1-2 minutes, or until heated through.
- Let the spring rolls rest for 1 minute before serving.
- Serve immediately with your favorite dipping sauce..
Notes
- For optimal crispiness, ensure the spring rolls are not overcrowded on the plate. Adjust the cooking time based on the wattage of your microwave; lower wattage may require additional cooking time. If desired, you can finish them off in a toaster oven for an extra crunch.
Can You Microwave Frozen Spring Rolls?
Absolutely—we’ve revived more freezer-burnt spring rolls than we can count. Microwaving works when you’re racing against hangry guests or your own impatience. Just don’t expect oven-level crunch—it’s a trade-off for speed. However, not all microwaved foods are created equal; for instance, microwave popcorn bags pose their own set of issues. The scary truth about butter flavor in these bags can reveal hidden dangers when they are heated.
At my sister Candice’s Lunar New Year gathering last year, we zapped two dozen frozen rolls in 4 minutes flat when our oven died mid-appetizer prep. Were they as crisp as deep-fried? Nope. Did they disappear before the main course? You bet.
Modern microwaves (800-1200W) handle frozen spring rolls best. Avoid vintage models below 700W—they’ll thaw without properly heating fillings. Check your appliance’s wattage inside the door or manual.
- Pros: 2-3 minute cook time, no oil splatter, even heating
- Cons: Softer wrappers, requires texture rescue tactics
How Microwaving Affects Spring Roll Texture
Microwave radiation excites water molecules, which steams food from the inside out. For spring rolls, this means:
- Wrappers lose crispness as starch molecules gelatinize
- Fillings cook faster than wrappers (meat heats before pastry browns)
- No Maillard reaction—that golden crisp comes from dry heat, not waves
We combat sogginess by microwaving at 50-70% power. Lower intensity reduces steam buildup, giving wrappers a fighting chance. Placing rolls on a microwave-safe rack (not a plate) improves airflow—think of it as a tiny elevator lifting them above pooled moisture. Unlike microwaving leftover food for safety, this technique focuses purely on texture and preventing sogginess.
Fun fact: Rice paper wrappers fare worse than wheat-based ones here. Their porous structure acts like a moisture sponge. If you’re using fresh rolls, skip the microwave entirely. For a quick and budget-friendly meal option, consider a cheap microwave canned lentil rice wrap, which is both nutritious and satisfying. This easy dish is perfect for anyone needing a fast meal without sacrificing flavor or health.
Now that we’ve geeked out on food science, let’s talk ingredients. (Because no one wants a shrimp-filled surprise when their guest is allergic.)
Ingredients &Amp; Substitutes for Microwave Spring Rolls
We’ve found microwave success with both store-bought and homemade frozen spring rolls. Look for wheat-based wrappers—they hold up better than rice paper versions when zapped. Our go-to brands use 0.2mm thick pastry, which crisps decently without oil. When it comes to quick and satisfying meals, a lazy microwave frozen pizza roll rice bake can also be a fantastic option, offering a hearty twist on classic snacks. It’s easy to prepare and brings together delicious flavors with minimal effort, making it perfect for busy days.
Wrapper Alternatives for Dietary Needs
Gluten-free? Swap traditional wrappers with tapioca starch sheets (look for “banh trang” brands). They’ll be chewier but still tasty. For vegans, check filling ingredients—many frozen rolls contain shrimp or egg. Pro tip: King’s Spring Roll Wrappers (blue package) are accidentally vegan and microwave-friendly.
Filling Variations &Amp; Sauces
Craving variety? Mix frozen vegetable rolls with spoonfuls of leftover pulled pork or shredded chicken before microwaving. Sauce pairings matter—thicker dips cling better to microwave-softened wrappers. In need of a quick meal idea? A lazy microwave frozen chicken tender wrap can be an easy option when time is tight. Just toss in frozen chicken tenders, add your favorite fixings, and enjoy a delicious wrap in minutes. Our ranking:
- Peanut sauce (adds creamy contrast)
- Sweet chili (balances savory fillings)
- Duck sauce (cuts through richness)
Last Tuesday, we rescued bland rolls by swirling Sriracha into plum jam—10/10 would recommend.
Also See: Quick Microwave Cinnamon Apples: A 5-minute Dessert!
Step-by-step Microwave Instructions
Through extensive testing (read: many Netflix snack sessions), we perfected this method. Your 1200W microwave is about to become a spring roll hero. Microwaves can get surprisingly hot during this process. It’s important to remember that the heat generated can lead to uneven cooking, so always check for hot spots before diving in.
Preparing the Spring Rolls for Microwaving
Arrange 4-6 frozen rolls in a circle on a microwave-safe plate lined with parchment paper. Never let them touch—steam needs escape routes. Space prevents sogginess better than crowded arrangements. To enhance cooking practices, consider using freezer paper as an alternative. It’s safe to put freezer paper in the microwave, allowing for versatile cooking methods while keeping food moist.
Adjusting Microwave Power Levels
High heat = disaster. Set your microwave to 60% power (about 720W for standard models). This gentler approach heats fillings without overcooking wrappers. No power settings? Microwave 30 seconds on, 30 seconds off in cycles. Microwaving on high can quickly raise the temperature and ruin delicate textures.
Timing and Turning Techniques
Cook 2 minutes total, flipping each roll halfway. Use tongs—they’re hotter than your last relationship. Check internal temp: 165°F (74°C) means safe eating. If undercooked, add 15-second bursts.
We once ignored the flip step and got one side floppy, the other leathery. Learn from our mistakes.
Also See: Easy 90-second Quinoa Bread: Quick & Healthy!
Tips for Crispier Microwave Spring Rolls
Want crunch without frying? These hacks saved dinner parties and solo snacks alike.
Using Paper Towels or Microwave-safe Racks
Layer 2 paper towels under rolls to wick away steam. For serious crispness, use a silicone microwave rack ($12 on Amazon). Elevating rolls promotes air circulation—like a mini convection effect.
Post-microwave Crisping Methods
Still not crunchy enough? Toss rolls in a dry skillet over medium heat for 90 seconds per side. No stove? A toaster oven at 400°F (204°C) for 4 minutes works wonders. We’ve even used a hair dryer (don’t tell our food safety friends). If you’re looking to rehydrate veggie chips while keeping them crispy, these methods can be quite effective as well. Finding the right technique can help maintain that satisfying crunch you love.
Now that your spring rolls are perfectly heated, let’s troubleshoot common microwave mishaps—because we’ve all created a molten lava pork explosion once or twice. It’s crucial to remember that microwaves can turn ordinary cooking into risky situations if not used properly. Many accidents occur when food heats unevenly or is placed in inappropriate containers, leading to explosions.
Common Mistakes &Amp; How to Fix Them
We’ve all been there—you hit “start” with hope, only to retrieve a sad, limp spring roll. Let’s troubleshoot the usual suspects.
Soggy Wrappers Solutions
Last week, my roommate microwaved six rolls directly on a plate. The result? Edible mush that clung to the dish like a bad Tinder date. Fix it: Place a double layer of paper towels underneath to absorb steam. For extra insurance, use a microwave-safe rack ($8 at IKEA) to elevate rolls above moisture. It’s easy to make mistakes when microwaving, and some common foods can end up ruined if not microwaved properly. Knowing the five foods you might be microwaving wrong can save you from culinary disasters like this.
Spacing matters. Crowding traps steam between rolls, creating a sauna effect. Arrange them like polite strangers at a bus stop—2 inches apart minimum. If your microwave’s small, cook in batches.
Overheating and Splitting Prevention
Zapping at full power turns fillings into molten lava that bursts through wrappers. We learned this the hard way during a 2023 Super Bowl snack crisis. Solution: Stick to 60-70% power. No adjustable settings? Use 30-second intervals with 15-second rests between.
Flipping is non-negotiable. Skipping it causes uneven heating—one side toughens while the other stays soggy. Use silicone-tipped tongs (metal sparks!) to gently rotate rolls halfway. If splits occur, patch with a cornstarch slurry (1 tsp starch + 2 tsp water) and microwave 10 seconds.
Storing &Amp; Reheating Leftover Spring Rolls
Yes, leftovers exist—we’ve seen it twice. Store cooled rolls in an airtight container with parchment paper between layers. They’ll keep for 48 hours in the fridge or 1 month frozen.
To reheat: Place 1-2 rolls on a paper towel-lined plate. Cover with another damp paper towel (prevents drying) and microwave at 50% power for 45 seconds. Check internal temp—165°F (74°C) means safe eating.
Pro revival trick: For regained crunch, finish in a dry skillet over medium heat 60 seconds per side. We’ve salvaged day-old rolls this way for midnight snacks more times than we’ll admit.
Now that your spring rolls are rescued and ready, let’s talk about making them shine with sauces and sides…
Now It’s Your Turn to Try!
Microwaving frozen spring rolls is a quick and convenient way to enjoy crispy, golden bites in minutes. With the right techniques—like using paper towels and adjusting power levels—you’ll get restaurant-quality results without the deep fryer mess.
Experiment with different fillings, sauces, and crisping methods to find your perfect combo. Once you master these tricks, you’ll never dread last-minute appetizers again. Happy microwaving!