Who says you need an oven for a buttery, crumbly crust? We’re ditching the traditional bake time with microwave magic that cooks the base in 90 seconds—quicker than waiting for your coffee to brew.
These bars pack a punch of bright citrus with a velvety filling that’ll make your taste buds tango. Imagine sunshine in dessert form: tart lemon meets sweet, melt-in-your-mouth crust without the hour-long oven vigil.
We’ll walk through microwave-safe techniques, ingredient swaps for dietary needs, and pro tips for perfect layers. Grab your mug and let’s zing!

Jump To:
Lemon Bars with Spring Zing (Microwave Crust)
Course: DessertCuisine: American9
10
minutes5
minutes180
kcal45
minutesThese lemon bars are not only delicious but also incredibly easy to make with a microwaveable crust. Say goodbye to the fuss of baking in the oven. In just a short time, you can whip up these tangy bars with a delightful lemon filling, making them a perfect addition to your spring dessert lineup.
Ingredients
graham cracker crumbs
melted butter
sugar
lemon juice
eggs
powdered sugar
lemon zest
pinch of salt.
Directions
- In a microwave-safe bowl, mix together the graham cracker crumbs, melted butter, and sugar until well combined.
- Press the mixture into the bottom of a greased microwave-safe dish to form the crust.
- Microwave the crust on high for 1-2 minutes until set, let it cool.
- In another bowl, whisk together the lemon juice, eggs, powdered sugar, lemon zest, and a pinch of salt until smooth.
- Pour the lemon filling over the cooled crust.
- Microwave the dish on high for 3-4 minutes until the filling is set but still slightly jiggly in the center.
- Remove from the microwave and let it cool completely at room temperature, then refrigerate for at least 30 minutes before cutting into squares.
- Dust the cooled lemon bars with extra powdered sugar before serving..
Notes
- For the best flavor, use fresh lemon juice and zest. You can adjust the sweetness to your liking by adding more or less powdered sugar to the filling. These bars can be stored in the refrigerator for up to a week, making them great for meal prep or entertaining during spring festivities!
Why Use a Microwave for the Crust?
We’ve all been there: craving lemon bars but dreading the oven preheating and crust-baking marathon. Microwaving the crust flips the script. 90 seconds versus 20+ minutes in the oven means you’re halfway to dessert before your oven finishes beeping its preheat alert. For those looking to satisfy their sweet tooth even faster, a TikTok hack lets you bake a cake in just two minutes without an oven. This quick method is perfect for anyone eager to skip traditional baking times.
Microwaves excel at melting butter evenly into flour, creating a shortbread-like texture without overworking the dough. No soggy bottoms here—just a golden, crumbly base that holds its own against the zesty lemon layer. It’s science, not sorcery!
At last year’s family reunion, my dad George accidentally commandeered the oven for his “famous” smoked brisket. Desperate times called for microwave measures. The crust turned out so perfectly crisp, Aunt Marge swore I’d smuggled in a bakery purchase. Microwave magic saves gatherings (and egos).
What Do Lemon Bars With Spring Zing Taste Like?
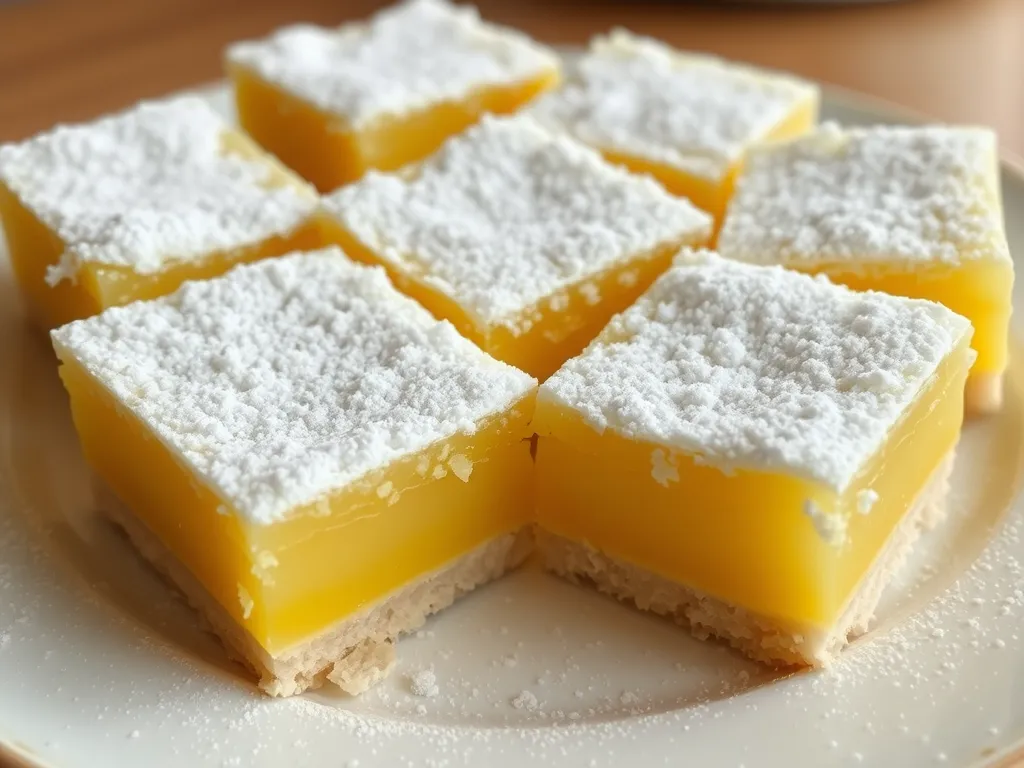
Imagine biting into a sunbeam—that’s the vibe. The filling is a tart, puckery lemon curd with a whisper of vanilla, balanced by the crust’s buttery sweetness. We add extra zest for a citrus perfume that lingers like a good punchline. If you’re eager to recreate that delightful lemon curd, a microwave lemon curd recipe is a quick and easy option that brings out the same vibrant flavors.
The texture contrast? Chef’s kiss. Velvety smooth filling meets crumbly, slightly nutty crust (thank you, microwave precision). A dusting of powdered sugar adds a snowy finish that’s Instagram-ready but disappears fast at potlucks. You can achieve similar delightful textures with microwave dough recipes, allowing for quick and easy baking at home. Microwave dough recipes often yield consistent results, making them a go-to option for those short on time.
George, a self-proclaimed “lemon skeptic,” inhaled three squares at that reunion. His review? “Tastes like spring threw a party.” High praise from a man whose palate usually starts and ends at medium-rare steak.
Ready to gather your ingredients? Let’s transform that microwave into a dessert powerhouse…
Ingredients for Lemon Bars With Spring Zing (Microwave Crust)
We’re keeping this simple with pantry staples plus a few zesty heroes. Want to riff? We’ve got swaps for allergies and ingredient shortages—no emergency grocery runs needed, unlike trying to make a microwave crust for lemon bars using spelt.
Crust Ingredients &Amp; Substitutes
- 1 cup all-purpose flour (or 1:1 gluten-free blend for celiac friends)
- ½ cup unsalted butter, softened (vegan butter works at 85% fat content minimum)
- ¼ cup powdered sugar (cornstarch-free blends okay)
- Pinch of salt (skip if using salted butter)
Pro tip: For a nuttier crust, replace 2 tbsp flour with almond meal. Just don’t tell George—he’ll detect “healthy” from a mile away. This idea is similar to an anyday dish hack for making microwave cornbread with almond flour, which can be a quick and delicious alternative.
Filling Ingredients &Amp; Alternatives
- 3 large eggs (or flax eggs: 3 tbsp ground flax + 7.5 tbsp water)
- 1 cup granulated sugar (reduce to ¾ cup if using Meyer lemons)
- Zest + ½ cup juice from 3-4 lemons (bottled works in a pinch but fresh = brighter zing)
- 2 tbsp all-purpose flour (cornstarch or arrowroot work 1:1)
- ½ tsp vanilla extract (optional but recommended)
Short on lemons? Use ¼ cup lime juice + ¼ cup orange for a tropical twist. We call it “Bahama Mama Bars” in our house. Adding a spicy margarita mix microwave citrus syrup can elevate this treat even further, creating a delightful fusion of flavors. This syrup combines the zing of citrus with a hint of spice, perfect for mixing into cocktails or drizzling over desserts.
Also See: Quick & Delicious: Easy Microwave Apple Crisp!
How to Make Lemon Bars With Spring Zing (Microwave Crust)
No pastry chef skills required—just a microwave, elbow grease (minimal), and patience (moderate). Let’s turn that mug into magic. With a few simple ingredients and the right timing, anyone can create a delicious treat in just minutes. A microwave mug cake recipe is a perfect way to indulge in a quick dessert without the hassle of baking.
Step 1: Preparing the Microwave Crust
- Mix flour, powdered sugar, and salt in a microwave-safe 8×8 dish (glass preferred).
- Cut butter into chunks and mash into dry mix with a fork until it resembles wet sand.
- Press firmly into an even layer—compactness prevents crumbling later.
- Microwave on high (850W) for 90 seconds. Let cool 5 minutes—it’ll firm up as it rests.
Microwave wattage varies! If yours is 1000W+, check at 60 seconds. Burnt crusts are nobody’s friend (trust me, 2021 Thanksgiving was rough). Microwaves operate using varying power settings, and the highest power setting can significantly increase the temperature of your food in a shorter amount of time.
Step 2: Mixing the Lemon Filling
- Whisk eggs, sugar, and vanilla until smooth—no floating globs.
- Sift in flour gradually while whisking to avoid lumps.
- Stir in lemon zest and juice. Strain through a sieve if you spot rogue egg bits.
- Pour over cooled crust. Microwave on 70% power for 4 minutes.
Resist the urge to stir mid-cook! Let the microwave work its low-and-slow magic for silky texture. Interestingly, there are several foods that taste even better when microwaved rather than baked. This method can enhance flavors and textures, making some dishes truly delightful.
Step 3: Baking &Amp; Cooling Tips
- After microwaving, let bars sit inside for 5 minutes—they’ll finish setting via residual heat.
- Chill in fridge for 1 hour minimum (2 is better) before slicing. Impatience leads to lemon soup.
- Dust with powdered sugar using a fine-mesh strainer for that “snow-kissed” look.
Pro move: Use a plastic knife to cut clean slices. Metal blades drag and tear—learned that during my “rustic phase” (read: messy).
Also See: Lazy Microwave Pre-cooked Bacon & Canned Green Beans
Common Mistakes and How to Fix Them
Even microwave masters slip up. Here’s how to salvage (or avoid) lemon bar mishaps.
Runny Filling: Causes and Solutions
Undercooking is the usual suspect. If your filling jiggles like a TikTok dance trend, microwave in 15-second bursts at 50% power until edges firm. Over-egging can also thin the mix—stick to 3 large (not jumbo) eggs. It’s important to know that microwaving certain foods incorrectly can lead to disappointing results. To avoid common mistakes, pay attention to the top 5 foods that people often microwave wrong.
Soggy or Undercooked Crust Adjustments
A weepy crust means insufficient pre-bake time or pressing too lightly. Crumble it, mix with 1 tbsp melted butter, repress, and nuke another 30 seconds. For next time: pack that crust like you’re mad at it.
Now that we’ve tackled troubleshooting, let’s chat about keeping your bars fresh (spoiler: they won’t last long).
How to Store Lemon Bars With Spring Zing
At our last picnic, George hid the lemon bars in his cooler “for safekeeping.” Spoiler: they survived 4 hours in 80°F heat but didn’t survive his sweet tooth. Here’s how to keep yours intact (or at least delay their delicious demise).
Room temp storage works for 1 day max—ideal for that afternoon tea party vibe. Use an airtight container with parchment between layers. Skip plastic wrap unless you enjoy sticky sugar tattoos on your filling.
For longer shelf life, refrigerate. Stack bars in a glass container separated by wax paper. They’ll stay texture-perfect for 5 days. The cold intensifies the lemon zing—like a citrusy wake-up call for your taste buds.
Freezing? Absolutely. Wrap individual bars in parchment, then foil. Chuck them in a freezer bag labeled “George’s Kryptonite.” Thaw overnight in the fridge—microwave thawing creates weepy filling. They’ll keep for 3 months (if you can resist that long). When it comes to reheating or thawing, remember that using freezer paper in the microwave can help preserve the texture and flavor of your food. Just make sure to follow best practices for safe microwave use.
Pro tip: Dust powdered sugar after thawing. Frozen sugar dissolves into sad ghostly streaks. Learned that during my “premake everything” phase (RIP, 2020 bridal shower). If only there were a quick trick to fix another common kitchen issue, like rock-hard brown sugar. A simple 5-second microwave fix can bring it back to its soft, usable state, making baking a breeze again.
Now that your bars are safely stashed, let’s explore fun twists on this zesty classic…
Now It’s Your Turn to Zing!
We’ve walked through every step—from microwave crust tricks to zesty filling tweaks—so you’re all set to whip up these bright lemon bars. The best part? You’ll spend less time baking and more time savoring that perfect sweet-tart balance.
Once you try this spring-ready treat, let us know how your microwave crust turned out! Got a creative twist? Share it—we’re always hungry for new flavor experiments.