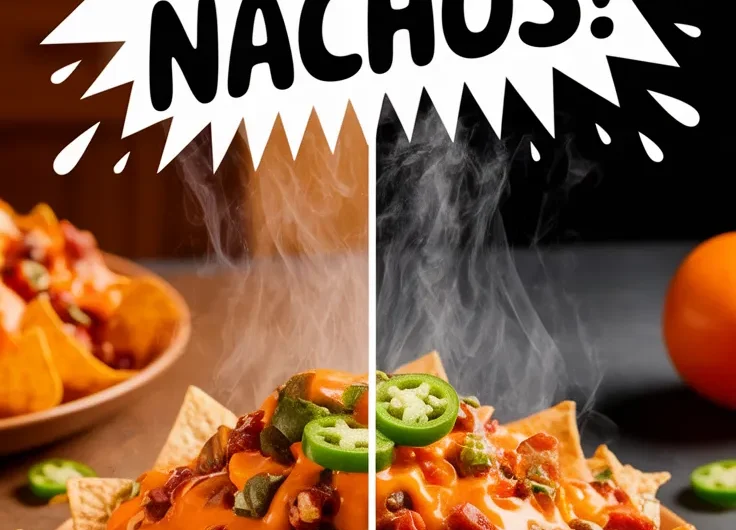
Nachos in 90 seconds? You bet! We’ve cracked the code for emergency snack attacks with zero oven drama. Perfect for solo Netflix binges or last-minute game day saves.
No fancy equipment, no sink full of dishes—just chips, cheese, and your trusty microwave. Bonus: You’ll dodge the “why is the oven on?!” side-eye from roommates. Win-win.
We’re covering everything from cheese melt science to chip survival tactics. Let’s turn that sad desk lunch into a crispy, gooey masterpiece.
Jump To:
Easy Microwave Nachos with Cheese
Course: SnackCuisine: Mexican2
5
minutes2
minutes350
kcal7
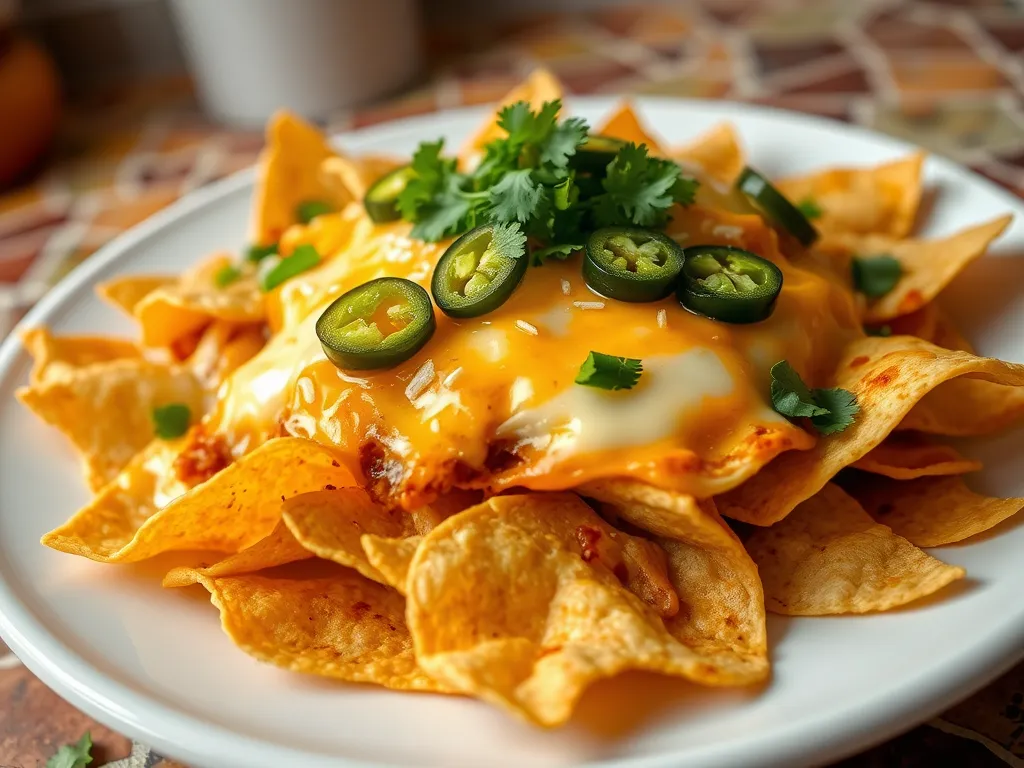
minutesThese microwave nachos are incredibly easy to prepare and are perfect for satisfying your cravings in a hurry. Using tortilla chips and cheese as a base, you can add a variety of toppings to make them your own. Whether you're enjoying a movie night or need a quick snack, these nachos can be ready in just a few minutes.
Ingredients
tortilla chips
shredded cheese cheddar or Mexican blend
sliced jalapeños optional
diced tomatoes optional
black beans optional
sour cream optional for serving
guacamole optional for serving
salsa . optional for serving
Directions
- Spread the tortilla chips evenly on a microwave-safe plate.
- Sprinkle the shredded cheese generously over the chips.
- Add any additional toppings like jalapeños, diced tomatoes, or black beans if desired.
- Place the plate in the microwave and heat on high for about 1 to 2 minutes, or until the cheese is melted and bubbly.
- Carefully remove the plate from the microwave; it will be hot.
- Serve immediately with sour cream, guacamole, or salsa on the side..
Notes
- For best results, use freshly opened tortilla chips and grated cheese for optimal melting. You can mix and match toppings according to your preference. Keep an eye on the nachos while microwaving to prevent overcooking. These nachos are best enjoyed immediately when the cheese is warm and gooey.
Ingredients for Microwave Nachos With Cheese
Let’s raid that pantry! You only need three basics:
Tortilla Chips, Cheese, and Essential Toppings
Grab restaurant-style chips – their sturdiness prevents nuclear-level sogginess. For cheese, block varieties shred better than pre-bagged (we’ll explain why later). Our summer camp hack? Uncle Peter always kept single-serve salsa packets in his cargo shorts for impromptu nacho nights. If you’re looking for a quick snack, consider crunchy veggie chips made in the microwave. These bites are not only tasty but also a healthier alternative to traditional chips.
- Base: 1 cup thick tortilla chips
- Cheese: 1/3 cup shredded cheddar or Monterey Jack
- Toppings: Pickled jalapeños, diced tomatoes, fresh cilantro
Cheese Alternatives: Shredded, Slices, or Homemade Sauce
Pre-shredded works in a pinch, but contains anti-caking agents that can create a grainy texture. For smoother melting, slice cheese blocks thin (Uncle Peter’s Swiss Army knife specialty) or make a 30-second cheese sauce:
- Microwave 2 tbsp milk + 1/4 cup cheese for 20 seconds
- Whisk vigorously
Optional Substitutes: Vegan Cheese, Gluten-free Chips, or Protein Add-ins
We’ve tested 7 vegan cheeses – Violife shreds mimic real cheese’s stretch best. For protein, leftover taco meat or black beans (blotted dry!) add heft without making chips sweat.
How to Make Nachos in the Microwave
Uncle Peter taught me this during a rainy summer camp week – our cabin’s secret against soggy nachos:
Step 1: Arrange Chips in a Single Layer
Use a microwave-safe plate, not bowls. Spread chips like sunbathers – no overlapping! Crowding = steam traps = sad, limp chips. A similar technique can be used for cooking corn on the cob. With a simple trick, you can microwave corn on the cob perfectly every time, ensuring it stays juicy and flavorful.
Step 2: Distribute Cheese Evenly
Sprinkle cheese like you’re feeding tiny chip people. Focus on the chip centers – edges burn faster than marshmallows at a bonfire. Be mindful, though, that if you’re not careful, you could burn something in the microwave while attempting fun snacks. It’s all too easy to end up with a charred mess if you don’t keep an eye on your food.
Step 3: Microwave in Short Intervals
Start with 30 seconds at 50% power. Rotate plate, zap another 15-20 seconds. Full power nukes cheese into rubber – trust me, we’ve mourned many a hockey puck cheese disc. For a quick and delicious alternative, grab some tortilla chips and melted cheese to whip up easy 2 minute cheese nachos that are perfect for snacking.
| Microwave Wattage | Total Time |
|---|---|
| 700-900W | 45-55 seconds |
| 1000W+ | 30-40 seconds |
Step 4: Add Toppings After Melting
Cold toppings prevent structural collapse. Add guac, sour cream, or pico after heating – unless you enjoy eating nachos with a spoon (no judgment).
Pro Tips for Crispy, Non-soggy Nachos
Uncle Peter’s cardinal rule: “Nachos don’t multitask.” Layer wet ingredients (beans, meat) between cheese barriers. Blot all ingredients with paper towels – water content is the enemy of crunch.
Ready to become a cheese whisperer? Let’s explore which varieties melt best without turning your plate into a greasy crime scene—whether you’re making grilled cheese roll-ups or spicy nachos.
Choosing the Best Cheese for Microwave Nachos
Cheese selection makes or breaks microwave nachos. Through extensive testing (and several cheese-related disasters), we’ve identified melt masters versus crumble champions. Knowing which cheeses melt best in the microwave can greatly enhance your nacho experience. For instance, varieties like cheddar, mozzarella, and Monterey Jack yield excellent results when melted.
Melting Properties: Cheddar, Monterey Jack, or Queso Fresco
Cheddar and Monterey Jack contain just enough oil (18-22% fat content) to melt smoothly without separating. Queso fresco? Delicious crumbled on top, but it’ll stubbornly hold its shape under heat like a cheese statue. Our Tuesday night fail: attempting to melting cotija—ended up with salty pebbles. When it comes to camping, making quesadillas is an easy and tasty option. Using a microwave to achieve that perfect cheese melt can turn a simple meal into a camping delight.
For optimal ooze, mix cheeses. Try 70% cheddar + 30% Monterey Jack. The combo prevents cheddar’s oil separation while boosting flavor complexity beyond basic queso.
Can You Microwave Cheddar Cheese? Texture Vs. Flavor Balance
Yes, but with caveats. Pure cheddar requires low power settings (50% max) and constant monitoring. At 15-second intervals, it transforms from glossy to gritty at 160°F—the point when casein proteins tighten.
Pro trick: Add 1/4 tsp cornstarch per 1/2 cup shredded cheddar. This stabilizes the emulsion, preventing that greasy pool mocking you under the chips. Learned this after rescuing three batches from oil-pocalypse. For a tasty treat, consider pairing these perfectly melted cheese chips with cheap microwave tortilla chips for a delightful snack. The combination creates a satisfying crunch that everyone will enjoy.
Also See: Can You Make Cornbread in the Microwave With Anyday Bowl?
Common Mistakes and How to Avoid Them
We’ve all created nacho disasters. My college dorm microwave once emitted smoke because someone (ahem) thought “more cheese = better math grades.”
Overloading With Toppings: Less is More
Limit wet toppings to two max—salsa or guacamole, not both. Each tablespoon of salsa adds ~5ml liquid. Multiply that across chips, and you’ve got a sponge situation.
Layer proteins between cheese barriers. Example: chip > cheese > beans > cheese > jalapeños. The cheese acts as a moisture shield, preserving crunch.
Uneven Cheese Distribution: Layering Techniques
Use the “snowfall method”: Hold shredded cheese 12” above chips and sprinkle. This distributes flakes evenly versus dumping clumps. For sliced cheese, place smaller pieces near chip edges where heat concentrates. A delicious twist to this technique is making cheap microwave tortilla chips with melted cheese. It’s a simple and satisfying snack that takes advantage of the quick heating power of microwaves, perfect for movie nights or unexpected cravings.
Microwave Timing: Preventing Burnt Edges
Burnt edges occur when outer chips reach 212°F while centers linger at 140°F. Rotate the plate 180° halfway through cooking. If your microwave lacks a turntable, pause every 10 seconds to manually shift chips. Learn a simple trick to make handmade microwave snacks taste fried to enhance your cheesy nachos.
Follow this wattage guide:
- 600-800W: 55-60 seconds total
- 900-1100W: 35-45 seconds total
Also See: Microwave Reese’s Mug Cake: A 5-minute Dessert!
Storing and Reheating Leftover Nachos
Leftover nachos? Rare, but possible. Store components separately—chips in airtight containers, cheese/toppings in fridge. Assembled nachos become sadder than a deflated balloon by morning.
Refrigeration Tips for Maximum Freshness
Place cheese-covered chips on parchment paper, not directly on plates. The paper absorbs condensation, preventing sogginess. Refrigerate up to 24 hours—longer and chips absorb fridge odors (nobody wants ham-scented nachos).
Reheating Without Sogginess: Oven Vs. Microwave
Oven method: 375°F for 5 minutes on a rack. Microwaving? Use the defrost setting (30% power) with a paper towel underneath. The towel wicks away steam, reviving some crunch. Tested both—oven wins, but microwave takes 1/4 the time. When using a microwave, choosing the right containers is crucial. For instance, aluminum trays can be tricky, and a microwaving aluminum trays guide will help you navigate the dos and don’ts.
Now that you’re a nacho ninja, let’s get wild with breakfast versions and chocolate-drizzled twists. Try using those skills to whip up a quick microwave nachos recipe for a tasty snack. It’s a fun and easy way to enjoy your favorite flavors in just a few minutes!
Now It’s Your Turn to Whip Up Some Nachos!
With just tortilla chips, cheese, and a microwave, you’re minutes away from melty, crunchy nachos. Remember: single layers, short bursts of heat, and post-microwave toppings keep things crispy.
Got creative combos? Swap cheeses, pile on fresh jalapeños, or drizzle with chocolate for dessert nachos. The microwave makes snack time instant—no oven required. Just don’t blame us when you start craving these daily!