Craving a warm, fudgy brownie but short on time? Our microwave peppermint brownie mug transforms into gooey chocolate perfection in just 3 minutes.
This single-serving dessert packs holiday cheer with cool peppermint zing – no oven required and zero leftovers to tempt you tomorrow.
We’ll walk through ingredient swaps, microwave tricks, and ways to balance that minty kick for a treat that’s festive without being overwhelming.
Jump To:
Microwave Peppermint Brownie Mug
Course: DessertCuisine: American1
5
minutes1
minute300
kcal6
minutesThis Microwave Peppermint Brownie Mug is the perfect solution for those late-night chocolate cravings. The combination of cocoa powder, peppermint extract, and a hint of chocolate chips creates a deliciously fudgy brownie that cooks in just a minute. No need to turn on the oven, this mug treat is ready in a flash!
Ingredients
all-purpose flour
unsweetened cocoa powder
sugar
salt
baking powder
vegetable oil
milk or dairy-free alternative
peppermint extract
chocolate chips optional
cream (for topping
optional).
Directions
- In a microwave-safe mug, combine the all-purpose flour, cocoa powder, sugar, salt, and baking powder.
- Stir until evenly mixed.
- Add the vegetable oil, milk, and peppermint extract to the dry ingredients.
- Mix until just combined, being careful not to overmix.
- If desired, fold in the chocolate chips.
- Microwave on high for 60-90 seconds, checking frequently to avoid overcooking.
- The brownie should look set but still moist.
- Allow to cool for a minute before adding whipped cream on top if desired..
Notes
- For a richer brownie, feel free to add extra chocolate chips or nuts. If you love peppermint, consider adding crushed candy canes on top for a festive touch. This single-serving recipe is perfect for when you want a quick dessert without the fuss, and you can easily customize it to your taste!
What Does a Peppermint Brownie Mug Taste Like?
Imagine biting into a fudgy chocolate cloud that whispers sweet nothings to your taste buds, then suddenly…BAM! A refreshing peppermint breeze sweeps through. My Uncle Peter accidentally invented this combo during summer camp when he dropped candy canes into our campfire brownies. We devoured it like raccoons finding a s’mores stash. It’s just as delightful as a Microwave Peppermint Brownie Mug – quick, cozy, and packed with flavor.
Rich Chocolate Base With Minty Freshness
The cocoa foundation uses Dutch-processed cocoa powder for deeper flavor – none of that pale, sad chocolate impersonator stuff. Peppermint enters stage left as either extract (precise) or crushed candies (festively chaotic).
Balance is key. Too much mint feels like brushing your teeth with dessert. Too little? Just chocolate with commitment issues. We’ll show you the Goldilocks zone later.
Ingredients for Microwave Peppermint Brownie Mug
Grab a 12-oz mug – anything smaller risks volcanic chocolate eruptions. Trust me, I’ve scrubbed microwave ceilings. Choosing a microwave-safe ceramic mug is essential for heating your favorite drinks while avoiding spills and messes.
Essential Base Ingredients
- 4 tbsp flour (all-purpose works best)
- 2 tbsp Dutch-process cocoa
- 3 tbsp sugar (granulated or coconut)
- Pinch of salt (enhances chocolate depth)
Peppermint Flavor Enhancers
- 1/8-1/4 tsp peppermint extract (start low!)
- OR 2 crushed candy canes (mix into batter)
- Optional: 1 tsp Andes mints bits
Substitutes & Alternatives
Allergies? Preferences? We’ve got you covered without sacrificing texture.
Egg Replacements for Vegan Options
- 1 tbsp ground flax + 3 tbsp water (gel 5 mins)
- OR 2 tbsp applesauce (adds moisture)
Flour Alternatives (Gluten-Free)
- Almond flour 1:1 ratio + 1/8 tsp xanthan gum
- Oat flour (blitz oats in blender)
Now that your mug arsenal is ready, let’s tackle the 3-minute microwave magic – including why 5 extra seconds can turn your brownie from fudgy to hockey puck. A quick and delightful treat you can whip up is a 2-minute microwave funfetti mug cake, perfect for satisfying that sweet tooth. Imagine a soft, fluffy cake bursting with colorful sprinkles, all made in just a couple of minutes.
How to Make a Microwave Peppermint Brownie Mug
We’ve all had those midnight brownie emergencies – this 3-minute fix is your chocolate 911. There’s nothing quite like a quick treat to satisfy those late-night cravings. A microwave brownie batter mug is the perfect solution when you need a warm, gooey brownie in minutes. Just promise not to lick the mug clean before it cools. (We’ve been there.)
Step 1: Mix Dry Ingredients
Grab your trustiest mug and whisk 4 tbsp flour, 2 tbsp cocoa powder, 3 tbsp sugar, and a salt pinch with a fork. Lumps are the enemy here – attack them like they owe you money. My roommate once skipped sifting and created cocoa boulders. Don’t be my roommate. A quick microwave chocolate peanut butter mug recipe could be a great alternative for satisfying your sweet tooth. It combines the rich flavors of chocolate and peanut butter, making it a delicious and easy dessert to whip up in minutes.
Step 2: Add Wet Ingredients
Pour in 2 tbsp neutral oil, 3 tbsp milk, 1/4 tsp vanilla, and 1 egg yolk (or flax goo for vegan). Stir until it resembles molten lava – glossy and slightly thick. Pro tip: scrape the mug’s sides with a spoon. Stray flour clumps lead to sad, dry patches. For a quick treat, consider whipping up a microwave raspberry vanilla mug cake instead, which is both flavorful and easy to prepare.
Step 3: Incorporate Peppermint Flavor
Here’s where magic (or toothpaste disasters) happen. Add 1/8 tsp peppermint extract – yes, measure it! My 2019 “eyeballing” incident still haunts me. Prefer candy canes? Fold in 1 tbsp crushed pieces. Taste the batter (it’s egg-free safe!) and adjust mint levels. If you’re looking for a fun holiday treat, consider making a 2 minute microwave peppermint mug brownie for a quick and delicious dessert. This simple recipe blends the festive flavors of peppermint with the satisfaction of a warm, gooey brownie right in your mug.
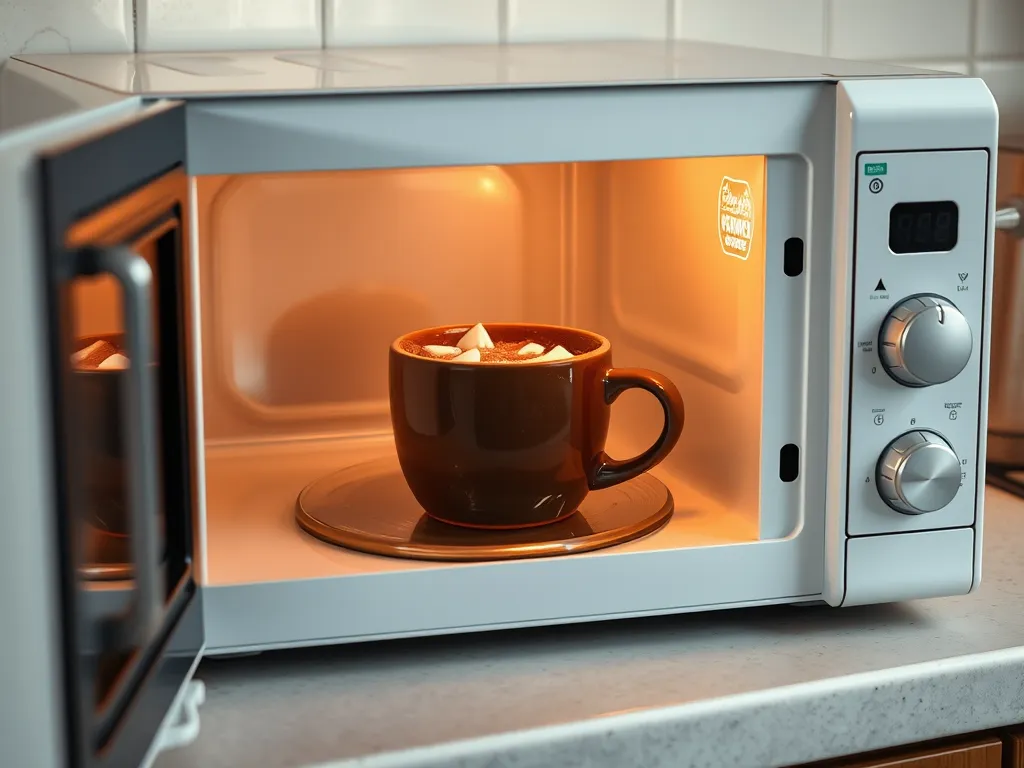
Step 4: Microwave Timing & Safety
Nuke for 60 seconds at 1000W. If your microwave croons oldies like mine, use oven mitts to remove the mug – handles get hotter than a peppermint patty left in the sun. Check doneness: a toothpick should emerge mostly clean but slightly fudgy. It’s important to know the limits of your microwave’s heat to avoid overcooking.
Also See: How to Cook Chestnuts in the Microwave: Quick Method
How Long to Microwave a Brownie Mug
Timing is everything – 5 seconds can turn fudge to fossil. Let’s prevent edible heartbreak.
Adjusting Time for Microwave Wattage
700-900W microwaves need 75-90 seconds. 1200W beasts? Start at 50 seconds. Watch through the door like it’s Netflix – the brownie should rise, then settle slightly. If it’s still jiggling like a salsa dancer, add 10-second bursts. Just as precise timing is vital for brownies, a microwaving hash browns guide will help ensure you achieve perfect results every time. Learning the right technique can make all the difference in enjoying crispy, delicious hash browns straight from your microwave.
Testing Doneness Without Overcooking
Skip the toothpick drama. Gently press the center – it should spring back softly, not leave a dent. See shiny wet spots? Nuke 5 more seconds. Remember: residual heat keeps cooking it, so patience, young Padawan.
Also See: 2-minute Microwave Buffalo Chickpea Wrap
Tips for the Best Peppermint Brownie Mug
We’ve made every mistake so you don’t have to. (RIP, rubbery brownie of 2020.)
Balancing Peppermint Intensity
Extract strength varies wildly. Brands like McCormick hit harder than LorAnn. Start with 1/8 tsp, then add drops post-baking if needed. Candy cane users: they sweeten as they melt. Crush finely – chunkier pieces create mint “pockets” that’ll clear sinuses.
Avoiding a Dry or Rubbery Texture
Overmixing develops gluten – the nemesis of fudginess. Stir just until combined, even if batter looks suspicious. Oil (not butter) keeps it moist at high temps. Using gluten-free flour? Add 1/2 tsp cornstarch to mimic that chew.
Even with perfect timing, brownie mishaps happen. Let’s tackle those “why is mine…” moments next – because nobody deserves a peppermint hockey puck. For those looking for a quick fix, cooking brownies in the microwave can save time and effort. A simple microwave brownie recipe can turn your dessert dreams into reality in just a few minutes.
Common Mistakes and How to Fix Them
We’ve all been there – that moment when your brownie mug emerges looking more like a kitchen experiment gone wrong. Let’s troubleshoot the usual suspects.
Why Your Brownie Mug Turned Spongy
Sponginess strikes when we overmix the batter. Vigorous stirring activates gluten proteins in flour, creating a bouncy texture better suited for trampolines than desserts. My 2021 “angry whisking” phase produced brownies that could’ve doubled as dish sponges.
Fix it next time: Gently fold wet and dry ingredients until just combined. Use a fork instead of a whisk. If you’ve already created a sponge, top it with ice cream – texture contrast saves everything.
Fixing Overpowering Peppermint Flavor
Nothing ruins a brownie faster than that “I just mouthwashed with dessert” feeling. This usually happens with extracts – some brands pack more punch than a candy cane avalanche. Last Christmas, my “1 tsp” typo left our tastebuds numb for hours. A quick and easy solution to avoid that mishap is creating a microwave brownie recipe. This way, you can control the flavors better and enjoy a delicious treat in just a few minutes.
Rescue options: Stir in 1 tsp cocoa powder post-baking to mute the mint. Or crumble the brownie into vanilla ice cream – dairy neutralizes intensity. Future batches? Start with 1/8 tsp extract or use 1 tbsp crushed candy canes instead. For a quick dessert option that combines mint and chocolate perfectly, consider trying a mint chocolate mug cake. It’s microwave-ready, so you can enjoy a warm treat in minutes.
Now that we’ve dodged texture tragedies and mint meltdowns, let’s talk about keeping your masterpiece fresh (if it lasts that long).
Now It’s Your Turn to Whip Up This Treat!
With just a mug, a microwave, and a few pantry staples, you’re minutes away from a warm, gooey peppermint brownie. The minty-chocolate combo is pure comfort in a cup—perfect for solo indulgence or impressing last-minute guests.
We’d love to hear how your brownie turned out! Did you add extra chocolate chips or go wild with candy cane sprinkles? Tag us on social media with your pepperminty creations.