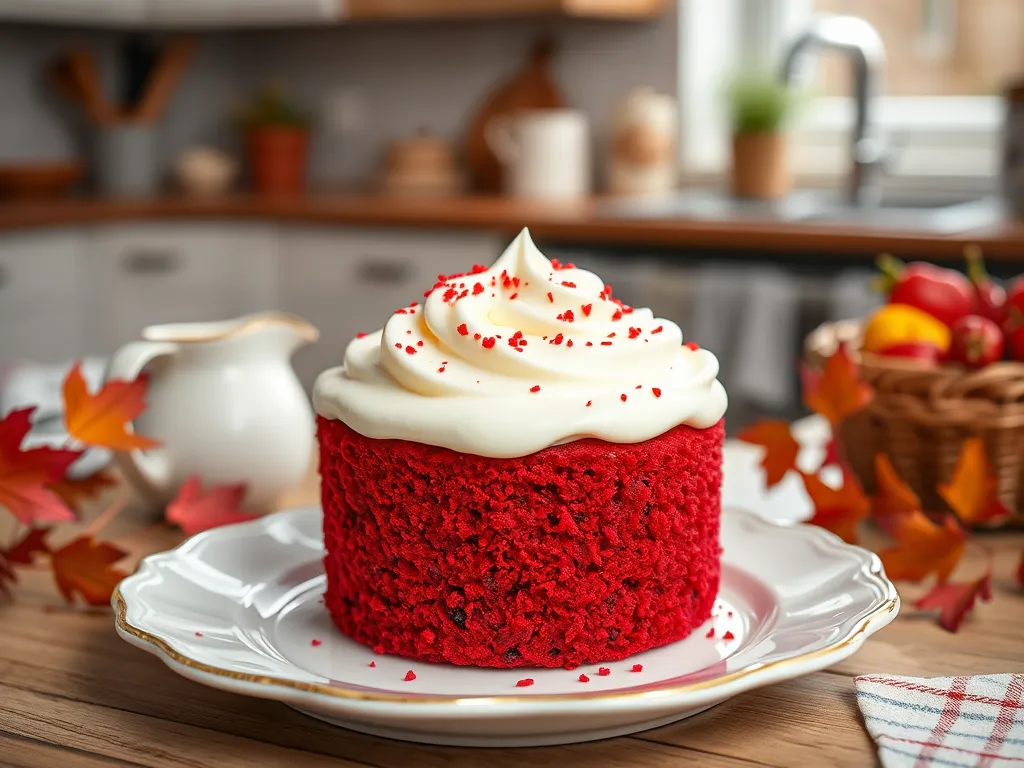
Craving red velvet cake but don’t want to wait an hour? We’ve got you. These microwave mini cakes bake in 90 seconds – faster than preheating your oven – and deliver that iconic velvety crumb.
Best part? No flour-dusted counters or sink full of bowls. Just mix, microwave, and devour. Single-serving magic means zero leftovers (unless you’re feeling generous).
Below, we’ll walk through ingredients, step-by-step tricks, frosting hacks, and even how to avoid common microwave mishaps. Ready to become a dessert wizard?

Jump To:
Mini Red Velvet Cakes (Microwave Magic)
Course: DessertCuisine: American2
5
minutes1
minute250
kcal11
minutesWho says you need an oven to bake delicious cakes? These Mini Red Velvet Cakes are a testament to microwave magic. Perfect for when you crave a small indulgence or need a last-minute dessert for a gathering, this recipe delivers the classic flavors of red velvet in just minutes.
Ingredients
all-purpose flour
cocoa powder
baking powder
salt
granulated sugar
buttermilk
vegetable oil
vanilla extract
red food coloring
cream cheese for frosting
powdered sugar for frosting
milk . for frosting
Directions
- In a microwave-safe bowl, whisk together the flour, cocoa powder, baking powder, salt, and sugar.
- Add the buttermilk, vegetable oil, vanilla extract, and red food coloring to the dry ingredients, and mix until smooth.
- Divide the batter evenly between two microwave-safe coffee mugs, filling each about halfway.
- Microwave each mug individually for 60-90 seconds, or until the cakes have risen and a toothpick inserted comes out clean.
- Let the cakes cool for a few minutes, then prepare the frosting by mixing the cream cheese, powdered sugar, and milk in a small bowl until smooth.
- Spread the cream cheese frosting on top of the cooled cakes and enjoy your delicious mini red velvet creations..
Notes
- These mini cakes are perfect for portion control, but feel free to double or triple the recipe for larger servings. Make sure to adjust the cooking time if you are using larger mugs. You can also experiment with different food coloring to create fun variations. Serve the cakes warm for a gooey experience or let them cool for a more traditional cake texture.
What Are Mini Red Velvet Cakes?
Imagine classic red velvet cake – that rich cocoa flavor, signature scarlet hue, and tangy cream cheese frosting – shrunk into single-serving cuteness. Our microwave version skips the oven entirely, using mugs or ramekins to create fluffy, shareable (or not) mini cakes in minutes. This quick and easy approach makes it possible to enjoy a delightful red velvet mug cake in just two minutes. Perfect for satisfying those sudden sweet cravings without any fuss, this recipe packs all the indulgence of a traditional cake into a speedy treat.
Why Make Them in the Microwave?
My grandma spent hours layering her famous red velvet cake for family reunions. While we adored it, our microwave hack lets us satisfy cravings without the marathon baking session. No preheating, no 30-minute bake time – just 90 seconds of zapping while you raid the fridge for milk.
Plus, portion control! Unlike Grandma’s towering layers tempting you into thirds, these mini cakes are perfectly sized. Unless you make four. We won’t judge.
Ingredients for Mini Red Velvet Cakes (Microwave Magic)
Grab these staples (check your pantry – you likely have most):
- 4 tbsp flour (all-purpose or cake flour)
- 2 tbsp sugar
- 1 tbsp unsweetened cocoa powder (not Dutch-process)
- 3 tbsp milk + ½ tsp vinegar (DIY buttermilk!)
- 1 tbsp red food coloring (gel for vibrancy)
- ¼ tsp vanilla extract
- 1/8 tsp baking soda
Ingredient Substitutes &Amp; Alternatives
Out of something? Adapt like a pro:
- Gluten-free? Swap flour 1:1 with GF blend (add ¼ tsp xanthan gum if missing).
- Dairy-free? Use almond milk + vinegar, and vegan cream cheese for frosting.
- No vinegar? Lemon juice works, but skip it if using real buttermilk.
- Natural dye? Beet powder (1 tsp) adds earthy red tones – but expect muted color.
Pro tip: gel food coloring prevents batter dilution. Liquid works but may lighten the crumb.
Fun fact: Grandma used to grate boiled beets into her batter for color. Our modern hack? A quick squeeze of red dye. Sorry, Grandma – we’re impatient sweet tooths. If you’re looking for a faster way to enjoy beets, microwaving them is a convenient option. The microwave can quickly soften beets while retaining their vibrant color—perfect for any recipe!
Ready to transform these into cake magic? Let’s nuke ‘em.
How to Make Mini Red Velvet Cakes in the Microwave
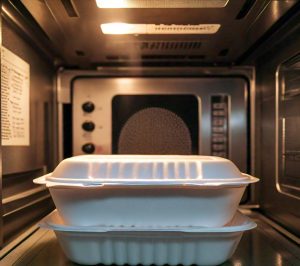
Let’s turn that scarlet batter into fluffy cakes. I learned the hard way that microwave wattage matters – my 1200W beast once turned a cake into charcoal. Start with 70% power if yours runs hot (since a microwave oven can increase the temperature significantly on its highest power setting). Here’s the foolproof method:
Step-by-step Instructions
- Mix dry ingredients: Whisk flour, sugar, cocoa powder, and baking soda in a mug until no lumps remain.
- Add wet ingredients: Stir in milk-vinegar mix, oil, vanilla, and red dye until smooth. Batter should coat the spoon thickly.
- Microwave: Cook on high 60-90 seconds. Stop at 60s and check – cakes rise FAST. A toothpick should come out clean.
Wait 2 minutes before unmolding. Why? Because molten sugar lava exists. Ask my burnt tongue from 2017, especially when trying to melt sugar in the microwave for those Mini Red Velvet Cakes (Microwave Magic).
Tips for Perfect Microwave Cakes
- Use room temp milk: Cold ingredients slow the buttermilk reaction. 10 seconds in the microwave fixes this.
- Don’t overmix: Stir just until combined. Overworked batter = rubbery hockey pucks.
- Pick tall mugs: Batter doubles in volume. My favorite 12-oz “World’s Okayest Baker” mug works perfectly.
Also See: Lazy Microwave Instant Oatmeal With Peanut Butter
Common Mistakes &Amp; How to Fix Them
We’ve all nuked a cake into a dry crater. Here’s how to avoid my fails:
Mistake 1: Overcooking. Microwaves vary – start at 60 seconds. If center looks wet, add 10-second bursts. Fix: Cover overcooked cake with frosting. Sugar hides many sins. It’s easy to make simple mistakes when microwaving, and some common foods are often microwaved incorrectly. Knowing the right techniques can help avoid mishaps with the top 5 foods that are microwaving wrong.
Mistake 2: Using shallow bowls. Batter bubbles over, creating a microwave crime scene.Fix: Fill containers only halfway. Ramekins > cereal bowls here. It’s also important to remember that certain foods can explode if not properly prepared for microwaving. For example, some items require poking holes to allow steam to escape and prevent a mess.
Also See: Microwave Strawberry Shortcake Mug Recipe in Minutes!
Cream Cheese Frosting Options for Microwave Cakes
My college hack? Soften cream cheese in the microwave (5 seconds!). Blend 2 oz cream cheese, 1 tbsp butter, ¼ cup powdered sugar, and ½ tsp vanilla. Pro tip: Add a pinch of salt to cut sweetness. Microwaving cream cheese is a quick way to get it to the right consistency for mixing. This simple technique can elevate your recipes, making them smoother and more delightful.
Quick Microwave Frosting Tips
- Too thick? Microwave 8 seconds to soften.
- No cream cheese? Mix 1 tbsp milk into vanilla ice cream for instant glaze.
- Garnish game: Crushed Oreos or rainbow sprinkles add crunch without effort.
Ready to keep these cuties fresh (if they last that long)? Let’s talk storage secrets…
How to Store Microwave Mini Red Velvet Cakes
These cakes taste best fresh, but if you’ve resisted eating all four (heroic!), storage is simple. Room temp works for 8 hours – just cover with plastic wrap. Found a rogue cake next day? The microwave revives it in 10 seconds. If you’re looking for a quick dessert, consider the delicious 2-minute microwave almond butter jelly mug cake for a satisfying treat. It’s a fun and easy way to enjoy a nostalgic flavor combo in no time!
For longer storage, refrigerate in airtight containers up to 3 days. Pro tip: Place a paper towel beneath the cake to absorb fridge moisture. Frosting? Store separately in a squeeze bottle – nobody likes soggy cream cheese hats. If you’re looking for a quick dessert, consider whipping up a 2 minute microwave vanilla mug cake with sprinkles for a fun treat. It’s a great way to enjoy a sweet moment without any fuss.
Freezing works too! Wrap unfrosted cakes in plastic, then foil. They’ll keep 2 months. Thaw at room temp 30 minutes, then microwave 15 seconds. My 2021 time-capsule cake? Still velvet-y after 6 weeks frozen. Science! For quick treats, microwave cooking frozen biscuits can provide a delicious snack in just minutes. This method makes it easy to enjoy freshly baked biscuits without the long wait.
Creative Recipe Variations
Once you’ve mastered the base recipe, try these twists. My roommate once added crushed candy canes – we called it “Christmas Velvet.” Messy? Yes. Festive? Absolutely.
- Chocolate Chip Velvet: Fold 1 tbsp mini chips into batter. They’ll melt into gooey pockets – microwave 10 seconds longer.
- Marbled Cheesecake: Swirl 1 tbsp plain cheesecake batter into red velvet before microwaving.
- Orange Zest Velvet: Replace vanilla with orange extract + ½ tsp zest. Pair with dark chocolate frosting.
Feeling adventurous? Swap cocoa with matcha powder for green velvet cakes (use ½ tsp). Or try pumpkin puree instead of milk for fall vibes – reduce to 2 tbsp and add cinnamon.
Whatever you choose, remember: microwave wattage affects cooking times. Start with 60 seconds, then add 10-second bursts. Burnt cake confetti isn’t a decoration trend. Yet. A quick and fun solution for a delicious treat is a 2-minute microwave funfetti mug cake, perfect for satisfying sweet cravings with minimal effort.
Now that your cakes are stored and customized, let’s talk about turning them into edible art. One delicious way to transform your cakes is by making a microwave chocolate raspberry cake. This quick and easy dessert combines rich chocolate and tart raspberry flavors, making it a delightful treat for any occasion.
Now It’s Your Turn to Microwave Some Magic!
With just a few pantry staples and 5 minutes of microwave time, you can whip up these decadent mini red velvet cakes. The rich cocoa flavor paired with tangy cream cheese frosting creates a dessert that feels fancy without the fuss.
We’d love to hear how your microwave baking adventure goes! Did you add any creative twists? Share your mini cake masterpieces with us – they might just inspire someone else’s next microwave masterpiece.