Craving cheesy garlic bread but don’t want to wait for delivery or heat up the oven? We’ve got you covered. This recipe transforms pantry staples into gooey, garlicky perfection faster than you can say “molten cheddar.”
Best part? Your microwave does 90% of the work. No preheating, no dough-kneading, and definitely no dishes piling up in the sink.
Below, we’ll walk through ingredient swaps, nuke-time tweaks, and pro tricks to avoid soggy bread or rubbery cheese. Let’s turn that microwave into a flavor missile.
Jump To:
Quick Cheesy Garlic Bread in the Microwave
Course: Side Dish, SnackCuisine: American, Italian2
5
minutes2
minutes150
kcal7
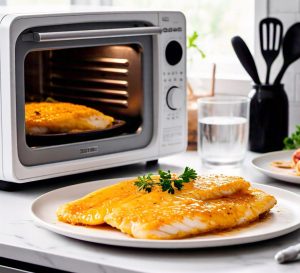
minutesThis microwave cheesy garlic bread is perfect for when you're short on time but still want a delicious and comforting side or snack. Made with simple ingredients that you probably already have at home, this recipe takes only minutes to prepare and cook. Whether paired with pasta, enjoyed on its own, or served at a gathering, it’s sure to please everyone’s taste buds.
Ingredients
of bread
shredded cheese mozzarella or cheddar
unsalted butter
garlic minced
dried oregano
salt
and a pinch of black pepper.
Directions
- Start by placing the butter in a microwave-safe bowl and microwaving it for about 15-20 seconds until melted.
- Add the minced garlic to the melted butter and mix well.
- Stir in the dried oregano, salt, and black pepper.
- Next, spread the garlic butter mixture evenly onto each slice of bread.
- Top each slice generously with shredded cheese.
- Place the prepared bread slices on a microwave-safe plate.
- Microwave on high for 30-60 seconds or until the cheese is melted and bubbly.
- Carefully remove the plate from the microwave and let it cool for a minute before serving..
Notes
- Feel free to customize your cheesy garlic bread by adding herbs like parsley or basil for extra flavor. You can also experiment with different types of cheese, such as Parmesan or pepper jack, for a unique twist. For best results, use fresh bread to achieve a crispy texture. This easy microwave recipe is ideal for quick snacks, side dishes, or whenever you're craving cheesy goodness!
What is Microwavable Cheesy Garlic Bread?
Microwavable cheesy garlic bread is emergency comfort food for when cravings strike but time’s tight. We’re talking soft bread slathered with garlic butter, topped with melty cheese, and nuked until golden(ish) in under two minutes. It’s the culinary equivalent of a warm hug from your microwave.
Unlike oven-baked versions, this skips crusty exteriors for speed. But done right, you’ll still get that iconic garlic punch paired with stretchy cheese. My aunt Clarice once whipped this up at summer camp using a waffle iron (long story), but trust us—the microwave method’s far less chaotic.
What Does Microwavable Cheesy Garlic Bread Taste Like?
Imagine buttery toast met a garlicky cheese fondue and they had a speedy lovechild. The bread stays tender with slight chew, while the cheese turns gooey—not crispy. Garlic shines through without raw harshness since microwaving mellows its bite. Embracing this effortless combination, garlic bread brings a refreshing spring flavor that delights the palate. The magic of microwave toast allows for quick preparation, making it a go-to choice for a flavorful snack or side dish.
Aunt Clarice’s camp version used powdered garlic and Velveeta (desperate times!), but fresh minced garlic and sharp cheddar elevate it. You’ll get savory richness with each bite, plus that nostalgic “I need this now” satisfaction. Just don’t expect shatter-crisp edges—this is lazy-day deliciousness. For a quick and satisfying meal, microwave garlic butter shrimp can be a fantastic option.
Ready to assemble your ingredients? Let’s talk bread choices, cheese varieties, and garlic hacks next…
Ingredients for Quick Cheesy Garlic Bread
Let’s raid your kitchen. You likely have everything already—bread, cheese, garlic, butter. But let’s optimize.
Bread Choices &Amp; Alternatives
Sturdy sandwich bread works best—think sourdough or ciabatta. Their tight crumb resists sogginess. Once, during a midnight craving, I used a leftover hamburger bun. Pro tip: Toast it slightly first for extra crunch.
Gluten-free? Rice cakes or thick corn tortillas can sub in a pinch. They won’t mimic bread’s chew but still deliver cheesy garlic goodness.
Cheese Types &Amp; Substitutes
Mozzarella melts like a dream. Cheddar adds tang. Combine both for maximum goo. My college hack? American cheese slices—they melt fast at 800W. For those craving the gooey texture of mozzarella sticks, Cooking mozzarella sticks in the microwave can be a quick solution. Cooking mozzarella sticks in the microwave allows for a delightful snack without firing up the oven.
Vegan? Shredded coconut oil-based cheeses work, but add 10-15 seconds. Nutritional yeast sprinkled post-microwave boosts umami. For a convenient snack option, consider microwave frozen vegan cheese sticks. They provide the perfect combination of taste and ease, making them a go-to choice for quick meals.
Garlic Flavor Options
Fresh minced garlic (1 clove per slice) packs punch. Powdered garlic (¼ tsp) is quicker. Once, I subbed garlic-infused olive oil—game changer. Cooking garlic in the microwave can be a quick and simple way to enhance your dishes. By using the microwave, you can soften garlic and bring out its flavor without the mess of traditional methods.
Roasted garlic paste? Yes. Jarred minced garlic? Sure. Garlic salt? Halve other salts. No wrong answers here.
Microwave-safe Dish Requirements
Use ceramic plates or glass dishes. No metal trivets or foil. I learned this hard way via spark-show brunch. Paper towels underneath absorb excess moisture.
For even heating, choose flat surfaces. Bowls cause steam buildup = sad, limp bread.
Also See: Microwave Canned Lentil and Instant Teff Bowl in 5 Minutes
How to Make Cheesy Garlic Bread in the Microwave
Time to build your garlicky masterpiece. Total active time: 3 minutes. Bragging rights: eternal.
Step 1: Preparing the Bread
Butter one side generously. Not margarine—it’s 90% water and breeds sogginess. Place buttered-side up on your microwave-safe plate.
Optional: Lightly toast in a toaster first. Adds crunch that survives the microwave.
Step 2: Adding Garlic &Amp; Cheese
Mix ½ tsp minced garlic into softened butter. Spread over bread. Top with ¼ cup shredded cheese. Leave a ½-inch border to contain meltage. This simple preparation pairs perfectly with a lazy meal of microwave canned spaghetti. For a complete and effortless dinner, serve it alongside some crispy garlic bread for a delicious treat.
Add a sprinkle of paprika or oregano here. My roommate swears by red pepper flakes for heat.
Step 3: Microwaving Techniques
Nuke on high (800-1000W) for 30 seconds. Pause. Microwave another 15-20 seconds. Stop before cheese bubbles violently—it’ll keep cooking off-heat.
If your microwave lacks turntable, rotate plate halfway. Ensures even melt.
Step 4: Testing Doneness
Cheese should pool slightly but not slide off. Tap the bread’s center—it should spring back, not squish. If underdone, add 10-second bursts.
Let rest 1 minute. Residual heat firms up the cheese. Impatience leads to third-degree tongue burns. Ask my cousin Earl.
Also See: Easy 90-second Seed Bread: Quick and Healthy!

Tips for Perfect Microwave Cheesy Garlic Bread
Avoid culinary heartbreak with these battle-tested tricks.
Avoiding Soggy or Overcooked Bread
Patience > power. High heat too long turns bread into rubber. 50% power for 60 seconds works better for thick slices. This method of microwaving is essential not only for regular bread but also for delicious microwave bread recipes that can be prepared quickly. Learning how to properly microwave specific types of bread can lead to soft, fluffy results without turning them into tough rubber.
Blotting melted cheese with a paper towel post-microwave soaks up excess grease. Lifesaver for gluten-free breads.
Enhancing Flavor &Amp; Texture
Post-nuke, add fresh parsley or basil. The heat wilts herbs perfectly. A drizzle of truffle oil? Yes, chef.
For crunch, sprinkle crushed croutons or fried onions post-cooking. They stay crisp unlike oven-baked toppings.
Now that you’re a microwave garlic bread wizard, let’s tackle storage hacks and creative twists. If you’re looking for a quick and delicious side, consider making easy 2 minute garlic bread. It’s a perfect complement to any meal and can be whipped up in no time.
How to Store &Amp; Reheat Microwavable Cheesy Garlic Bread
Leftovers? (Unlikely, but we’ll pretend.) Store cooled garlic bread in an airtight container with parchment between layers. Fridge life: 2 days max—beyond that, the garlic vibe turns funky. Freezing works too: wrap slices in foil, then bag for 1 month.
My roommate once “hid” a slice behind the milk carton. Three days later? Let’s just say science experiments belong in labs, not fridges.
Reheating Like a Pro
Microwave method: Place on paper towel, cover with another, and nuke at 50% power for 20 seconds. The towel absorbs steam, preventing sogginess. Check cheese melt—add 10-second bursts if needed. A similar approach can be applied to corn on the cob. Using a simple trick microwaving corn cobs can lead to perfectly cooked kernels in just a few minutes without the hassle of boiling.
Want crispy edges? Use a toaster oven at 350°F for 5 minutes. Air fryer at 375°F for 3 minutes works magic too. We’ve resurrected freezer-burnt slices this way—crisp salvation! If you’re looking for a quicker method, a convection microwave can also toast bread to perfection. This appliance combines microwave and convection heating, delivering evenly browned toast in just a few minutes.
Freezer-friendly Fixes
Frozen slices reheat best with a double-layer paper towel shield. Microwave 30 seconds at full power, flip, then 15 more seconds. The cheese revives surprisingly well—like garlicky phoenix rising from icy ashes. This method not only restores flavor but can also melt cheese perfectly in just moments. Learning how to melt cheese in the microwave can open up a world of tasty possibilities.
Avoid the “rubber cheese” curse: never reheat longer than 45 seconds total. Trust us—we’ve mourned many a toughened cheddar slab.
Now that your leftovers are sorted, let’s explore creative twists to keep your garlic bread game fresh. One fun option is making microwave garlic bread, which is quick and super easy to whip up. It’s a perfect way to enjoy freshly flavored bread without the hassle of an oven.
Now It’s Your Turn to Try!
We’ve covered everything from bread choices to microwaving techniques for that perfect quick cheesy garlic bread. With just 2-3 minutes in the microwave, you’ll have gooey, garlicky goodness ready to devour.
Experiment with different cheeses or add a pinch of red pepper flakes for heat. The best part? No oven required—just your trusty microwave and a serious craving for comfort food. Let us know how your cheesy creation turns out!