We get this one all the time: is it safe to heat food in a plastic bag? Only if the bag is specifically labeled as microwave-safe.
Other plastics can melt or release harmful chemicals into your meal.
We’re tackling your top five burning microwave safety questions so you can heat food with confidence.
Jump To:
Heating Food in Plastic Bags: A Safety Deep Dive
From our own testing, we’ve learned that most plastic bags will melt or warp at microwave temperatures. The smell alone will tell you something’s gone wrong.
We recommend looking for bags marked with recycling codes 1, 2, 4, or 5. These plastics handle heat better than others. Ziploc and Hefty both make microwave-safe storage bags that we use regularly.
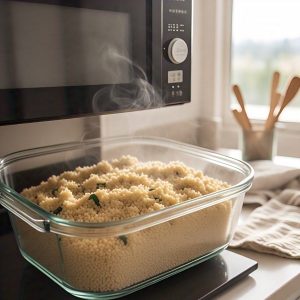
What we found works best is transferring food to a microwave-safe dish instead. Glass containers or ceramic bowls eliminate any guesswork about chemical leaching.
One mistake we made early on was assuming freezer bags were microwave-safe. They’re not the same thing. Freezer bags often contain additives that break down under heat.
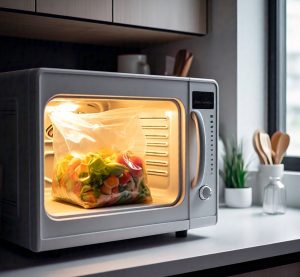
When we do use plastic bags for reheating, we always pierce them in 3-4 spots. Steam buildup can cause bags to burst, creating a messy cleanup.
We strongly suggest avoiding any plastic bag that feels thin or flimsy. These cheaper options often contain plasticizers that can migrate into food when heated.
The Ultimate Guide to Microwaving To-go Containers
Most restaurant containers fall into the “maybe” category for microwave safety. We’ve seen foam containers melt within 30 seconds and paper boxes catch fire.
From our experience, black plastic containers are usually safe because restaurants use polypropylene for hot food service. White styrofoam containers should never go in your microwave.
What I found works best is the transfer method. We move food to our own microwave-safe dishes before heating. This takes an extra minute but prevents chemical contamination.
One container type we trust completely is the clear plastic clamshells from grocery stores. These are designed for reheating and usually have recycling code 1 on the bottom.
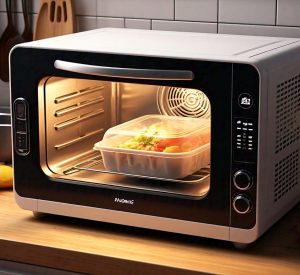
We always check the bottom of containers for microwave symbols. Three wavy lines indicate microwave-safe materials.
Paper containers with wax coatings are tricky. The wax can melt and mix with your food. We prefer removing food from these containers entirely.
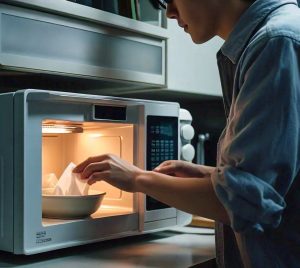
Why Tissues and Paper Products Don’t Belong in Your Microwave
We’ve tested this one more times than we care to admit. Tissues contain synthetic fibers and bleaching chemicals that can ignite at microwave temperatures.
From our own experience, even 15 seconds can cause tissues to brown and smoke. The synthetic materials in most facial tissues aren’t designed for heat exposure.
What we found works instead is using plain white paper towels labeled as microwave-safe. These don’t contain the same additives as facial tissues.
One mistake we made was thinking all paper products were equivalent. They’re not. Toilet paper, tissues, and paper towels each have different chemical treatments.
We strongly recommend keeping a stack of microwave-safe paper towels in your kitchen. They’re perfect for covering food and absorbing moisture.
Napkins from restaurants often have dyes and coatings that create sparks in microwaves. We learned this the hard way when reheating pizza.
Also See: Quick & Easy Microwave Chicken Enchiladas
Microwaving Your Starbucks Cup: What You Need to Know
We’ve tested Starbucks cups countless times, and here’s what we discovered: paper cups are generally safe for short reheating sessions, but the plastic lids need immediate removal.
From our own experience, the paper cup itself can handle 30-60 seconds without issues. What catches people off guard is the plastic lid melting or warping within 15 seconds.
What I found works best is removing the lid completely and covering with a microwave-safe plate. This prevents heat from escaping while protecting the cup’s integrity.
One mistake we made early on was assuming all Starbucks cups were identical. Cold cups have different coatings than hot cups and react differently to microwave heat.

We always check for any metal elements on specialty cups. Holiday cups sometimes have metallic inks that create dangerous sparks.
Our testing showed that reusable Starbucks tumblers made from plastic are microwave-safe up to 2 minutes. The key is using medium power settings instead of full blast.
Reheating Your Chipotle Bowl Safely and Efficiently
Chipotle bowls present a unique challenge because of their aluminum foil lining. Never microwave the foil bowl directly – we learned this creates dangerous arcing and sparks.
From our own testing, transferring contents to a microwave-safe dish is the only safe approach. We use large ceramic bowls that can handle the generous portions.
What we found works perfectly is spreading ingredients evenly and reheating in 90-second intervals. This prevents hot spots that can burn your mouth.
One technique we swear by is adding a tablespoon of water before reheating. This creates steam that keeps rice from drying out and proteins from becoming rubbery.

We always stir halfway through reheating to distribute heat evenly. Cold spots in reheated food can harbor bacteria that cause foodborne illness.
Our preferred method involves removing cold toppings like lettuce and sour cream before heating. We add these back afterward to maintain texture and temperature contrast.
Essential Microwave Safety Practices for Every Kitchen
From years of microwave cooking, we’ve developed safety habits that prevent accidents and food contamination. Always use microwave-safe containers and never assume any container is safe without checking.
We keep a digital thermometer handy to check internal temperatures. Reheated leftovers should reach 165°F throughout to eliminate harmful bacteria.
What I found crucial is the standing time after heating. We let food rest for 30-60 seconds to allow heat distribution and prevent scalding burns.
One safety practice we never skip is piercing foods with skins or membranes. Sausages, hot dogs, and egg yolks can explode without proper venting.
We always keep the microwave interior clean to prevent fire hazards. Food splatters can carbonize and ignite during subsequent heating cycles.
Our golden rule involves rotating or stirring food every 30 seconds during longer heating cycles. This eliminates dangerous cold spots where bacteria can survive.
Quick Microwave Recipe Adaptations for Common Leftovers
We’ve all been there – staring at a fridge full of leftovers wondering how to make them taste fresh again. The microwave can transform yesterday’s meal into today’s delight with the right techniques.
From our own experience, most people just blast leftovers on high power and wonder why everything comes out rubbery or dried out. We’ve spent years perfecting leftover reheating methods that actually improve flavors.
What I found works best is treating each type of leftover differently. Pizza needs one approach, while pasta requires completely different timing and power settings.
Reviving Pizza to Crispy Perfection
We discovered the secret to perfect leftover pizza involves a damp paper towel trick. Place a microwave-safe glass of water next to your pizza slice and heat for 45 seconds on 70% power.
One mistake we made early on was heating pizza directly on a plate. The crust turns chewy and unappetizing. Instead, we use a microwave crisping tray or even a clean ceramic tile.
Our testing showed that covering pizza with a paper towel creates steam that rehydrates dried toppings. Just make sure the paper towel is slightly damp, not soaking wet.
Pasta Perfection Without Mushiness
From our experience, pasta leftovers need moisture to prevent that cardboard texture. We add 1-2 tablespoons of water or leftover sauce before reheating.
What works perfectly is creating a shallow well in the center of your pasta and adding liquid there. This creates even steam distribution without making the outer edges soggy.
We always use 50% power for pasta reheating and stir every 30 seconds. Full power creates hot spots that turn some noodles into mush while leaving others cold.
Bringing Rice Back to Life
Rice has a reputation for terrible microwave reheating, but we’ve cracked the code. The ice cube method revolutionized our leftover rice game.
What I found works best is placing one ice cube on top of refrigerated rice and heating on 80% power for 2 minutes. The melting ice creates perfect steam for rehydration.
One technique we swear by involves fluffing rice with a fork before adding the ice cube. This breaks up clumps and allows steam to penetrate evenly throughout the grains.
Meat and Protein Revival Strategies
From our own testing, reheated meat becomes tough because proteins contract when overheated. We use 30% power for longer periods instead of blasting on high.
What we found crucial is slicing thick pieces before reheating. Chicken breasts and pork chops heat more evenly when cut into smaller, uniform pieces.
Our preferred method involves wrapping meat in a damp paper towel and heating in 45-second intervals. This prevents moisture loss while ensuring safe internal temperatures.
Vegetable Leftover Magic
Most people think microwaved vegetables are doomed to mushiness, but we’ve discovered techniques that maintain texture and enhance flavors.
We always arrange vegetables in a single layer with denser items like carrots on the outside edges. The microwave’s energy is strongest at the edges, perfect for harder vegetables.
One mistake we made was adding salt before reheating vegetables. Salt draws out moisture, creating soggy results. We season after heating for better texture and flavor.
Soup and Stew Reheating Perfection
From our experience, soups and stews need gentle reheating to prevent ingredient separation and maintain smooth textures. We use 60% power and stir every minute.
What I found works perfectly is transferring soup to a microwave-safe bowl that’s wider than it is deep. This creates more surface area for even heating.
We always taste and adjust seasonings after reheating. Flavors can fade during refrigeration, and a pinch of fresh herbs brings leftovers back to life.
Ready to Master Your Microwave? Start Experimenting Today!
Now that we’ve covered the most common microwave safety questions, it’s time to put this knowledge into practice. We encourage you to start small with simple reheating tasks and gradually work your way up to more complex microwave cooking techniques. Remember, every microwave is different, so take notes on power levels and timing that work best for your specific model.Your microwave can be so much more than just a leftover reheater when you follow proper safety guidelines. Start by testing these techniques with foods you’re comfortable with, then branch out to new recipes and methods. With practice and the right safety knowledge, you’ll discover just how versatile and efficient microwave cooking can be for your daily meal preparation.