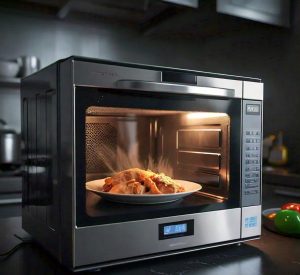
Craving a warm, cheesy breakfast but pressed for time? Our 2-Minute Microwave Cheesy Grits Breakfast Mug delivers creamy Southern comfort faster than you can brew coffee.
Yes, you read that right—this recipe skips the stovetop and transforms humble grits into a velvety, cheese-packed meal using just your microwave and a mug.
We’ll walk you through choosing the right grits (or instant polenta in a pinch), nailing the perfect texture, and customizing your mug with proteins or spices.
Jump To:
2-Minute Microwave Cheesy Grits Breakfast Mug
Recipe by Lisa MartinCourse: BreakfastCuisine: American1
1
minute1
minute250
kcal2
minutesAre you craving a warm and cheesy breakfast but short on time? These microwave cheesy grits are a fantastic solution for a filling and flavorful meal in just 2 minutes. Perfect for those busy mornings or when you're in a rush, it’s a delightful lift to your breakfast routine without the hassle!
Ingredients
quick-cooking grits
water
shredded cheddar cheese
garlic powder
salt
freshly ground black pepper to taste
green onions or parsley for garnish . optional
Directions
- In a microwave-safe mug, combine 1/4 cup of quick-cooking grits and 1 cup of water.
- Stir well to blend the grits with the water, Microwave on high for 1 minute, Remove the mug carefully, as it may be hot.
- Stir the mixture and microwave for an additional minute, Add 1/4 cup of shredded cheddar cheese, 1/4 teaspoon of garlic powder, and 1/4 teaspoon of salt to the grits.
- Stir until the cheese has melted and is fully incorporated, Season with freshly ground black pepper to taste, Garnish with chopped green onions or parsley if desired, and serve immediately..
Notes
- Feel free to customize your cheesy grits by adding cooked bacon, sausage, or different types of cheese. For extra flavor, consider mixing in some hot sauce or your favorite spices. This recipe is perfect for a quick breakfast or even a late-night snack!
What Are Grits?
Grits are coarsely ground corn kernels, typically from dent corn (a starch-rich variety). Think of them as polenta’s Southern cousin with a quicker attitude. My Uncle Peter once declared, “Grits are just tiny flavor sponges waiting to hug cheese.” Canned corn is another delicious way to enjoy this versatile ingredient. Microwave canned corn can be a quick and easy side dish that complements grits perfectly.
Microwave-friendly Texture Explained
Quick-cooking grits thrive in microwaves because their coarse grind absorbs liquid rapidly without turning gluey. The starch releases gradually, creating a creamy base in 90 seconds flat. Traditional stone-ground grits? Delicious, but they’ll test your patience with longer cook times.
Microwaves heat water molecules intensely, so grits need that quick-cooking structure to avoid uneven textures. We’ve all seen Joseph’s “grit-splosion” incident—trust us, grain size matters here.
What Do Cheesy Microwave Grits Taste Like?
Imagine buttery corn pudding meets sharp cheddar in a cozy mug hug. The cheese amplifies grits’ natural sweetness while adding salty richness. It’s the breakfast equivalent of a weighted blanket. For a delicious twist, try adding chili and cheese to your corn for a quick microwave chili cheese corn dish that’s sure to warm you up.
Creamy Vs. Grainy Consistency Tips
Avoid Uncle Peter’s infamous “pebble grits” by stirring every 30 seconds. This breaks up starch clumps for velvety smoothness. Too thick? Add 1 tsp liquid (milk or broth) and whisk vigorously.
Grainy grits often stem from insufficient liquid. Use a 4:1 ratio (liquid to grits) and a tall mug—it gives room for bubbling without overflow. Pro tip: Warm your liquid first for faster starch activation.
Ready to build your flawless grits mug? Let’s break down the ingredient dream team…
Ingredients for Microwave Cheesy Grits Mug
Our cheesy grits mug requires just four core ingredients: quick-cooking grits, liquid, cheese, and a pinch of salt. But let’s talk swaps—because breakfast emergencies demand flexibility. (We’ve all been there mid-shuffle between coffee brewing and sock matching.)
Grits Alternatives (Instant Polenta, Cornmeal)
Out of grits? Instant polenta works beautifully—it’s similarly coarse-ground. Cornmeal’s finer texture risks mushiness, so use 25% less and stir twice as often. My cousin swears by masa harina for a toastier flavor, but add 1 extra tbsp broth. For those looking for a quick and easy meal, a microwave polenta recipe can be a fantastic option. It allows for a delicious, creamy side dish in just a few minutes.
Cheese Substitutes (Dairy-free, Low-sodium Options)
Sharp cheddar’s our MVP, but nutritional yeast (1 tsp) + 1/4 tsp lemon juice nails dairy-free “cheesiness.” For low-sodium diets, try Swiss or goat cheese—their tang compensates. Avoid pre-shredded bags; anti-caking agents can turn your grits into a science fair slime.
Liquid Adjustments (Water Vs. Broth Vs. Milk)
Water works, but chicken broth adds savory depth—like a flavor blanket for your taste buds. Milk (dairy or oat) boosts creaminess but requires 15% less microwaving time to prevent curdling. Pro tip: Heat liquids 10 seconds first for smoother starch integration.
Also See: The Anyday Dish Challenge: 5 Microwave Recipes
How to Make Cheesy Grits in a Microwave Mug
Grab a 12-oz mug—anything smaller invites overflow drama. Combine 1/4 cup quick grits + 1 cup liquid (broth FTW) + pinch of salt. No need to stir yet. My first attempt looked like a cornmeal volcano, but we’ve optimized this. For a quick and easy twist, try making a lazy microwave canned cornbread mug. This delicious option offers a convenient way to enjoy cornbread without the oven.
Step 1: Measure and Microwave Base Ingredients
Microwave uncovered for 1 minute 30 seconds on high (700-900W). If your microwave’s a powerhouse (1000W+), reduce to 1 minute. The mixture should bubble gently like a tiny Jacuzzi, not erupt like Old Faithful. Understanding how hot microwaves can get helps in avoiding overcooking delicate dishes like this.
Step 2: Stirring Techniques to Prevent Lumps
Remove the mug (careful—hot handle alert!) and stir vigorously with a fork. Those tines are lump-busters. For extra silkiness, whisk in a figure-8 pattern. If grits seem too thick, add 1 tsp liquid and stir again. For the best results when heating liquids, choosing the right container is essential. Opt for a microwave-safe ceramic mug to ensure even heating without any harmful chemicals leaching into your food.
Step 3: Melting Cheese Evenly Without Overcooking
Mix in 1/4 cup shredded cheese and let residual heat melt it. Stir once after 30 seconds. Microwaving cheese directly can make it grainy—trust the carryover cooking. The microwave is a great tool for melting cheese quickly and evenly without the hassle of stovetop cooking. When done correctly, it creates a smooth, creamy texture perfect for topping dishes or enjoying as a dip. (Learned this after creating “cheese pebbles” in 2017. Not my finest culinary hour.)
Also See: Mini Eggnog Cakes (Microwave Holiday Warm-up)

Common Microwave Mistakes and Fixes
Even microwave pros face grits mishaps. Let’s troubleshoot two biggies before they strike.
Overflow Prevention for Small Mugs
Using an 8-oz mug? Halve the recipe (2 tbsp grits + 1/2 cup liquid). Leave 1.5 inches of space at the top. For extra security, place a plate underneath. If foam rises, pause microwaving and stir gently. When it comes to comforting desserts, a microwave mug cake recipe is a quick and easy option that requires minimal ingredients. In just a few minutes, you can enjoy a delicious treat right from your mug!
Adjusting Cook Time by Microwave Wattage
High-wattage microwaves (1000W+) cook faster—start with 1 minute, then add 15-second bursts. At 600-700W, extend initial cook time to 2 minutes. Your grits are done when they pull away slightly from the mug’s edges. For those nights when cooking feels like too much effort, consider quick and easy meals you can make in a mug. This method not only saves time but can also lead to delicious instant mug meals that require minimal prep.
Now that your grits are perfected, let’s tackle storing leftovers (because doubling the batch is always smart).
Storage and Reheating Instructions
Leftover cheesy grits? We’ve all stared at that half-eaten mug wondering, “Can I save this for tomorrow?” Absolutely—here’s how to keep your grits tasting fresh without turning them into a science experiment.
Refrigerating Cooked Grits in Microwave-safe Containers
Transfer cooled grits to a microwave-safe glass or BPA-free plastic container within two hours of cooking. Leave ½ inch of space at the top—grits expand slightly when chilled. Seal tightly, label with the date, and refrigerate for up to three days.
Fun fact: My roommate once stored grits in a takeout soup container. The lid popped off overnight, gifting us with “grits glaciers” on the fridge shelf. Learn from our mess—use sturdy containers! If you’re looking for a quick way to enjoy grits, try making them in the microwave for an easy and delicious meal option.
Reviving Thickened Leftovers With Water
Cold grits thicken into a brick-like texture (we call it “grits cement”). Fix this by stirring in 1-2 tsp water or milk before reheating. Microwave on 50% power for 60 seconds, stir, then blast 15-second intervals until steamy. A simple trick can help prepare other foods in the microwave perfectly as well, like corn on the cob. This method will leave you with tender and juicy corn without boiling a pot of water.
Pro tip: Add liquid gradually. My cousin flooded his grits with a quarter-cup of water and ended up with cheesy soup. Start small—you can always adjust! In addition to grits, mastering the right liquid balance is key for making a delicious microwave soup recipe. With just a few simple ingredients, you can whip up a warm and comforting bowl in minutes.
Now that your grits are safely stored or revived, let’s jazz them up with proteins, spices, and herbs…
Now It’s Your Turn to Whip Up Cheesy Grits!
We’ve walked you through every step—from picking the right grits to nailing that creamy-cheesy texture in just 2 minutes. Whether you’re a grits newbie or a microwave maestro, this recipe is foolproof.
Tag us on social if you try it! We’d love to see your cheesy, steamy mug creations (or hear about your favorite add-ins). Breakfast just got a whole lot faster—and tastier.


