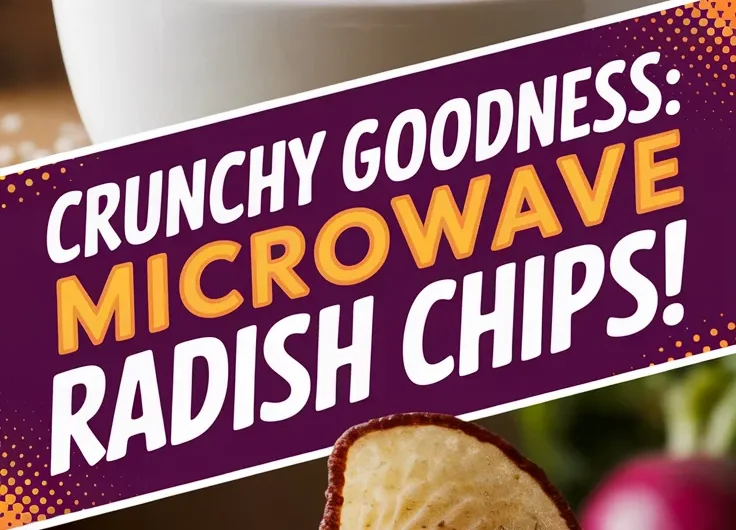
Craving a crunchy snack but short on time? We’ve got your back with radish chips that go from fridge to crispy in one microwave sprint.
Skip the oven – these paper-thin slices transform into guilt-free chips faster than you can say “burned kale.” No oil splatters, no preheating, just a plate and your trusty microwave doing the heavy lifting.
We’ll walk through slicing tricks, seasoning hacks, and microwave power tweaks to nail that perfect crunch every time.
Jump To:
Crispy Radish Chips with Microwave Pop
Course: SnackCuisine: American2
5
minutes5
minutes50
kcal10
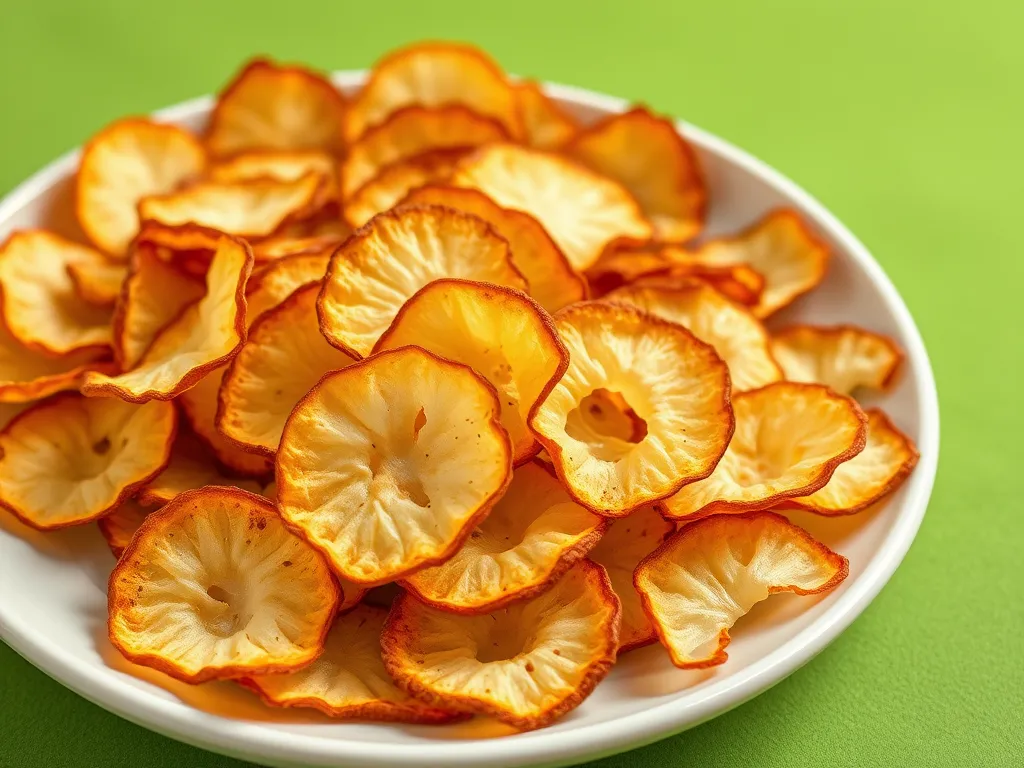
minutesTransform your radishes into a delightful and crispy snack with this simple microwave recipe. With just a few ingredients and minimal prep time, you can enjoy a crunchy treat that’s rich in flavor and low in calories. The microwave method ensures that you get perfectly crispy chips without the hassle of frying. Great for snacking, topping salads, or serving with dips.
Ingredients
thinly sliced
olive oil
sea salt
garlic powder optional
paprika optional
black pepper to taste.
Directions
- Start by washing and drying the radishes.
- Slice the radishes thinly using a sharp knife or mandoline, ensuring even thickness for uniform cooking.
- In a bowl, combine the radish slices with olive oil, sea salt, garlic powder, paprika, and black pepper.
- Toss well until all slices are evenly coated.
- Spread the seasoned radish slices in a single layer on a microwave-safe plate, making sure they do not overlap.
- Microwave the radish slices on high for 4-5 minutes, checking them every minute to ensure they do not burn.
- Once crispy, remove the plate from the microwave and let the chips cool for a minute.
- Enjoy the crispy radish chips alone or pair them with your favorite dip..
Notes
- For extra flavor, feel free to experiment with other seasonings like chili powder, or nutritional yeast. Ensure that the radish slices are as thin as possible for the best crispiness. Store any leftover chips in an airtight container at room temperature for up to 2 days, but they are best enjoyed fresh.
Why Microwave Radish Chips?
My sister Candice once attempted oven-baked radish chips during a chaotic family game night. The result? A smoky kitchen and chips that could’ve doubled as hockey pucks. Enter microwaving – our crispy redemption story. In fact, many foods actually taste better when microwaved instead of baked, making it a worthwhile kitchen hack. From popcorn to leftovers, microwaving can enhance flavors and retain textures that baking simply can’t match.
Benefits Of Microwaving Radishes
Microwaving slices at 1000W for 3-5 minutes dehydrates radishes 4x faster than conventional ovens. This locks in vitamin C (14.8mg per 100g) while evaporating excess water that causes sogginess. No preheating, no babysitting – just rapid crunch. However, it’s important to consider that while microwaving can maintain some nutrients, it can also lead to nutrient loss, especially if cooking times are not monitored. Choosing vegetables wisely when microwaving can enhance your meal without adding empty calories.
Radishes’ natural peppery bite mellows into a subtle earthiness when microwaved. Think of it as their glow-up moment – less “raw bite,” more “sophisticated snack.” A great way to enhance your microwave experience is to pair microwaved radishes with cheap microwave hot dogs for a quick meal. Canned diced radishes can also add an unexpected twist to this easy dish, providing both flavor and crunch.
What Do Crispy Radish Chips Taste Like?
Imagine kale chips and potato chips had a zesty lovechild. The initial crisp gives way to a light, airy texture with a faint peppery kick. Properly seasoned, they’re addictive – Candice’s kids now request them over popcorn!
Pro tip: The Maillard reaction (that fancy browning process) still happens here! Microwaves excite water molecules, but with thinly sliced radishes, you’ll still get golden edges and complex flavors.
Ingredients for Microwave Radish Chips
Our base recipe uses 3 staples, but we’ve included swaps for dietary quirks. Because nobody should miss out on crispy radish joy – gluten-free, keto, or otherwise. And speaking of crispy snacks, if you’re looking for a tasty twist, try the anyday hack for microwave veggie chips topped with parmesan crisps for a quick and delightful treat.
Essential Ingredients
- 10-12 medium radishes (150-200g total)
- 1 tsp olive oil (or 2 spritzes of avocado oil spray)
- 1/4 tsp sea salt (adjust for sodium needs)
Oil and Seasoning Substitutes
- Oils: Coconut oil (adds sweetness), sesame oil (for umami)
- Seasonings: Garlic powder, smoked paprika, nutritional yeast
- Heat hacks: 1/8 tsp cayenne or 1/2 tsp Tajín
Radish Alternatives
Daikon radish yields thicker, potato-chip-like crisps (microwave 6-8 mins). Watermelon radishes offer vibrant pink edges – slice them 1/16” thin for best results. Even turnips work in a pinch!
Just avoid jicama – its high sugar content leads to scorching. Learned that the hard way during Candice’s “experimental phase.”
Ready to turn those radishes into golden crisps? Let’s nuke some magic.
How to Make Crispy Radish Chips in the Microwave
Let’s turn those peppery roots into crispy gold. I’ll share the exact steps Candice and I perfected after three “crunch fails” (RIP, batch #2). One delicious way to utilize summer squash is in a casserole, and preparing it in the microwave can offer a delightful crunch. The technique of creating a summer squash casserole microwave crunch is a fantastic addition to any meal, ensuring flavor and texture come together beautifully.
Preparing Radishes: Slicing Techniques and Thickness
Grab a mandoline or sharp knife. 1/16-inch slices are our sweet spot – thicker than paper, thinner than a dime. Uniformity prevents half-burnt, half-soggy chaos.
Pro tip: If hand-slicing, angle your knife diagonally. This increases surface area for extra crisp. Just watch those fingertips – radishes are slippery little devils!
Seasoning Methods for Maximum Flavor
Toss slices in a bowl with 1 tsp oil first – it’s the flavor glue. For every 1 cup of radishes, use 1/4 tsp seasoning. Our current obsession: smoked paprika + garlic powder + nutritional yeast. These complements the spicy and savory flavors you get when snacking on radish-based dishes.<\/p>
- Dry rub: Apply spices directly to oiled slices
- Spritz method: Mist chips post-microwave with vinegar or lime juice
Microwave Setup: Plate Arrangement and Timing
Use a microwave-safe plate lined with parchment (no wax paper – trust us). Arrange slices like lily pads – no overlapping! A standard 12” plate holds 1 medium radish per batch. Remember, using parchment paper in the microwave can help with easy cleanup and prevent sticking. It’s a handy tool to ensure your food heats evenly without creating a mess.
Microwave at 1000W for 3 minutes. Flip slices. Continue in 1-minute bursts until edges curl. Total time: 5-7 minutes depending on your microwave’s personality (yes, they have them). For a delicious twist, try a simple trick to make microwaved fries taste fried again. Just adding a little oil after microwaving can give them that crispy texture you love.
Testing Crispiness (Running Water Dry-off Tip)
Here’s Candice’s weird-but-brilliant trick: Run a chip under water for 2 seconds. Pat dry. If it stays crisp, you’re done. If it softens, keep nuking in 30-second intervals. This simple technique can have a big impact on snacks that have lost their crunch, especially when you consider that a genius trick can revive stale chips in just 30 seconds.
This mimics humidity exposure – chips that survive this test will stay crunchy in snack jars!
Adjusting Microwave Power Levels
If edges brown too fast, drop to 700W (70% power). Add 2 extra minutes. For 1200W beasts? Start checking at 2.5 minutes. We made a cheat sheet:
| Power Level | Initial Time | Total Range |
|---|---|---|
| 600W | 5 mins | 8-10 mins |
| 1000W | 3 mins | 5-7 mins |
| 1200W | 2.5 mins | 4-6 mins |
Also See: 2-minute Microwave Pesto Egg Mug (Keto)
Common Mistakes and Fixes
We’ve eaten our share of leathery radish “chips” so you don’t have to. Here’s how to avoid our face-palm moments.
Soggy Chips: Causes and Solutions
Sogginess = un-evaporated water. Slice thinner (see that mandoline?) and pat dry pre-oil. Still limp? Microwave 1 minute more, then let sit 2 minutes – residual heat finishes the job.
Avoiding Overcrowded Microwave Plates
Radishes release steam as they cook. Crowding traps moisture, creating a mini sauna. Give each slice a 1/4-inch buffer zone. Better three small batches than one sad, steamed pile. For a quick and easy meal, consider pairing your radishes with microwave pre-cooked bacon. This combination not only simplifies meal prep but also adds a savory twist that complements the crispness of diced radishes.
Preventing Burnt Edges
Burnt edges happen when power’s too high. Rotate the plate 180° halfway through cooking. If using a turntable-less microwave, pause and rearrange slices manually every minute. Not all foods react the same way in the microwave, and some can even lead to undesirable results. Learn which 5 foods are microwaved wrong to avoid kitchen mishaps.
Now that you’re a radish chip wizard, let’s talk about keeping them crispy long-term (because let’s be real – they might not last that long). A great way to achieve that crunchiness is by making crunchy veggie chips in the microwave. These microwave crispy snacks can be both delicious and a healthier alternative to regular chips.
Also See: Microwave Raspberry Brownie Mug: Ready in 5 Minutes!
Now It’s Your Turn to Crunch!
With just a microwave and some fresh radishes, you’re minutes away from crispy, guilt-free snacking. We love how these chips turn ordinary veggies into something extraordinary—without the deep-fryer drama.
Experiment with different radish varieties or spice blends to make them your own. Once you nail the technique, you’ll never look at that microwave the same way again. Happy crunching!