Craving garlic bread but short on time? Our microwave method delivers hot, buttery garlic bread in just 2 minutes—no oven preheating or dishwashing required.
This recipe turns basic bread into a garlicky sidekick for pastas, soups, or solo snacking. And yes, it’s faster than ordering delivery.
Below, we’ll share ingredient swaps, step-by-step instructions, and pro tips to avoid soggy or chewy bread. Let’s nuke that craving!
Jump To:
Easy 2-Minute Garlic Bread
Course: Side Dish, SnackCuisine: American2
1
minute1
minute150
kcal2
minutesThis easy 2-minute garlic bread is a delightful way to enjoy a classic side dish without the hassle of baking. Using the microwave, you can have warm, buttery garlic bread ready to go in just moments. Whether paired with your favorite pasta or enjoyed as a snack, this recipe is both convenient and delicious.
Ingredients
of bread
butter softened
garlic powder
fresh parsley chopped
pinch of salt
optional grated Parmesan cheese.
Directions
- In a small bowl, mix together the softened butter, garlic powder, chopped parsley, and a pinch of salt
- Spread the garlic butter mixture evenly on each slice of bread
- Place the prepared slices on a microwave-safe plate
- Microwave the bread on high for 30 seconds to 1 minute, or until the butter has melted and the bread is warm
- If desired, sprinkle with grated Parmesan cheese before serving.
Notes
- For best results, use fresh bread for a more flavorful garlic bread. Feel free to adjust the amount of garlic powder to suit your taste. This recipe can easily be doubled if you're serving more people. Enjoy your garlic bread warm for the best flavor!
Why You’ll Love Microwave Garlic Bread
We’ve all been there: spaghetti’s ready, but garlic bread is MIA. Last summer at our family reunion, John (my butter-obsessed husband) forgot to prep the oven version. Cue Grandma’s eyebrow raise and her muttered “Microwaves exist for a reason, dear.” Ten minutes later, we had hot, garlicky slices for 15 cousins. No heroes were born that day—just a microwave.
This method skips the oven’s 20-minute preheat cycle. Your bread gets steamy-soft interiors with lightly toasted edges in 2 minutes flat. It won’t mimic oven-level crunch (science hasn’t cracked that yet), but it’ll rescue Tuesday dinners.
Ingredients for 2-minute Garlic Bread
You need four basics:
- Bread: Stale Italian or sourdough works best (absorbs butter without disintegrating)
- Butter: Softened, not melted—30 seconds at 50% power does the trick
- Garlic: 1 fresh clove per slice (or ¼ tsp powder in emergencies)
- Parsley: Fresh or dried, for color contrast
Ingredient Substitutes &Amp; Alternatives
No butter? Olive oil adds fruity notes (use ¾ tsp per slice). Vegan? Margarine works, but check the fat content—it needs to solidify slightly when cooled.
Out of fresh garlic? Garlic powder (¼ tsp per clove) or pre-minced jarred garlic (½ tsp) saves the day. Just avoid garlic salt—it’ll turn your bread into a salt lick. For an easy meal, consider pairing your garlic bread with lazy microwave canned spaghetti—it’s a quick and satisfying option that doesn’t compromise on flavor.
Grandma once used leftover hot dog buns and chives from her garden. It tasted… creative. We recommend sticking to crusty breads, but hey—desperation breeds innovation. For a more traditional flavor, try using dried chives instead. Microwaving dry chives can help release their aroma and enhance your dishes in no time.
Now that your kitchen smells like an Italian bakery, let’s nuke this thing properly.
How to Make Garlic Bread in the Microwave
Let’s turn that bread into golden, garlicky greatness. Pro tip: Use a microwave-safe plate unless you enjoy scrubbing melted butter off rotating trays (we don’t). For a super quick treat, consider making cheesy garlic bread in the microwave for a delicious snack in minutes.
Step 1: Prep the Bread
Slice your bread ¾-inch thick—any thinner and it’ll crisp into a cracker. Stale bread works best here. Last week, I used day-old ciabatta while muttering “waste not, want not” like a true pantry warrior.
Arrange slices in a single layer with breathing room. Overcrowding leads to steam pockets and sad, soggy centers.
Step 2: Mix Garlic &Amp; Butter
Mash 1 minced garlic clove into 2 tbsp softened butter per slice. If your butter’s fridge-cold, zap it for 10 seconds at 50% power. Stir in parsley—it’s not just garnish. Those green flecks make you look like a pro. This simple technique can be a delightful addition to quick microwave dishes, enhancing flavors effortlessly. For instance, using garlic butter on microwave garlic butter green beans elevates a simple side into a gourmet treat.
My neighbor once substituted garlic with onion powder. We don’t talk about that.
Step 3: Microwave in Intervals
Nuke one slice at 15-second intervals on high. Stop when edges bubble and centers look glossy (45-60 seconds total). Overdo it, and you’ll invent garlic-flavored hockey pucks.
Microwaves vary—ours is a 1200-watt beast. If yours is weaker, add 5-second bursts. Watch like it’s the season finale of your favorite show.
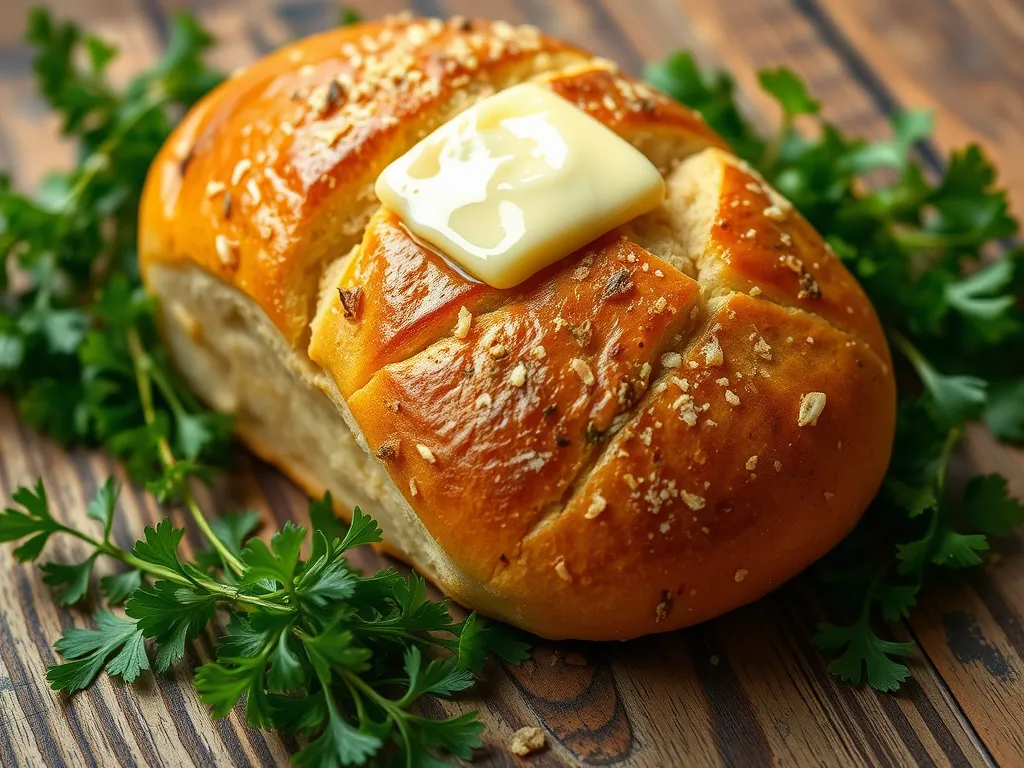
Step 4: Add Finishing Touches
Sprinkle grated Parmesan or red pepper flakes immediately after microwaving. The residual heat melts cheese without requiring another zap. Let it cool 30 seconds—unless you enjoy roof-of-mouth burns. For an even creamier result, consider using the microwave to melt cheese on your favorite dishes.
John once inhaled a slice straight from the microwave. His “I’m fine!” through tears is why we have a fire extinguisher.
Also See: 2-minute Microwave Caprese Salad in a Mug
Common Mistakes &Amp; How to Avoid Them
Soggy bread? You used fresh, moisture-rich loaves. Stale bread absorbs butter better. Chewy texture? Overcooking evaporates all moisture. Stick to 15-second checks. If stale bread is an issue, a quick fix can be achieved with a wet paper towel. Reviving stale bread in just 30 seconds using a moist paper towel can bring back its softness and freshness.
Avoid cold butter—it won’t spread evenly, creating garlic-free zones (culinary betrayal). Soften it properly, or face uneven flavor distribution. A quick and effective method is to soften butter in the microwave. By carefully using short intervals, you can achieve the perfect texture without melting it.
Also See: Can You Microwave Pumpkin Spice Custard in Anyday Bowl?
Microwaving Different Types Of Bread
Not all carbs are created equal. Here’s how to handle various breads:
Baguettes or Crusty Breads
Their nooks hold butter beautifully. Slice diagonally for maximum surface area. Microwave 10% longer—dense crumb needs extra time.
Soft Sandwich Bread
Reduce power to 70% to prevent toughening. Toast lightly first if you crave structure. White bread browns faster—watch closely. If you ever find yourself needing a quick breakfast option, how to make toast in the microwave can be quite handy. This simple method allows you to enjoy warm, toasted bread without the wait of a traditional toaster.
Hamburger Buns or Rolls
Split horizontally, butter the insides, and microwave open-faced. They’ll crisp like mini garlic platforms. Perfect for slider parties.
Up next: Learn how to revive leftovers without summoning the dreaded bread-zombie texture.
How to Store Leftover Garlic Bread
Leftover garlic bread? Rare in our house, but possible. Last week, John hid a slice behind the coffee filters (nice try, buddy). Here’s how to keep spares fresh without turning them into breadcrumbs.
Room Temp Short-Term: Wrap cooled bread tightly in foil and stash it in a bread box or airtight container. It’ll stay decent for 4-6 hours—ideal for snackers who circle back. Avoid plastic wrap—it traps steam and creates a soggy horror show.
Refrigerate for 1-2 Days: Place slices in an airtight container with a paper towel beneath them. The towel absorbs excess moisture while the butter solidifies. Reheat for 15 seconds before eating—it revives the garlic aroma, especially if you’re cooking garlic in the microwave.
Freeze for Up to 1 Month: Wrap individual slices in parchment paper, then slide them into a freezer bag. Squeeze out air to prevent freezer burn. To reheat: Microwave frozen slices at 50% power for 30 seconds, then full power for 10. No thawing needed. When using the microwave, consider utilizing materials like freezer paper to help ensure the food remains fresh and safe. Freezer paper can be beneficial in protecting your food during the reheating process in the microwave.
Pro tip: Garlic bread stored near onions absorbs their flavor. Unless you want onion-garlic fusion, keep them separated. We learned this after a questionable chili night experiment. For a quick and tasty twist, trying making microwave garlic bread can enhance your meal experience. It’s an easy way to enjoy delicious garlic flavors without the fuss of traditional baking.
Now that your leftovers are secured, let’s jazz up your next batch with cheesy twists and herb upgrades…
Now It’s Your Turn to Try!
We’ve covered everything from ingredient swaps to microwave timing tricks for perfect garlic bread in minutes. Whether you’re craving a cheesy version or keeping it classic, this method delivers buttery, garlicky goodness fast.
Grab that loaf and get microwaving – just don’t blame us when your kitchen smells like an Italian bistro. Tag us CanYouMicrowaveWiki with your creations!