Glass is a fantastic material for microwaving, but not every piece is created equal. Choosing the right glass makes all the difference for safety and taste.
We’ll show you how to pick the best glass and use it to create amazing meals.
Get ready to explore easy, tasty recipes and smart tips for your microwave.
Jump To:
The Ultimate Guide to Microwave-safe Glass Cookware
Glass cookware has become our go-to choice for microwave cooking, and for good reason. The right glass container heats food evenly while keeping flavors pure.
We’ve discovered that borosilicate glass performs exceptionally well under microwave heat. This type of glass withstands temperature changes up to 300°F without cracking or shattering.
Tempered glass also works wonderfully for our daily microwave needs. It’s tougher than regular glass and handles the thermal stress much better.
From our experience, look for glass marked “microwave-safe” on the bottom. We always perform the simple water test: place an empty glass container next to a cup of water in the microwave for one minute at full power.
If the glass stays cool while the water heats up, you’re good to go. If the glass gets hot, it’s absorbing microwave energy and shouldn’t be used.
What we avoid completely are decorative glasses with metallic trim or paint. These can spark and damage your microwave instantly.
Crystal glassware is another no-go zone. The lead content makes it unsuitable for microwave use and can create hot spots that crack the glass.
Mastering Microwave Meal Prep With Glass Containers and Lids
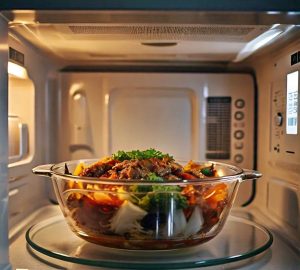
Glass containers with proper lids have revolutionized our meal prep game. We can cook, store, and reheat all in the same container.
The key is using microwave-safe lids that vent properly. We’ve learned the hard way that sealed containers can explode from pressure buildup.
Our favorite technique involves leaving one corner of the lid slightly open during heating. This creates just enough venting to prevent pressure while keeping moisture in.
For batch cooking, we use different sized glass containers. Large ones work great for casseroles and stews, while smaller versions are perfect for individual portions.
What works best for us is layering ingredients strategically. Dense vegetables go on the bottom, proteins in the middle, and delicate items like herbs on top.
We always add a tablespoon of water to prevent drying out. This creates steam that helps distribute heat more evenly throughout the food.
Unlocking the Potential Of Your Pyrex for Microwave Mastery
Pyrex has been our trusted companion for microwave cooking for decades. This borosilicate glass handles temperature changes like a champion.
We use our Pyrex measuring cups for more than just measuring. They’re perfect for melting butter, heating milk, and making quick sauces in the microwave.
The deeper Pyrex bowls work wonderfully for steaming vegetables. We add just two tablespoons of water, cover with a microwave-safe plate, and steam for 3-4 minutes.
One mistake we made early on was using vintage Pyrex from before 1998. Older pieces were made with soda-lime glass, which can shatter under thermal stress.
Modern Pyrex handles our casserole recipes beautifully. We’ve made everything from lasagna to bread pudding with excellent results.
What I found works best is preheating the Pyrex slightly with warm water before adding cold ingredients. This prevents thermal shock and potential cracking.
Also See: Cheap Microwave Instant Mashed Potatoes With Squash
Essential Safety Tips for Microwaving in a Glass Bowl
From our years of microwave cooking, safety comes first when working with glass bowls. We’ve learned some hard lessons about what works and what doesn’t.
Always check for cracks or chips before microwaving. Even tiny hairline fractures can turn into major breaks under heat stress. I inspect every glass bowl carefully before use.
Temperature shock is the biggest enemy of glass bowls in microwaves. We never put ice-cold glass directly into the microwave at high power. Instead, let it come to room temperature first.
What I found works best is starting with 30-second intervals at 50% power for thick or cold foods. This gradual heating prevents sudden temperature changes that crack glass.
One mistake I made early on was overfilling glass bowls. Leave at least one inch of space at the top to prevent boiling liquids from spilling over and creating hot spots.
We always use oven mitts when removing hot glass bowls. The handles might look fine, but they can be scorching hot and cause serious burns.
Understanding What Makes Glass Microwave-safe
Not all glass is created equal for microwave use, and knowing the difference can save you from dangerous accidents. We’ve tested various types over the years.
Borosilicate glass is our gold standard for microwave safety. This type contains boron oxide, which makes it incredibly resistant to thermal shock and temperature changes up to 500°F.
Tempered glass also performs well in microwaves. The tempering process makes it four times stronger than regular glass and more resistant to breaking from heat stress.
What we avoid completely is soda-lime glass, which makes up most drinking glasses and decorative bowls. This type absorbs microwave energy and can shatter without warning.
From my experience, look for the microwave-safe symbol on the bottom of glass containers. It usually looks like wavy lines or says “microwave safe” explicitly.
Crystal and lead glass are absolute no-gos for microwave use. The lead content creates hot spots that can crack the glass and potentially release harmful substances into your food.
Choosing the Right Glassware for Your Microwave Recipes
Selecting the perfect glass container can make or break your microwave cooking experience. We match our glassware to the specific recipe for best results.
For soups and stews, we prefer deep glass bowls with straight sides. These allow for even heating and prevent spills during the bubbling process.
Shallow glass dishes work wonderfully for casseroles and baked items. The wider surface area helps food cook more evenly and browns better if your microwave has a browning feature.
What I found works best for vegetables is using glass dishes with fitted lids. This traps steam and creates a pressure-cooking effect that keeps nutrients intact.
For delicate items like fish or eggs, we use glass pie plates. The gentle curves distribute microwave energy more evenly than sharp-cornered containers.
Round glass containers beat square or rectangular ones for most recipes. The curved edges prevent food from overcooking in the corners, which happens frequently with angular containers.
One mistake I made was using glass that was too thick for quick heating. Thin-walled glass containers heat food faster and more evenly than heavy, thick-bottomed pieces.
Quick and Easy Cleaning for Your Microwave-safe Glass
Keeping your microwave-safe glass containers spotless doesn’t have to be a chore. We’ve discovered some game-changing cleaning methods that save time and prevent damage.
From my own experience, the biggest mistake people make is letting food residue sit too long. Dried-on splatters become ten times harder to remove and can even stain your glass permanently.
What I found works best is cleaning glass containers immediately after use while they’re still warm. The heat helps loosen food particles, making them wipe away effortlessly with just a damp cloth.
For stubborn stains and burnt-on food, we use a simple steam cleaning method. Fill the dirty glass container with water and a tablespoon of white vinegar, then microwave for 2-3 minutes.
The steam created softens even the toughest residue. After letting it cool for a minute, the food wipes away without scrubbing.
One mistake I made early on was using abrasive cleaners on my glass containers. Steel wool and harsh chemicals can scratch the surface, making it more prone to breaking and harboring bacteria.
What works brilliantly for grease stains is mixing baking soda with a tiny amount of dish soap. This paste cuts through oil without damaging the glass surface.
For water spots and mineral buildup, we rely on lemon juice. Rub half a lemon directly on the glass, let it sit for five minutes, then rinse with warm water for a crystal-clear finish.
I strongly suggest avoiding sudden temperature changes during cleaning. Never put hot glass under cold water – this thermal shock can cause your container to crack or shatter completely.
What I found saves the most time is soaking multiple containers together in warm, soapy water. This batch approach makes cleanup faster and ensures nothing gets forgotten in the sink.
Ready to Transform Your Microwave Cooking Experience?
Now that we’ve covered the essentials of safe glass microwave cooking, it’s time to put this knowledge into action. Start with simple recipes like steaming vegetables in a glass bowl or reheating leftovers in your trusty Pyrex containers. We guarantee you’ll notice the difference in taste and texture compared to plastic alternatives.
Your microwave and glass cookware make an unbeatable team for quick, healthy meals. Whether you’re meal prepping for the week or whipping up a last-minute dinner, these techniques will become second nature. Remember to always check for the microwave-safe symbol and keep those safety tips in mind as you explore new culinary possibilities with your glass collection.


