Craving crisp-tender green beans but short on time? This 5-minute side dish skips the stovetop chaos and delivers restaurant-quality flavor with microwave convenience.
Say goodbye to soggy veggies—our method locks in freshness while infusing every bite with garlicky richness. No fancy equipment or babysitting required!
We’ll walk you through choosing fresh beans, nailing the butter-garlic balance, and avoiding common microwave pitfalls.

Jump To:
Quick Microwave Garlic Butter Green Beans
Course: Side DishCuisine: American4
5
minutes5
minutes150
kcal10
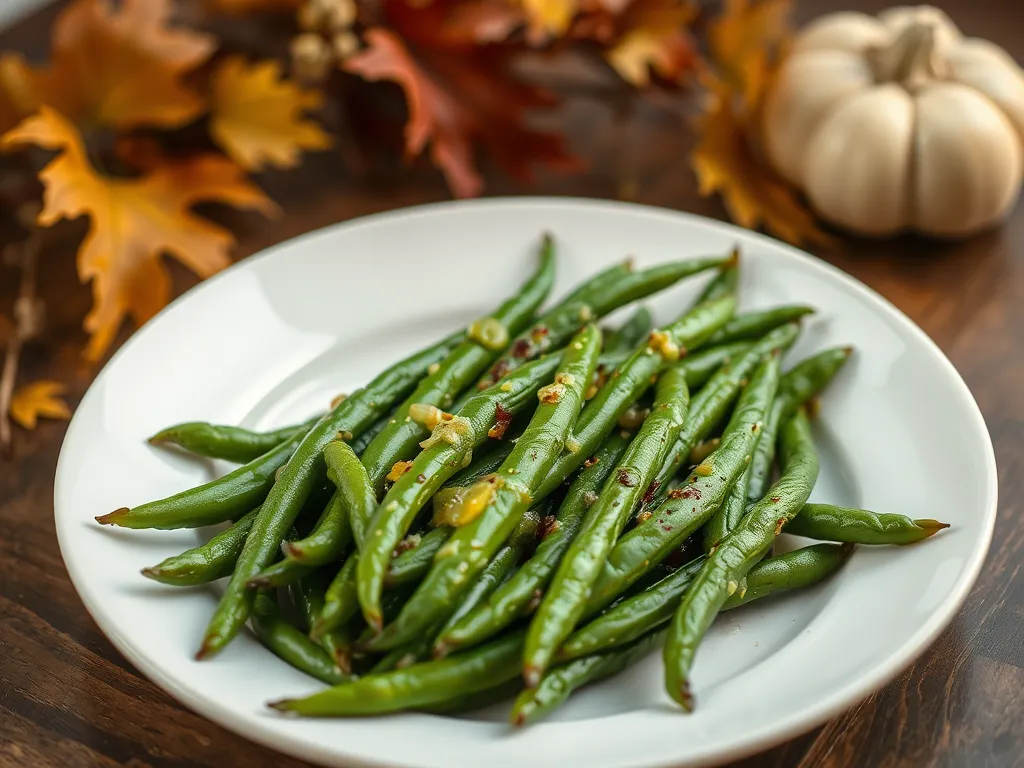
minutesThis quick microwave garlic butter green beans recipe is a game-changer for a simple yet elegant side dish. With just a few ingredients, you can create a flavorful vegetable side that pairs perfectly with any meal. The use of the microwave makes it not only a time-saver but also an easy clean-up process.
Ingredients
fresh green beans
trimmed
butter
garlic
minced
salt and pepper to taste
lemon juice optional
chopped fresh parsley optional
Directions
- Place the trimmed green beans in a microwave-safe dish.
- Add about 2 tablespoons of water to the dish, then cover it with a microwave-safe lid or plastic wrap.
- Microwave the green beans on high for 3-4 minutes until tender-crisp.
- Carefully remove the dish from the microwave, as it will be hot.
- Drain any excess water from the green beans.
- In a small bowl, melt the butter in the microwave, which should take about 30 seconds.
- Stir in the minced garlic into the melted butter and microwave for an additional 30 seconds.
- Pour the garlic butter over the cooked green beans.
- Toss well to combine, then season with salt and pepper to taste.
- For added flavor, sprinkle lemon juice and chopped parsley on top before serving..
Notes
- For the best flavor, use fresh green beans. You can also add red pepper flakes for a bit of heat, or substitute olive oil for butter for a healthier twist. This dish is versatile and can be paired with a variety of main courses.
What Do Garlic Butter Green Beans Taste Like?
Imagine crisp-tender beans with a buttery sheen and garlic’s warm, toasty punch. Each bite offers a satisfying snap followed by rich umami – like summer camp’s campfire veggies but without the burnt edges. My sister Candice once microwaved a similar dish during camp counselor training, proving even rookies can nail this flavor combo.
The microwave’s quick cook preserves the beans’ natural sweetness while softening garlic’s bite into mellow perfection. It’s the Goldilocks zone of green bean prep – neither raw nor mushy, just right.
Ingredients for Microwave Garlic Butter Green Beans
Fresh Green Beans
Opt for beans with a vibrant green color and audible snap when bent. Avoid floppy or yellowing pods. Trim ends: we’re talking 1/8” off, not a dramatic chop. Candice once left stems on at camp, creating accidental “bean whistles” that entertained kids for hours.
Butter (and Substitutes)
Unsalted butter lets you control sodium levels. For dairy-free swaps, use olive oil (adds fruitiness) or vegan butter (contains 18-22% water – adjust microwaving time). Avoid margarine: its 80% oil content can make beans greasy.
Garlic (and Alternatives)
Freshly minced cloves pack 30% more aromatic compounds than pre-chopped jarred versions. In a pinch? Use 1/8 tsp garlic powder per clove. Skip garlic salt unless reducing added butter. Pro tip: microwave minced garlic with butter for 15 seconds first to mellow harsh flavors. This method works wonderfully with vegetables like Brussels sprouts, making for a quick, flavorful side dish. Quick microwave garlic butter Brussels sprouts can be prepared in just minutes, elevating any meal effortlessly.
Ready to transform these ingredients into a 5-minute masterpiece? Let’s fire up that microwave…
How to Make Garlic Butter Green Beans in the Microwave
Step 1: Prep the Green Beans
Wash ½ pound beans under cold water—no need to towel dry, a little moisture helps steam them. Trim ends using kitchen shears: think precision over speed. My camp counselor days taught me skipping this step creates accidental bean whistles (fun for kids, annoying during dinner).
Step 2: Combine Ingredients
Toss beans in a microwave-safe bowl with 1 tbsp butter and 2 minced garlic cloves. For flavor fusion, microwave this trio for 15 seconds first. The butter will barely melt, creating a fragrant garlic-infused base that clings to every bean. For a quick and delicious side dish, consider adding a sprinkle of salt and serving these garlic green beans alongside your meal.
Step 3: Microwave Cooking Technique
Cover the bowl with a microwave-safe plate or vented lid. Nuke on high:
- ½ lb beans: 3 minutes
- Stir halfway for even cooking
The beans should hiss slightly but never scream—adjust time if your microwave rivals jet engines.
Step 4: Season and Serve
Pull them out when they’re bright green with a crisp-tender bite. Toss with ¼ tsp salt, ⅛ tsp black pepper, and a squeeze of lemon. My campers once added crushed Cheetos; we don’t recommend it. For a fun twist, consider making crunchy veggie chips in the microwave. This method can create a tasty, healthier alternative to traditional snacks.
Also See: Chicken à la King Recipe in Microwave – 5 Variations, Tips, Tools, FAQs & More
How Long to Microwave Green Beans?
For ½ lb beans, 3-4 minutes delivers ideal texture. Double the quantity? Add 1-2 minutes. At high altitudes (above 3,000 ft), extend by 30-second increments. Wattage matters: 700W microwaves need 10% more time than 1200W models.
Test doneness by fishing out one bean—it should snap when bent but not fight back. Soggy beans mean oversteaming; reduce time next round.
Also See: Lazy Microwave Instant Pancake Mix With Canned Fruit
Can You Microwave Garlic Butter Safely?
Absolutely! Butter’s low smoke point (302°F) stays safe in short microwave bursts. Garlic won’t burn if mixed with butter and nuked ≤30 seconds at a time. Always use a covered dish to contain splatters—no one wants garlic butter abstract art on their microwave walls. This method really helps when you’re short on time, especially for dishes like quick microwave garlic butter corn.
For extra safety, pause every minute to stir. This prevents hot spots where garlic could scorch. Dairy-free? Coconut oil handles heat similarly but adds a tropical twist. When cooking garlic in the microwave, this method can help achieve a perfectly softened texture for various dishes.
Ready to transform good beans into greatness? Let’s tackle common pitfalls and flavor upgrades next. One great way to elevate your bean dishes is by using microwave beans, which provide a quick and convenient option for a nutritious meal.
Tips for Perfect Microwave Garlic Butter Green Beans
We’ve all had that sad, overcooked veggie side dish. Let’s make sure your beans stay crisp, buttery, and far from mushy with these battle-tested tricks. For an easy meal upgrade, consider adding some lazy microwave pre-cooked bacon alongside your canned green beans. The combination of bacon and beans can create a flavorful side dish with minimal effort.
Avoiding Overcooking
Microwave in 60-second bursts after the initial 3 minutes. Test one bean – it should snap like a fresh pencil, not bend like a soggy noodle. My neighbor Karen once nuked hers for 6 minutes straight. We now call her “Creamed Bean Karen” (she’s a good sport). Interestingly, beans and other foods often taste better when microwaved rather than baked, as the microwave helps preserve moisture and texture. This technique can enhance the eating experience of a variety of foods.
Adjusting Butter Consistency
Cold butter? Dice it into pea-sized pieces for even melting. If using melted butter, toss beans post-cooking to prevent sogginess. For dairy-free spreads (usually 15% water), add 10 extra seconds to account for evaporation. When melting butter in the microwave, it’s essential to do so in short intervals, checking frequently to avoid overheating. This method ensures perfect, even melting with minimal fuss.
Enhancing Flavor With Add-ins
After microwaving, try:
- Lemon zest + 1 tsp toasted sesame seeds
- Grated Parmesan + crushed red pepper
- 1 tsp miso paste stirred into melted butter
My book club goes wild for the Parmesan version – we’ve dubbed it “Green Bean Gatsby.”
Ingredient Substitutes and Variations
Out of butter? Allergic to garlic? We’ve got you covered without sacrificing flavor.
Oil Alternatives for Butter
Avocado oil (smoke point 520°F) handles high heat beautifully. For richness, use ½ tbsp mayo + ½ tbsp olive oil – it clings to beans like a cozy flavor blanket. Avoid flaxseed oil; its low smoke point (225°F) creates bitter notes.
Fresh Vs. Pre-minced Garlic
1 fresh clove = ½ tsp jarred minced garlic. Need speed? Use frozen garlic cubes – they retain 90% of fresh garlic’s pungency. My babysitter swears by these when cooking with twin toddlers underfoot. A quick and efficient alternative for peeling garlic is using microwave garlic 10-second peelable cloves. This method can save even more time and effort in the kitchen, making meal prep a breeze.
Spice and Herb Variations
Swap classic garlic butter for:
- 1 tsp smoked paprika + ¼ tsp cayenne
- 2 tbsp chopped dill + 1 tsp lemon juice
- 1 tsp five-spice powder + sesame oil
Pro tip: Add dried herbs before microwaving, fresh herbs after.
How to Store and Reheat Leftovers
Transfer cooled beans to an airtight container within 2 hours. They’ll keep for:
- Fridge: 3 days
- Freezer: 1 month (texture softens slightly)
To reheat, spread beans on a microwave-safe plate. Cover with a damp paper towel and nuke 45-60 seconds. Stir halfway – this prevents the “hot spot shuffle.”
Now that your beans are perfected, let’s talk about the best mains to pair with this speedy side…
Now It’s Your Turn to Whip Up These Green Beans!
We’ve walked through every step to make these quick microwave garlic butter green beans—from prepping fresh beans to nailing the perfect microwave timing. With just 5 minutes and minimal effort, you’ll have a vibrant, buttery side dish that pairs beautifully with everything from grilled chicken to pasta.
Give this method a shot next time you need a speedy veggie fix. We’d love to hear how your garlicky, buttery green beans turn out! If you tweak the recipe with extra herbs or spices, share your creative twists too.